Categories
beginners Fitness nutrition & meal snacks workouts

High-Protein Snacks for Beginners Workouts

If you’re new to working out, you’ve likely heard that protein is important—but figuring out how to include it in your day without overcomplicating things can feel confusing. This guide breaks down easy, beginner-friendly high-protein snacks, explains why they matter, and gives you step-by-step instructions to make them at home or prep ahead of time.

Whether you’re exercising to build strength, lose fat, or improve endurance, your results start in the kitchen—with smart nutrition & meal prep.

Why Protein Matters in Fitness for Beginners

For beginners in fitness, protein plays a major role in:

Repairing and building muscle

Supporting metabolism

Reducing post-workout soreness

Preventing excess hunger later

Snacking on high-protein foods helps you recover from workouts and avoid overeating between meals. Now let’s look at how to prepare some beginner-friendly options.

6 High-Protein Snack Ideas (with Instructions)

  1. Greek Yogurt + Berries

Protein per serving: ~15g

What you need:

1 cup plain Greek yogurt (2% or full-fat)

½ cup mixed berries (fresh or frozen)

Optional: sprinkle of chia seeds or honey

Instructions:

Scoop yogurt into a bowl or container.

Add berries on top.

Stir in chia seeds or drizzle honey if desired.

Store in the fridge or eat immediately.

  1. Boiled Eggs

Protein per egg: ~6g

What you need:

6 large eggs

Salt, pepper, or paprika

Instructions:

Place eggs in a pot, cover with water.

Heat until the water starts boiling, then lower the temperature and let the eggs cook gently for about 9 to 12 minutes.

Transfer to cold water and peel when cooled.

Store in the fridge up to 1 week.

Meal Prep Tip: Boil a batch on Sunday and grab 1–2 each day.

3.Cottage Cheese + Pineapple

Protein per serving: ~14g

What you need:

½ cup cottage cheese (low-fat or full-fat)

¼ cup diced pineapple (fresh or canned in juice)

Instructions:

Spoon cottage cheese into a bowl or container.

Add pineapple chunks on top.

Eat cold—no prep required!

  1. Hummus + Veggie Sticks

Protein per serving: ~6–8g

What you need:

½ cup hummus

1 cup raw veggies (carrots, bell peppers, cucumber, etc.)

Instructions:

Wash and slice your vegetables.

Portion into containers with hummus.

Keep chilled until snack time.

Prep multiple servings at once for the week.

  1. Nut Butter on Rice Cakes

Protein per serving: ~7g

What you need:

1–2 plain rice cakes

2 tbsp natural peanut or almond butter

Optional: banana slices or cinnamon

Instructions:

Spread nut butter evenly across rice cakes.

Top with banana slices or cinnamon if desired.

Eat immediately or prep in advance and wrap.

  1. Tuna Packet with Avocado

Protein per serving: ~18–20g

What you need:

One 3-ounce pouch of tuna packed in either water or olive oil

¼ mashed avocado

Salt, pepper, squeeze of lemon

Instructions:

Open tuna packet and place in a bowl.

Mix in mashed avocado and season to taste.

Pair with whole-grain crackers or wrap in crisp lettuce for a fresh, easy bite.

Ready in 2 minutes and ideal for post-workout protein!

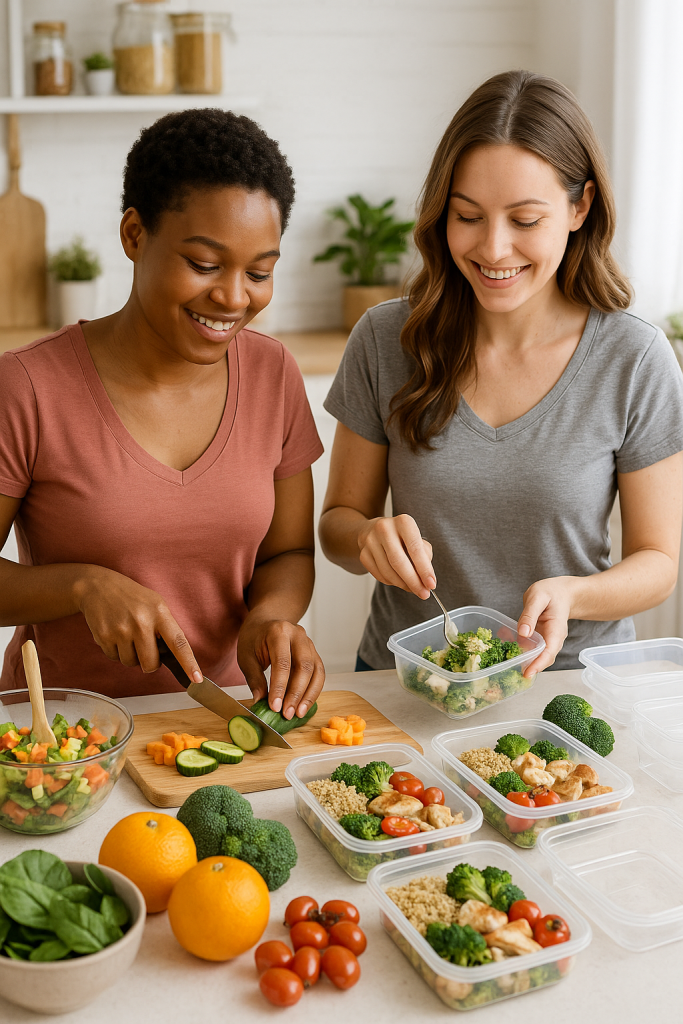
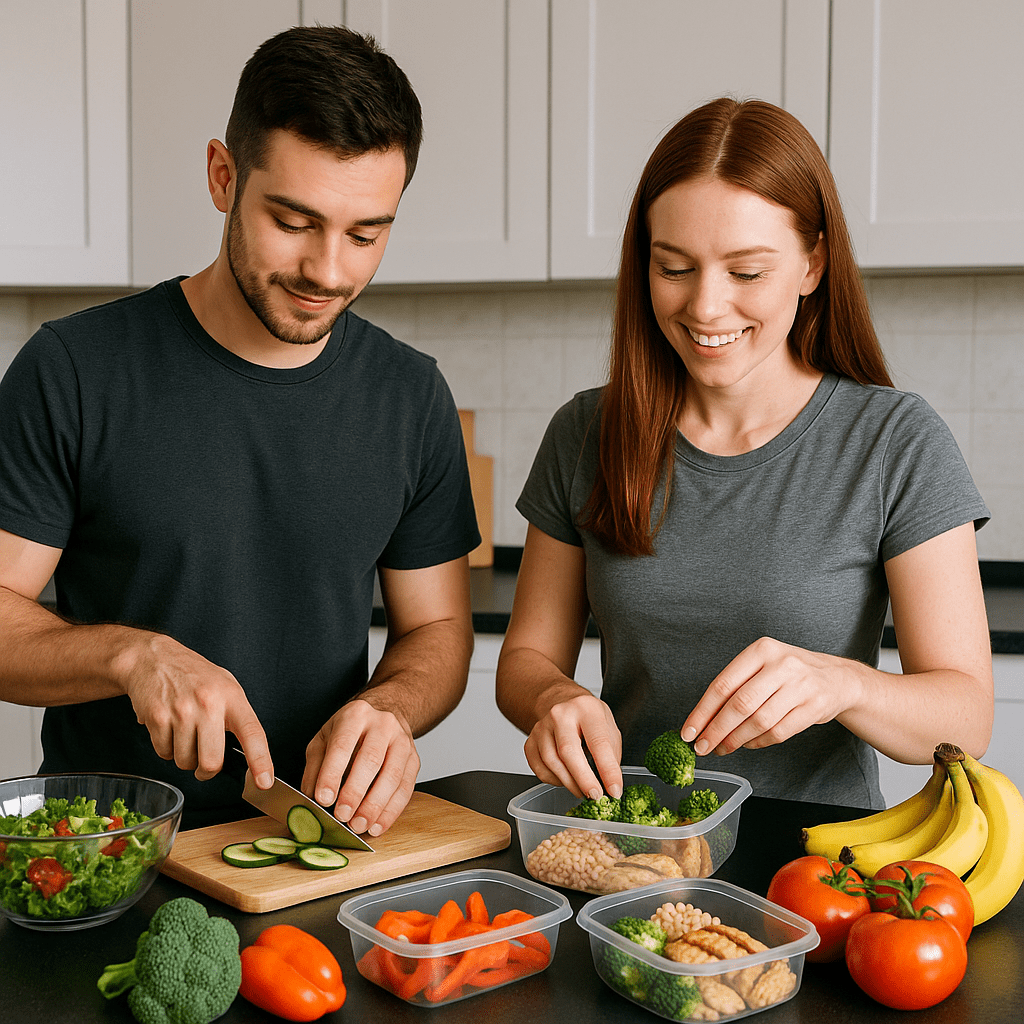
Meal Prep Tips for Beginners

Start small: Pick 2 snacks to prep this week.

Use transparent containers and portion your snacks to keep things tidy and easy to find

Balance is key: Pair protein with fiber or healthy fats.

Don’t overthink it: Keep ingredients simple and affordable.

Benefits of High-Protein Snacking

Supports muscle recovery

Reduces cravings between meals

Improves satiety and energy

Helps regulate blood sugar

Final Thoughts

When you’re starting out, the goal isn’t perfection—it’s consistency. These protein-rich snack options are simple, hassle-free, and perfect for anyone just starting out. By incorporating them into your nutrition & meal prep routine, you’ll build a strong foundation for your fitness journey—one bite at a time.

Categories
Fitness Meals nutrition & meal women

Healthy Meal Prep for Women Days

Balancing wellness, work, and everything in between isn’t easy — especially when your schedule leaves little time to think about food. That’s where meal prep can truly change your life. This guide breaks down everything you need to know about nutrition & meal prep specifically for women – with realistic tips, instructions, and benefits that support your fitness and lifestyle.

Why Meal Prep Matters for Women

Whether you’re training, managing a busy household, or simply trying to eat better, prepping your meals helps you:


Maintain energy throughout the day
Avoid last-minute unhealthy food choices
Fuel your body for workouts and recovery
Reduce stress around food decisions
Stay in control of your health goals

How to Start: Step-by-Step Meal Prep Instructions

Here’s a simple and effective way to plan and prep your meals for the week:

Step 1: Plan Your Meals (30 minutes)

Pick 2–3 main meals you enjoy and that align with your goals (e.g., high protein, plant-based, low-carb).

Choose meals that share ingredients to save time and money.

Make sure to include snacks and breakfast in your plan, as they’re commonly missed but important.

Example Weekly Plan:

Breakfast: Overnight oats with almond butter & berries

Lunch: Grilled chicken quinoa bowls

Dinner: Veggie stir-fry with brown rice

Snacks: Greek yogurt, almonds, chopped cucumbers

Step 2: Make a Grocery List (15 minutes)

Break it down into categories: proteins, veggies, grains, dairy, pantry, snacks

Check what you already have at home

Stick to the list to avoid impulse buys

Tip: Use a grocery app or notepad to stay organized.

Step 3: Prep & Cook (1.5–2 hours on your chosen day)

Choose a day when you have time to prep — Sundays work well for many, but midweek is fine too.

Start with ingredients that take longest (e.g., rice, baked sweet potatoes)

While those cook, chop veggies and portion out snacks

Cook proteins (grill, roast, or sauté chicken, tofu, etc.)

Assemble meals in containers or keep ingredients separate for mix-and-match flexibility

Label containers with contents + date (especially if freezing)

Pro Tip: Use a sheet pan to roast multiple veggies at once for easy cleanup!

Step 4: Store Smart

Use glass or BPA-free containers with tight lids

Separate sauces/dressings to keep meals fresh

Stack meals for easy grab-and-go access

Freezer Tip: Freeze one or two servings for busier weeks — just thaw overnight in the fridge.

Bonus: Quick & Healthy Meal Ideas

Protein Power Bowl

Quinoa + roasted chickpeas + spinach + tahini drizzle

Simple Stir-Fry

Broccoli + carrots + tofu + brown rice + sesame oil

Mason Jar Salad

Start by placing the dressing on the bottom, then add grains and vegetables, finishing with a layer of fresh greens on top.

Tips for Long-Term Success

Keep it flexible: Life happens. Prepping just 2 meals a week is still progress.

Rotate ingredients: Try different grains, proteins, and sauces to avoid burnout.

Prep with a friend: Makes the process more fun and adds accountability.

Pay attention to your body’s signals and tailor your portion sizes and nutrient balance according to your energy needs and daily activity.

Final Thoughts

Meal prepping is more than just a health hack — it’s an act of self-care. By planning ahead, you’re giving yourself the gift of time, energy, and confidence. Whether your goal is to feel better, get stronger, or simply eat more whole foods, meal prep can support every part of your wellness journey.

Start small, stay consistent, and remember: You don’t have to be perfect — just prepared.

Categories
Baths Fitness recovery & wellness women

Cold Showers vs. Ice Baths: What’s Better for Women?

Cold exposure has become a powerful tool for modern women looking to improve fitness, recovery & wellness. Whether it’s to speed up muscle recovery, support mental clarity, or manage stress, cold showers and ice baths are two go-to options. But which one is better?

Let’s compare the benefits, when to use them, and how to safely get started — step by step.

Cold Showers: Accessible Daily Recovery

Why Women Love It:

Requires no equipment or prep

Stimulates circulation and mood

Enhances focus and energy

Supports healthy skin and hair

Cold showers are ideal for women who want a manageable, everyday practice that promotes wellness without being too intense.

How to Take a Cold Shower (Beginner-Friendly Steps)

Start with a warm shower – Feel free to begin with your regular temperature.

Gradually lower the temp – After a few minutes, reduce the water to cool or cold (aim for ~60°F / 15°C).

Start with a brief exposure—around 30 seconds of cold water—and concentrate on steady breathing: breathe in through your nose and exhale slowly to stay relaxed

Work your way up – Over time, increase cold exposure to 1–3 minutes.

Finish strong – Step out and towel off, letting your body warm naturally.

Frequency: Daily or post-workout.

Best for: Mental clarity, mood boost, quick recovery.

Ice Baths: Deep Recovery for Intense Training

Why Women Use Them:

Reduces inflammation and soreness

Speeds muscle recovery

Trains the nervous system to handle stress

Enhances sleep and relaxation post-session

Ice baths are especially beneficial for women engaged in strength training, running, HIIT, or competitive sports.

How to Do an Ice Bath Safely (Step-by-Step)

Fill your tub or container with cold water. Add ice until the temp reaches 50–59°F (10–15°C).

Time it right – Best done within 30 minutes post-workout to reduce inflammation.

Wear a sports bra or swimsuit – Optional, but helps you ease in mentally.

Enter slowly – Sit in the water and gradually submerge up to waist or chest.

Set a timer – Start with 2–3 minutes and slowly build to a maximum of 10–12 minutes over time.

Breathe steadily – Use long, deep exhales to stay calm and manage the shock response.

Exit and warm up – Use a towel, dry clothes, and move around. Avoid hot showers immediately afterward.

Frequency: 1–3 times per week.

Best for: High-intensity recovery, reducing soreness, building stress resilience.

Tips for Cold Therapy Success

Always listen to your body – If you feel dizzy, numb, or uncomfortable, stop immediately.

Breathwork is key – Try box breathing (4 seconds inhale, 4 hold, 4 exhale, 4 hold) to calm your system.

Be consistent – Like any wellness habit, results come with routine.

After cold exposure, make sure to drink fluids and eat something nourishing to help your body recover and regain strength.

So, Which Should You Choose?

Cold Showers Ice Baths

Time Commitment 2–5 minutes 10–15 minutes (including setup)

Best For Daily energy, mood, light recovery Deep recovery, athletes, soreness relief

Accessibility Easy Requires planning and setup

Mental Challenge Mild Intense

Final Thoughts

For women balancing fitness, recovery, and daily life, both cold showers and ice baths can be incredible tools. The best choice depends on your goals:

Cold showers can help boost your energy, lift your mood, and support your daily well-being.

Use ice baths after hard workouts or to boost physical recovery and resilience.

Whichever method you choose, cold therapy can support a strong, energized, and well-recovered body — one cold breath at a time.

Categories
Fitness gear & reviews seniors

What to Look for in a Seniors Gym Bag

Keeping physically active is a powerful way to maintain both body and mind as we grow older. But before you head to your fitness class or take a brisk walk at the park, it’s important to be prepared. Preparing your gym bag thoughtfully helps ensure your workouts are safe, comfortable, and pleasant.

This guide breaks down exactly what seniors should pack, why it matters, and how to organize it all—with a few product reviews and safety tips along the way.

Step 1: Choose the Right Gym Bag
Look for:

Lightweight design

Padded shoulder strap or handles

Wide zippered opening

At least 2–3 compartments

Water-resistant or easy-clean material

Instruction: Try the bag on (even at home) and check that you can lift and carry it without strain. If it’s uncomfortable empty, it will be worse when full.

Gear & Reviews Tip: Consider brands like Everest or Fitdom that make ergonomic bags with easy-access zippers.

Step 2: Pack a Hydration Bottle

Dehydration is a common issue among older adults, especially during exercise.

What to Pack:

1 spill-proof water bottle with easy-grip

Optional: Electrolyte drink packets (check with your doctor first)

Instruction: Fill your water bottle before leaving home. If possible, choose one with a flip straw or push-button lid for easier use.

Suggested Gear: Contigo AutoSeal bottles are leak-proof and senior-friendly.

Step 3: Include Proper Footwear and Socks

Healthy feet play a key role in maintaining balance, reducing discomfort, and lowering the risk of injuries.

What to Pack:

Clean gym shoes or supportive sneakers

Compression or cushioned socks

Small laundry pouch for used socks

Tip: Store your workout shoes in their own compartment or a dedicated shoe pouch to keep things clean and organized. After each session, store used socks in a sealable pouch or mesh bag to keep your bag fresh.

Step 4: Add Personal Care Essentials

Don’t underestimate the value of staying fresh and comfortable post-workout.

What to Pack:

Microfiber towel

Travel-size deodorant

Body wipes or facial cloths

Lip balm

Hand sanitizer

Instruction: Use small, leak-proof toiletry containers and place them in a zippered pouch to prevent spills.

Skin-Friendly Tip: Choose fragrance-free, sensitive-skin products.

Step 5: Prepare Medical and Emergency Items

Be ready for anything with a small health kit.

What to Pack:

Any medications you may need (in labeled containers)

Inhaler, EpiPen, or glucose tablets if required

ID card and emergency contact info

Copy of insurance card

Instruction: Store these in a small, clearly labeled pouch and put it in an easy-to-reach compartment of your bag.

Safety Tip: Include a written note of your known conditions, allergies, and medications in case of emergency.

Step 6: Add Fitness Gear for Warmups or Cooldowns

Even light equipment can boost your workout.

What to Pack:

Resistance band or stretch strap

Small foam roller or massage ball (optional)

Notebook or workout log

Instruction: Use your notebook to track how you feel before and after workouts, and jot down any exercises that help (or hurt).

Gear & Reviews Pick: TheraBand makes color-coded bands with varying resistance levels, great for all fitness levels.

Step 7: Pack for Motivation and Comfort

A little comfort goes a long way.

What to Pack:

Headphones and music or audiobook player

Light snack (like a granola bar or banana)

Extra pair of glasses or reading aids

Tip: Use a resealable bag for snacks and keep your glasses in a sturdy case to protect them from breaking. Download music or podcasts ahead of time if you’ll be in a low-signal area.

Before You Go – Final Bag Check:

Use this checklist before each outing:

Water bottle full

Shoes & socks packed

Towel & hygiene items in place

Medications/ID included

Fitness gear ready

Music/snack/glasses packed

Why This Matters

When seniors are well-prepared, fitness becomes less of a chore and more of an empowering part of daily life. Organizing your gym bag thoughtfully can promote self-reliance, boost safety, and encourage consistency—key elements for staying well over time.

Remember: You don’t need to pack everything every time. But with these essentials on hand, you’ll be ready for almost any activity, from tai chi to strength training.

Categories
beginners Fitness Meals nutrition

Top Beginners Supplements for Muscle Growth

Building muscle as a beginner is exciting — you’re making real changes to your body, gaining strength, and stepping into a new fitness lifestyle. But between gym sessions and meal prepping, the world of supplements can feel overwhelming. Which ones actually work? Which are safe for beginners? And how do you fit them into your nutrition and meal prep routine?

Let’s break it down with a beginner-friendly guide that’s simple, effective, and based on real science — not hype.

  1. Whey Protein: Your Go-To for Gains
    Why it matters:
    Think of whey protein as your post-workout wingman — it’s fast, effective, and gets straight to work helping your muscles bounce back and grow stronger. Super clutch on days when your meals are a little light on protein.

How to use it:

Mix 1 scoop with water or milk post-workout.

Add it to smoothies for a nutrition boost.

Aim for 20–30g of protein per serving.

Meal prep tip:
Use whey protein in overnight oats, protein pancakes, or even baking for extra muscle-friendly meals.

  1. Creatine Monohydrate: Strength and Size
    Why it matters:
    Creatine’s that no-nonsense supplement that actually pulls its weight. It gives your muscles an energy kick during those tough sets and helps you pack on strength and size as you stay consistent.

How to use it:

Take 3–5g daily, with or without food.

No need to “load” — just be consistent.

Stay hydrated!

Quick tip: Mix your creatine with a post-workout shake or something carby — like a banana or oatmeal — to help your body soak it up better.

  1. Omega-3 Fish Oil: Recovery and Wellness
    Why it matters:
    Omega-3s reduce inflammation, improve joint health, and may even support muscle recovery. They’re often overlooked but essential — especially if you’re new to intense workouts.

How to use it:

Take 1–2 grams of combined EPA/DHA daily.

Choose high-quality fish oil (look for purity-tested labels).

Meal prep tip:
Add fatty fish like salmon to your weekly meals to boost natural intake.

  1. Vitamin D3: Energy and Immunity Support
    Why it matters:
    Many beginners don’t realize low vitamin D levels can affect energy, mood, and recovery. If you’re indoors a lot or live in a place with limited sun, supplementing is smart.

How to use it:

Take 1000–2000 IU daily (with a meal that has fat).

Consider a blood test for personalized dosing.

  1. A Quality Multivitamin: Nutritional Insurance
    Why it matters:
    Even with solid nutrition & meal prep, beginners often miss micronutrients that help the body function properly. A multivitamin ensures you’re not running low on key nutrients while you focus on fitness.

How to use it:

Take once daily with food.

Don’t rely on it — whole food should still be your priority.

Instructions for Beginners: Getting Started
Start with the basics: Begin with whey protein and creatine. They offer the biggest bang for your buck.

Keep it simple: Don’t overload your stack. More isn’t always better.

Pay attention to how you’re feeling — more energy, better recovery, extra strength? That’s your progress showing.

Match your supplements with solid meals — they’re there to back up your nutrition and meal prep, not take over.

And remember, don’t expect overnight miracles — supplements work best when you stick with them, just like hitting the gym regularly.

Final Thoughts
Supplements can enhance your muscle growth journey, but only when paired with proper training, recovery, and meal prep. For beginners, sticking to proven basics — like whey protein, creatine, and omega-3s — sets a strong foundation without overwhelming your routine.

Fitness is a journey. Take it one smart step at a time.

Categories
Fitness flexibility seniors

Improve Your Posture with These Seniors Stretches

As we age, maintaining good posture becomes more than a matter of appearance — it’s essential for overall health, balance, and quality of life. Poor posture can contribute to aches, fatigue, and even an increased risk of falls. The good news? With the right stretches and a consistent routine, seniors can significantly improve both flexibility and mobility — two critical components of fitness that support healthy posture.

Why Posture Matters for Seniors
Good posture is essential for your body to function efficiently. When your spine is properly aligned, it allows your muscles, joints, and ligaments to move together smoothly and support each other effectively. But with age, muscles tend to tighten, and joint mobility may decline, making it harder to stand or sit upright. Over time, this may contribute to ongoing pain, impaired balance, and a loss of physical independence.

Stretching: A Simple Tool for Lasting Benefits
Incorporating gentle stretching into your daily routine can help restore mobility and ease muscular tension. The best part?

Best Stretches to Support Better Posture
Below are several targeted stretches designed to help seniors enhance their posture and boost overall fitness.

  1. Chest Opener
    Slouching tends to tighten the chest muscles.

Position yourself in a doorway and rest your hands on the doorframe aligned with your shoulders.Step forward with one foot until you notice a light stretch across your chest.

Hold for: 15–30 seconds.

  1. Seated Spinal Twist
    This movement enhances the spine’s flexibility while strengthening the muscles that help you maintain an upright position. Start by settling into a chair with your feet firmly on the floor to ensure balance. Turn your upper body to the right, placing your left hand on your right knee for support. Hold, then switch sides.

Hold for: 20 seconds on each side.

  1. Neck Stretch
    Releases tension from the neck, a common problem area for those who spend time reading or watching screens.

How to do it: Sit upright. Gently tilt your head toward one shoulder without raising the shoulder. To increase the stretch gently, place your hand on your head and apply slight pressure.

Hold for: 15–20 seconds per side.

  1. Cat-Cow Stretch
    A gentle movement that improves spinal flexibility and brings awareness to posture.

How to do it: On hands and knees, alternate between arching your back up (cat) and lowering it with your head up (cow).

Repeat: 8–10 times, moving slowly.

  1. Wall Angels
    Great for improving shoulder mobility and encouraging a straight spine.

How to do it: Stand against a wall with your back, arms, and head touching it. Slowly raise and lower your arms in a “snow angel” motion, keeping contact with the wall.

Repeat: 10–12 reps.

Tips for Safe Stretching
Warm up with light walking or arm circles.

Remember to take steady, deep breaths — avoid holding your breath while stretching.

Never push into pain; stretching should feel like a gentle pull.

Stay consistent: even 10 minutes a day makes a difference.

Final Thoughts
Improving posture doesn’t require drastic changes — just a little daily movement that promotes flexibility and mobility. These simple, senior-friendly stretches can support better balance, ease tension, and help you stand tall with confidence. Whether you’re just beginning your fitness journey or looking to stay active well into your golden years, adding these stretches to your routine is a powerful, preventative step toward lifelong wellness.