Categories
exercises fat loss Fitness fitness-tips flexibility & mobility Gym training workouts yoga

Fat Loss Yoga Poses for Better Flexibility

When it comes to fat loss, most people immediately think of high-intensity workouts or strict diets. But what if I told you that yoga — particularly poses designed to improve flexibility and mobility — can be a powerful tool to help shed fat while boosting your overall fitness?

Yoga isn’t just about stretching or calming your mind. Certain poses actively engage muscles, increase your heart rate, and improve your body’s ability to move efficiently. This combination supports fat loss and enhances your flexibility and mobility, creating a foundation for sustainable fitness.

Why Focus on Flexibility & Mobility for Fat Loss?

Flexibility and mobility are more than just buzzwords. They play a critical role in how your body performs everyday movements and exercises. When your joints and muscles move freely, you can work out more effectively and safely, reducing the risk of injury. This means you can stick to your fat loss plan longer and with better results.

Moreover, improved mobility encourages greater calorie burn by allowing more dynamic, full-range movements. Fat loss becomes a natural byproduct of moving well and consistently.

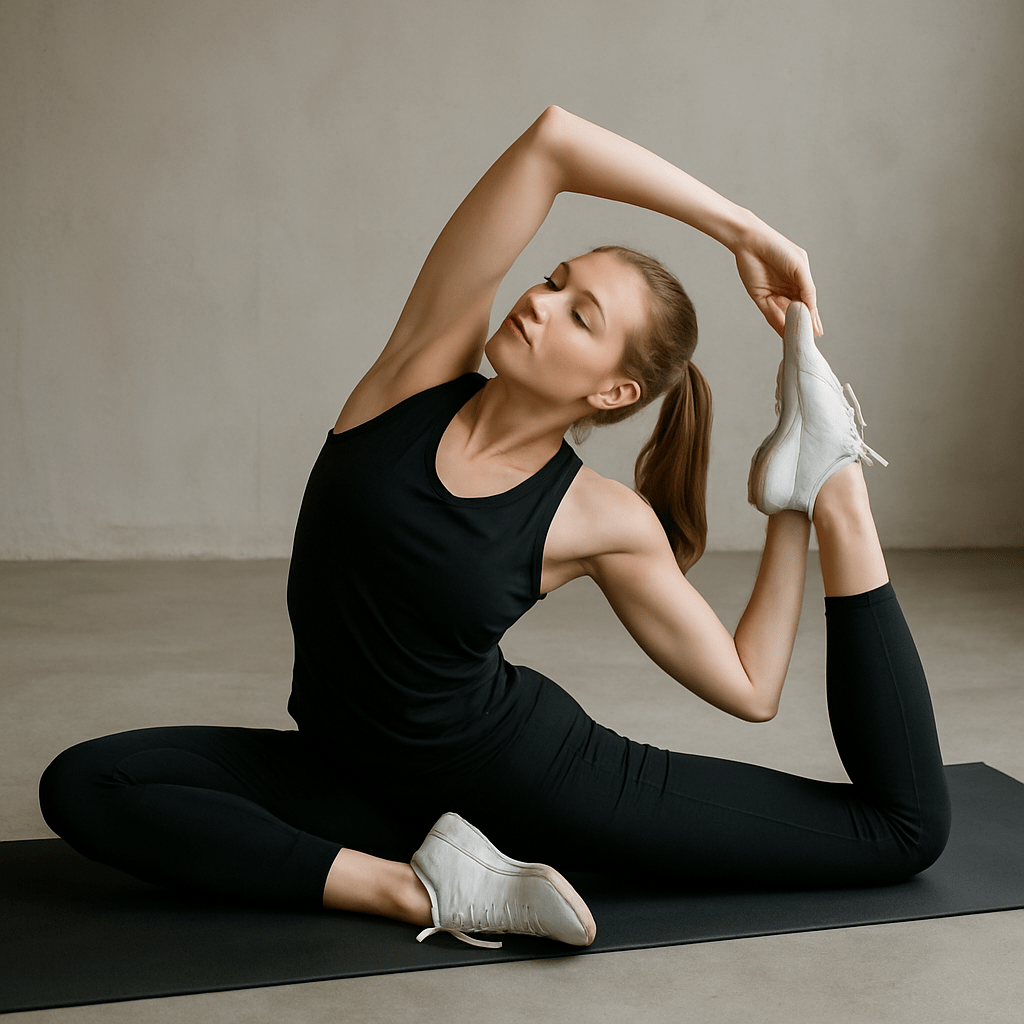
Key Yoga Poses for Fat Loss and Flexibility (With Instructions)

Here are some effective yoga poses that support fat loss while enhancing flexibility and mobility. Follow the step-by-step instructions to get the most out of each pose.

  1. Warrior II (Virabhadrasana II)

Instructions:

Stand with your feet about 3-4 feet apart

How to do it:

Stand with your feet spaced wide apart.

Turn your right foot outward to about a right angle, while angling your left foot slightly inward.

Slowly bend your right knee so it aligns directly above your ankle.

Reach your arms out wide at shoulder level, keeping them parallel to the ground with palms facing down.

Direct your eyes toward your right fingertips and maintain the position for 30 to 60 seconds.

Benefits:

This posture strengthens the muscles in your legs and core, while also stretching the hips and chest, which enhances joint flexibility and movement.

  1. Chair Pose (Utkatasana)

How to do it:

Stand with your feet about hip-distance apart.

As you breathe in, raise your arms above your head with your palms turned toward each other or facing inward.

With an exhale, bend your knees and lower your hips like you’re sitting back into a chair, while keeping your spine upright.

Keep your chest lifted and your weight rooted through your heels.

Why it helps:

This pose activates your thighs, glutes, and core muscles, promoting muscle endurance and encouraging fat burning.

  1. Downward Dog (Adho Mukha Svanasana)

How to do it:

Begin on all fours with your wrists beneath your shoulders and knees under your hips.

Fan your fingers apart and ground your palms firmly into the mat.

Curl your toes under and press your hips upward toward the ceiling, straightening your legs as far as feels comfortable.

Let your head relax naturally between your arms, and work toward bringing your heels down toward the floor.

Stay in this position for 30 to 60 seconds, maintaining slow, controlled breathing.

Why it helps:

Downward Dog stretches key muscle groups like the hamstrings, calves, and shoulders while strengthening the upper body and core.

  1. Plank Pose

How to do it:

Position yourself like you’re about to do a push-up, with your hands under your shoulders.

Engage your abdominal muscles and keep your body in one straight line from your head down to your heels.

Keep your hips aligned by preventing them from dropping too low or lifting too high.

Hold the plank for 20 to 60 seconds, breathing smoothly.

Why it helps:

This pose builds core strength, improves shoulder flexibility, and works multiple muscle groups at once.

  1. Bridge Pose (Setu Bandhasana)

How to do it:

Lie on your back with your knees bent and feet planted firmly on the floor, spaced about hip-width apart.

Place your arms by your sides, keeping your palms facing downward.

Press firmly through your feet and lift your hips toward the ceiling.

If comfortable, clasp your hands beneath your back and gently roll your shoulders under.

Hold the pose for 30 seconds to a minute, then slowly lower your hips back down.

Why it helps:

Bridge strengthens the gluteal muscles and lower back while opening the chest and hip flexors, improving posture and flexibility.

Tips to Maximize Benefits

Consistency is key: Aim to include these poses in your routine 3-4 times a week to see noticeable improvements in flexibility and fat loss.

Breathe deeply: Proper breathing enhances oxygen flow, which supports muscle function and calorie burning.

Combine with cardio: Yoga alone helps, but pairing it with cardio or strength training can accelerate fat loss.

Listen to your body: Flexibility develops over time. Avoid pushing too hard, which can cause injury.

The Long-Term Benefits

Beyond fat loss, integrating flexibility and mobility-focused yoga into your fitness plan improves posture, reduces stress, and enhances recovery from other workouts. The mind-body connection cultivated through yoga also supports mindful eating and healthier lifestyle choices, reinforcing your fat loss goals.

Incorporating yoga poses that focus on flexibility and mobility is a gentle yet effective way to accelerate fat loss. It’s not just about burning calories—it’s about building a strong, supple body that moves with ease and supports your overall fitness journey.

Categories
athletes exercises Fitness fitness-tips flexibility Gym home workout men mobility recovery & wellness strength training stretching training women workouts yoga

Mindfulness Techniques for Flexibility Athletes

Flexibility athletes—whether you’re a yoga enthusiast, dancer, gymnast, or contortionist—know the importance of maintaining and improving range of motion. But flexibility is about more than just stretching; it’s deeply connected to recovery and wellness, and mindfulness plays a pivotal role in this holistic approach to fitness.

Why Mindfulness Matters for Flexibility Athletes

Incorporating mindfulness into your routine isn’t just a trendy wellness buzzword. Mindfulness—being fully present and aware during movement and recovery—helps athletes connect with their bodies on a deeper level. This connection promotes better control, reduces injury risk, and enhances recovery times.

Mindfulness Techniques That Boost Flexibility and Recovery (with Instructions)

  1. Focused Breathing During Stretching

Breathing deeply and mindfully during stretches relaxes muscles and improves flexibility. Here’s how to do it:

Find a comfortable stretch position that you can hold for 20-30 seconds without pain.

When you’re comfortable, softly close your eyes to improve your focus.

Slowly inhale through your nose for a count of four, feeling your stomach lift as you breathe in.

Hold the breath gently for around two seconds.

Then, release the air steadily through your mouth over a count of six, imagining the muscle tension melting away as you exhale.

Repeat this breathing cycle 3–5 times while maintaining the stretch.

  1. Body Scan Meditation Post-Workout

A body scan helps identify and release muscle tension after training. Follow these steps:

Lie down comfortably on your back in a quiet space.

Close your eyes and take three deep breaths, relaxing your body with each exhale.

Slowly bring your attention to your toes. Notice any sensations—warmth, tightness, or ease.

Gradually move your focus upward to your feet, ankles, calves, knees, thighs, hips, abdomen, chest, back, shoulders, arms, neck, and finally your head.

As you notice tension, imagine breathing into that area and releasing the tightness on each exhale.

Spend 5–10 minutes completing the scan.

  1. Mindful Movement Practices

Deliberate, gentle movements help improve both your body’s awareness and its ability to stretch. Try this simple routine:

Choose 5–10 minutes for a gentle flow, such as a slow yoga sequence or tai chi basics.

Move deliberately from one posture to another, paying attention to how each joint feels.

Breathe naturally and keep your focus on the sensation of movement.

If your mind wanders, gently bring it back to your body.

Take your time, letting your breathing and movements flow together naturally.

  1. Visualization Techniques

Mental imagery supports physical flexibility by calming the mind and motivating your practice. Here’s how to practice:

Sit or lie down in a relaxed position. Close your eyes.

Take a few deep breaths to center yourself.

Picture your muscles lengthening and becoming supple as you stretch. Visualize your joints moving freely without resistance or pain.

Imagine warmth and healing energy flowing into any tight or sore areas.

Spend 3–5 minutes in this visualization before or after your workout.

The Benefits of Combining Mindfulness with Flexibility Training

Enhanced Recovery & Wellness: Mindfulness promotes relaxation and reduces stress hormones, which accelerates muscle repair and decreases soreness.

Improved Flexibility & Performance: Being mindful during stretches encourages you to listen to your body’s limits, avoiding overstretching while gradually expanding your range.

Better Mental Clarity & Focus: Mindfulness helps reduce distractions, allowing you to fully engage with your fitness routine and maintain consistency.

Injury Prevention: Awareness of body sensations helps detect early signs of strain or fatigue, leading to smarter training decisions.

Getting Started: Practical Tips

Spend 5 to 10 minutes daily focusing on mindful breathing or performing a body scan.

Explore mindfulness apps designed specifically for athletes or flexibility exercises to guide your practice.

Make mindfulness a regular part of both your warm-up and cool-down sessions.

Keep a journal to track how mindfulness impacts your flexibility progress and recovery.

By weaving mindfulness into your flexibility routine, you’re investing in your body’s long-term health and performance. With these easy-to-follow instructions, recovery and wellness become a natural and enjoyable part of your fitness journey.

Categories
Fitness fitness-tips flexibility flexibility & mobility home workout mobility recovery recovery & wellness strength training yoga

Flexibility Yoga Poses for Better Flexibility

If you’ve ever felt stiff after a long day or sore from a workout, you know how important flexibility is for overall fitness and well-being. Flexibility improves your mobility, reduces injury risk, and helps your body feel more relaxed. Incorporating specific yoga poses into your routine can transform how you move—and feel.

Here’s a guide to six effective yoga poses designed to enhance your flexibility & mobility, complete with step-by-step instructions to get you started safely and confidently.

Why Flexibility Matters

Tight muscles limit your movement and can cause discomfort. Increasing flexibility doesn’t just help you touch your toes—it improves circulation, balance, and even stress relief.

6 Yoga Poses to Improve Flexibility (with Instructions)

  1. Downward Facing Dog (Adho Mukha Svanasana)

Instructions:

Begin on all fours, making sure your wrists line up right under your shoulders and your knees sit directly beneath your hips.

Spread your fingers wide to get a good grip on the floor, pressing down through your palms.

Curl your toes under, then slowly lift your hips up and back toward the ceiling, straightening your legs as much as feels good—no need to push it.

Let your head hang naturally between your arms and keep your eyes looking toward your feet.

Stay here for about 30 seconds to a minute, taking slow, deep breaths to really settle in.

To release, gently lower your knees back down.

Benefits: Lengthens spine, calves, hamstrings, and shoulders.

  1. Low Lunge (Anjaneyasana)

Instructions:

Low Lunge (Anjaneyasana)

Start in Downward Dog, then bring your right foot forward, planting it right between your hands. Make sure your right knee sits comfortably over your ankle.

Lower your left knee down to the floor and untuck those toes so your foot can rest easy.

Lift your chest up and reach your arms overhead, palms facing each other like you’re reaching for the sky.

Keep your core tight and hips facing forward—don’t let them twist.

Hold this pose for about 30 seconds, then switch sides and do the same on your left leg.

Why it’s great: This move opens up your hip flexors and gives your quads and groin a nice stretch.

Seated Forward Fold (Paschimottanasana)

Sit down on the floor with your legs stretched out straight in front of you.

Take a deep breath in and sit tall, lengthening your spine.

As you breathe out, gently fold forward from your hips, reaching toward your feet. If you can’t reach your toes comfortably, grab a strap or towel around your feet to help.

Keep your back nice and straight—try not to round your shoulders or collapse forward.

Hold here for 30 seconds to a minute, breathing steadily and calmly.

When you’re ready to come back up, take a deep breath and slowly roll your spine up bit by bit—like stacking building blocks from the base up.

Why it’s great: This stretch works wonders for your hamstrings and lower back.

Cat-Cow Stretch (Marjaryasana-Bitilasana)

Start on your hands and knees with your wrists lined up under your shoulders and knees under your hips.

Take a big inhale and arch your back, lifting your tailbone and head toward the ceiling — this is Cow Pose.

Exhale, round your spine, tucking your chin and tailbone (Cat Pose).

Flow smoothly between these two positions with your breath for 1-2 minutes.

Benefits: Warms up and increases spinal flexibility.

  1. Pigeon Pose (Eka Pada Rajakapotasana)

Instructions:

Pigeon Pose (Eka Pada Rajakapotasana)

From Downward Dog, swing your right knee forward and set it just behind your right wrist.

Stretch your left leg straight out behind you, keeping your hips facing forward and even.

Slowly lower your chest down toward your right shin, using your hands to support your upper body.

Hang out here for 30 seconds to a minute, then switch sides and do the same on the left.

If you need extra support, pop a folded blanket under your hip to keep things comfy and balanced.

Why it rocks: This pose is a deep hip opener that really helps release built-up tension.

Bridge Pose (Setu Bandhasana)

Sprawl out on your mat and get comfy. Bend your knees and plant your feet hip-width apart—close enough that your fingertips can just skim your heels.

Press your feet down firmly and gradually raise your hips, as if you’re gently lifting off the ground.

Keep your thighs parallel and close together, gently activating your glutes to stay balanced and steady

Hold the stretch for anywhere between 30 seconds and a minute, keeping your breath steady and relaxed.

When it feels right, slowly lower your hips back down, gently stacking your spine back onto the mat.

Why it’s awesome: Bridge strengthens your glutes and gives your chest and spine a nice stretch.

Tips for Building Flexibility

Always start with some light movement or dynamic stretches to warm up your muscles before you dive in.

Use props like straps or blankets to support your body.

Breathe deeply — steady breath helps muscles relax.

Avoid pushing beyond your limits; flexibility builds gradually.

The Benefits Go Beyond the Mat

Greater flexibility & mobility enhances your everyday movements, improves posture, and speeds recovery after workouts. When your body moves with ease, life feels better.

Final Thoughts

These yoga poses offer a practical and gentle approach to boosting flexibility and supporting your overall fitness. Consistent practice, patience, and mindful breathing will help you unlock a freer, more agile body.

Start today, and watch how your flexibility transforms your wellness journey.