Categories
exercises Fitness Gym home workout men mobility Muscle Gain strength training stretching training women workouts yogis

How to Increase Bench Press in Yogis Weeks

Yoga develops functional strength, flexibility, and mindfulness—but it often lacks targeted resistance work for upper body pushing strength. That’s where the bench press comes in. Adding it to your weekly practice can help build shoulder and chest strength, balance your muscular system, and support advanced yoga postures like arm balances, chaturanga, and handstands.

This guide is for yogis who want to increase their bench press in just a few weeks—without sacrificing mobility or their commitment to mindful movement.

Benefits of Bench Press for Yogis

Before we dive into the plan, here are a few reasons to start bench pressing:

Improves upper body strength for transitions and holds

Builds muscular endurance and postural control

Balances out push-pull muscle groups (important for injury prevention)

Supports stronger and more stable shoulder joints

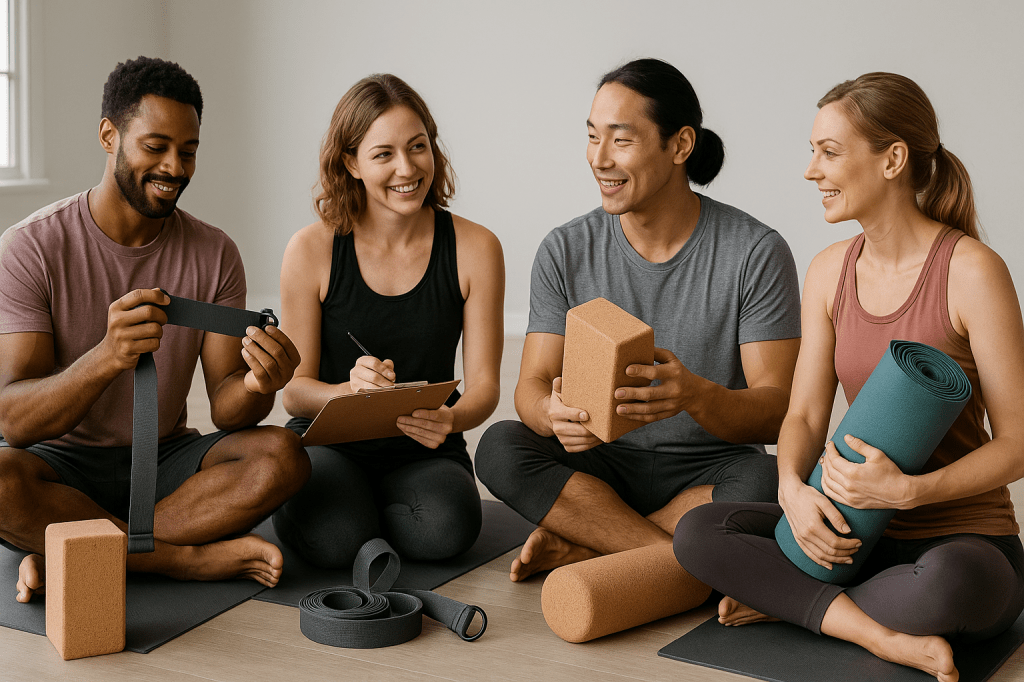
What You Need to Begin

Equipment:

Barbell or dumbbells

Weight bench

Access to a squat rack or power rack (optional, but safer)

Yoga mat and mobility tools (foam roller, resistance band)

Baseline Assessment:

If you’re new to bench pressing, test your 5-rep max (a weight you can lift 5 times with good form). This will guide your starting load.

How to Bench Press – Step-by-Step Instructions

Position yourself on the bench . Your eyes should be directly under the bar.

Grip the bar slightly wider than shoulder-width. Wrists should be stacked over elbows.

Draw your shoulder blades together and create a gentle arch in your upper back while keeping your glutes and shoulders firmly in contact with the bench.

Unrack the bar and hold it over your chest with straight arms.

Breathe in as you slowly lower the bar toward the middle of your chest, keeping your elbows angled slightly away from your sides—around 45 degrees.

Exhale and press the bar upward, driving through your feet and engaging your core.

Form Tips:

Keep your head, shoulders, and glutes in contact with the bench.

Avoid flaring elbows too wide.

Use a spotter if lifting heavy.

4-Week Bench Press Plan for Yogis

Use this weekly layout to increase strength without sacrificing your yoga schedule.

Week 1–2: Build the Foundation

Goal: Improve neuromuscular control and form.

Frequency: 2x/week

Sets/Reps: 3 sets of 8–10 reps

Load: 60–70% of 1-rep max (1RM)

Rest: 60–90 seconds between sets

Yoga Integration:

Focus on mobility and core-focused classes.

Include shoulder openers like Puppy Pose, Eagle Arms, and Thread the Needle.

Week 3: Increase Volume

Goal: Begin challenging the muscles with more workload.

Frequency: 2–3x/week

Sets/Reps: 4 sets of 6–8 reps

Load: 70–75% of 1RM

Accessory Work: Add 2–3 sets of dumbbell chest flys, incline bench, and tricep dips

Rest: 90–120 seconds between sets

Yoga Integration:

Include 1–2 slower-paced flows with shoulder stability drills.

Use Child’s Pose and Downward Dog as recovery.

Week 4: Focus on Strength

Goal: Maximize force production and build pure strength.

Frequency: 2x/week

Sets/Reps: 5 sets of 4–6 reps

Load: 75–85% of 1RM

Rest: 2 minutes between sets

Include: Close-grip bench press or push-ups as finishers

Yoga Integration:

Additional Tips for Success

Warm-Up Before Each Session

5–10 mins of light cardio

Dynamic stretches (arm swings, shoulder circles)

1–2 warm-up sets with light weights

Track Your Progress

Use a workout journal or app to record weights, reps, and how you felt.

Fuel Your Body

Get 20–30g of protein post-lift to support muscle repair.

Stay hydrated and eat whole, balanced meals.

Recover Intentionally

Be sure to schedule at least one full day off each week to allow your body to fully recover.

Use foam rolling, restorative yoga, and long savasana sessions.

Final Thoughts: Merging Strength and Stillness

You don’t need to choose between yoga and weightlifting—especially when done mindfully. Incorporating gradual strength training exercises such as the bench press can enhance the effectiveness, safety, and longevity of your yoga practice.

By following this 4-week program, you’ll likely notice more ease in your flows, better posture, and a deeper connection between power and presence.

Now it’s time to unroll your mat, rack the bar, and embrace both sides of the practice.

Categories
cardio cardio & endurance cycling exercises Fitness fitness-tips home workout men recovery & wellness running workouts

Cycling vs. Running: Which Is Better for Men?

When it comes to building cardio & endurance, few workouts compete with running and cycling. They’re both highly effective, scalable, and accessible for men at any fitness level. But how do you know which one suits your goals, body type, and schedule best?

This guide breaks down the benefits, differences, and real-world instructions to help you make the best decision for your training routine.

  1. Cardiovascular & Endurance Benefits

Both activities will boost heart health, stamina, and aerobic capacity—but they work your body differently.

Running

Benefit: Builds cardiovascular strength quickly

Best for: High-intensity workouts, fat loss, time-efficient routines

Instruction:

Start with a 20-minute jog at conversational pace, 3x/week.

Add one session of intervals (e.g., 30 sec sprint, 90 sec walk, repeat 6–8x).

Warm up and cool down with 5–10 minutes of walking.

Cycling

Benefit: Strengthens heart and lungs without joint stress

Best for: Long sessions, injury prevention, steady-state endurance

Instruction:

Start with 30-minute bike sessions at a comfortable, consistent pace, aiming for a smooth pedaling rhythm of around 80 to 90 revolutions per minute.

Gradually increase time/distance weekly by 10–15%.

Include one hill or resistance ride weekly to build leg power.

  1. Muscle Activation and Joint Impact

Running

Involves high-impact movement and activates key lower-body muscles like the calves, hamstrings, and glutes, while also requiring core stability.

Caution: May cause joint wear, especially in knees and hips.

Instruction:

Invest in high-quality running shoes with arch and heel support.

Stick to softer surfaces (dirt trails, tracks) 2–3 days/week.

Incorporate strength training (e.g., lunges, squats) twice a week to reduce injury risk.

Cycling

Low-impact; activates quads, glutes, and calves.

Ideal for recovery days or post-injury training.

Instruction:

Adjust seat height: When pedaling, your leg should be almost fully extended at the bottom.

Use clip-in pedals for efficiency once you’re comfortable.

Add core work (planks, bridges) to balance muscle engagement.

  1. Calorie Burn and Fat Loss

Running

Burns more calories per minute.

Best for quick fat reduction.

Instruction:

Combine steady-state runs (20–30 min) with intervals 1–2x/week.

Monitor effort using heart rate or RPE (Rate of Perceived Exertion: aim for 7–8 during intervals).

Keep rest days to recover and avoid burnout.

Cycling

Lower calorie burn per minute, but can ride longer and more often.

Instruction:

Aim for 45–60 min moderate rides or 30 min intense sessions.

Use apps like Strava or Zwift to track output (watts, distance, elevation).

Try fasted morning rides (if approved by a physician) for fat burning.

  1. Convenience and Lifestyle Fit

Running

Minimal gear and planning. Great for travel or urban life.

Instruction:

Keep a backup pair of running shoes in your car or office.

Use running apps with GPS tracking to find new routes wherever you are.

Don’t run on consecutive days at first — allow recovery time.

Cycling
More planning involved (gear, route, safety) but can be more enjoyable for longer durations.

Instruction:

Start with a hybrid or road bike — get a professional fit if possible.

Make sure to wear a helmet at all times, and equip your bike with lights or reflective accessories when riding in dim or dark conditions.

Join a local group ride once a week to stay motivated.

  1. Sample Weekly Routine (Beginner to Intermediate)

Day Workout

Monday Rest or 20-min light recovery ride

Tuesday 30-min run (moderate pace)

Wednesday 45-min cycle (steady pace)

Thursday Strength training + core

Friday 20-min interval run

Saturday 60-min cycle (with hills)

Sunday Active recovery walk/stretch

Final Thoughts: Which Is Better?

There’s no universal winner. Both cycling and running help men build cardio & endurance, stay lean, and improve mental focus. The right choice is the one you’ll stick with, enjoy, and benefit from long term.

TL;DR:

Choose Running if you want quick workouts, fat loss, and don’t mind impact.

Many men find the perfect mix by alternating both: running for intensity, cycling for recovery and endurance.

Pro Tips for Men Getting Started

Stretch after every session to improve recovery

Hydrate before, during, and after workouts

Fuel smart: Eat carbs 1–2 hours pre-workout; protein post

Aim for 7 to 8 hours of quality sleep each night to support recovery and maintain healthy hormone levels.

Stay consistent — results build with time, not perfection

Categories
exercises Fitness fitness-tips home workout men nutrition nutrition & meal women workouts

Healthy Meal Prep for Home Workout Days

If you’re working out at home, you’re already investing in your health — but are your meals working as hard as you are? Pairing home workouts with intentional nutrition & meal prep can help you recover faster, feel stronger, and stay consistent without the stress of last-minute food choices.

This guide breaks down not just the why, but the how — with real-life instructions you can apply starting this week.

Why Nutrition & Meal Prep Matter

Home workouts give you flexibility — no commute, no crowds, no excuses. But when the fridge is only a few steps away, it’s easy to reach for what’s quick instead of what’s best for your body.

Planning your meals ahead of time helps ensure your nutrition supports your workout goals It also helps regulate energy levels, improve focus, and prevent overeating after workouts.

Step-by-Step Instructions for Healthy Meal Prep

Step 1: Plan Your Workout Days

Take 5 minutes to map out your week. Identify your workout days and rest days.

Example:

Monday: Strength

Wednesday: HIIT/cardio

Friday: Yoga

Saturday: Rest

Tip: You don’t need a complex workout program — just enough structure to plan your meals around.

Step 2: Match Meals to Workout Intensity

Not every day requires the same fuel. Adjust your prep based on your energy needs.

Workout Type Focus What to Include

Strength Muscle repair High-protein moderate carbs

Cardio Endurance Moderate protein, higher carbs

Recovery Anti-inflammatory & hydration Healthy fats, veggies, electrolytes

Step 3: Choose 2–3 Recipes Per Meal Type

Keep it simple. You don’t need 10 new recipes a week. Pick 2–3 each for:

Breakfasts (e.g., overnight oats, veggie omelet muffins, Greek yogurt parfaits)

Lunch/Dinner (e.g., grilled chicken bowls, veggie stir-fry with tofu, salmon & quinoa)

Snacks (e.g., protein bites, boiled eggs, apple with almond butter)

Aim for meals that reheat well and can be stored 3–5 days in the fridge.

Step 4: Grocery Shop with a List

Write down your ingredients for the week ahead. Organize your list by category to save time.

Example Grocery List:

Protein: Chicken breast, canned tuna, tofu, eggs

Carbs: Brown rice, oats, sweet potatoes

Veggies: Spinach, broccoli, bell peppers, carrots

Fats: Avocados, olive oil, almonds

Extras: Greek yogurt, bananas, lemon, herbs/spices

Step 5: Batch Cook 1–2 Times a Week

Choose a day (Sunday works well) to cook and portion meals. A midweek top-up (Wednesday) keeps things fresh.

Basic Batch Cooking Routine:

Cook all proteins (bake or grill for easy cleanup)

Roast or steam veggies

Prepare grains (quinoa, rice, or couscous)

Portion into containers by meal

Store your meals in transparent containers to easily identify what’s inside without opening them. Label with the day if that helps you stay organized.

Step 6: Prep Pre- and Post-Workout Snacks

Keep quick energy and recovery options on hand:

Pre-Workout:

Banana + peanut butter

Rice cake + avocado

Small smoothie with oats

Post-Workout:

Protein shake with fruit

Turkey wrap

Cottage cheese + berries

Step 7: Stick to the System, Not Perfection

Meal prep isn’t about strict dieting. It’s about making your week easier, more nutritious, and more intentional.

If you skip a prep day or order takeout once, don’t scrap the whole week. Get back to your plan the next meal. Progress over perfection.

Benefits You’ll Notice (Quickly)

Less mental energy spent deciding what to eat

Improved performance during your home workouts

Faster recovery and better mood throughout the day

Reduced stress around meals and grocery runs

Final Thoughts

Healthy meal prep isn’t a trend — it’s a strategy. When you pair intentional eating with consistent home workouts, your body responds. You don’t need to be a gourmet chef or a fitness model — just someone with a plan.

Start small. Prep one extra meal this week. Build from there.

You’ve already committed to moving your body — now let your meals move you closer to your goals, too.

Categories
cardio cardio & endurance fat loss Fitness fitness-tips flexibility flexibility & mobility Gym home workout mobility runners running strength training training Treadmill women workouts

Cycling vs. Running: Which Is Better for Women?

When it comes to building cardio & endurance, cycling and running are two of the most popular exercises among women. Both offer excellent health benefits, but deciding which is better depends on your personal goals, fitness level, and lifestyle. This guide will help you understand the benefits of each and provide clear instructions to help you get started or improve your routine.

Cardio & Endurance: Why It Matters

Cardiovascular fitness improves heart and lung health, increases stamina, and helps manage weight. For women, cardio exercises also play a role in hormone regulation, mental well-being, and bone health. Cycling and running are both effective, but knowing how to approach each will maximize your results.

Running: Benefits & How to Start

Benefits:

Burns calories quickly, ideal for weight management

Strengthens bones and joints

Easy to do anywhere with minimal equipment

How to Start Running:

Choose the Right Shoes: Invest in a pair designed for your foot type to prevent injury.

Warm-Up: Begin with 5-10 minutes of brisk walking or dynamic stretches.

Start Slow: Try a walk-run approach. For example, alternate 1 minute running with 2 minutes walking for 20 minutes.

Set a Schedule: Aim for 3 sessions per week, gradually increasing running time.

Listen to Your Body: Stop if you feel pain and adjust your pace.

Cool Down: Walk for 5 minutes and stretch major muscles after your run.

Cycling: Benefits & How to Start

Benefits:

Low-impact, great for joint health

Tones leg muscles effectively

Can be used for commuting or leisure

How to Start Cycling:

Get the Right Bike: Choose a bike that fits your height and purpose (road, hybrid, or stationary).

Wear a Helmet: Safety first!

Begin on Easy Terrain: Start with flat routes or a stationary bike session for 20-30 minutes.

Pedal at a Comfortable Pace: Aim to maintain a steady rhythm that challenges your endurance without overexerting.

Increase Duration Gradually: Add 5-10 minutes per week as you build stamina.

Incorporate Intervals: Try alternating 2 minutes of faster pedaling with 3 minutes of easy cycling to boost cardio.

Cool Down and Stretch: Just like running, end with a gentle ride and stretch your legs and hips.

Tips for Choosing and Combining Both

Assess Your Joints: If you experience knee or hip pain, cycling is likely a safer starting point.

Set Goals: Running can be more time-efficient for calorie burn, while cycling is better for sustained endurance.

Mix It Up: Alternate between running and cycling throughout the week to prevent burnout and injury.

Track Your Progress: Use apps or wearables to monitor your endurance improvements.

Hydrate and Fuel Properly: Both activities demand energy, so eat balanced meals and drink water before, during, and after workouts.

Final Thought

Choosing between cycling and running doesn’t have to be an either/or decision. Both support women’s cardio & endurance beautifully when practiced with care and consistency. Follow these steps, listen to your body, and most importantly, pick the activity that feels right for you. Your fitness journey should empower and inspire, no matter the path.

Categories
Bands Fitness fitness-tips gear & reviews home workout men mobility workouts

Top 5 Men’s Resistance Bands for Home Workouts

Looking to build strength, improve mobility, or just stay in shape at home? Resistance bands are an underrated powerhouse for men’s fitness. They’re affordable, portable, and surprisingly effective—whether you’re a beginner or serious about your training.

This guide covers the top 5 resistance bands for men, along with usage instructions, tips, and expert techniques to help you get the most from each workout.

Top 5 Resistance Bands for Men

  1. Rogue Monster Bands

Best for: Serious strength training

Why we like them: These are the gold standard for powerlifters and serious lifters. The thick latex offers a ton of resistance and can be used for banded squats, deadlifts, or push-up variations.

How to use:

Anchor under your feet for curls or overhead presses.

Wrap around a pull-up bar for assisted pull-ups.

Use to add tension during barbell lifts.

Pro Tip: Start with the red or black bands before jumping to the thicker ones.

  1. TRX Strength Bands

Best for: Functional, full-body workouts

Why we like them: TRX’s premium bands have great stretch and grip, perfect for multi-plane movements. They’re long enough for upper and lower body exercises without feeling restrictive.

How to use:

Step on the center and hold each end for squats, rows, or presses.

Attach to a door anchor for chest flies or face pulls.

Use in lateral walks or lunges for core and glute engagement.

Pro Tip: Combine bands with TRX’s digital workouts for guided sessions.

  1. Undersun Fitness Bands

Best for: Replacing a full home gym

Why we like them: Designed by fitness pro James Grage, these bands come with a full training program. They’re ideal for guys who want a no-excuses, high-performance home setup.

How to use:

Loop around feet or overhead anchors for full-body push/pull workouts.

Use progressive resistance by shortening the band’s length.

Pair with Undersun’s app for structured workouts.

Pro Tip: The orange and gray bands offer solid resistance for strength-focused routines.

  1. Iron Bull Strength Bands

Best for: Powerlifting support and bodybuilding

Why we like them: These bands are rugged and strong, perfect for accommodating resistance in compound lifts. If you’re looking to boost deadlift lockout or add intensity to squats, these are your go-to.

How to use:

Loop around a barbell for squats, bench, or deadlifts.

Attach to a rack for triceps pushdowns or lat pulldowns.

Anchor for explosive speed training.

Pro Tip: These are best used with racks, platforms, or stable anchors.

  1. Fit Simplify Loop Bands

Best for: Warm-ups, mobility, and recovery

Why we like them: These small-loop bands are ideal for glute activation, shoulder stability, and rehab. Lightweight but effective, they’re great for beginners or as part of your warm-up routine.

How to use:

Loop around legs for side steps or monster walks.

Use for shoulder or hip mobility drills.

Perform high-rep sets for muscle activation before lifting.

Pro Tip: Use the lightest band for joint prep, and double up for more resistance.

How to Train with Resistance Bands

No matter which band you choose, here are basic instructions and tips to get started:

Basic Setup

Choose your resistance: Start light and scale up.

Anchor properly: Use a secure door, rack, or your feet.

Control the movement: Maintain tension throughout the motion.

Full range of motion: Don’t shortchange reps—stretch the band fully.

Beginner Workout Example (Full Body – 20 Minutes)

Do 3 rounds of the following (rest 30–60 seconds between sets):

Band Squats – 12 reps

Resistance Band Rows – 10 reps each side

Push-Up with Band Resistance – 10 reps

Banded Lateral Walks – 12 steps each way

Overhead Press – 12 reps

Tips & Techniques

Warm up first: Use light bands for joint prep.

Breathe properly: Exhale during the effort (e.g., pushing or pulling).

Mix resistance levels: Use lighter bands for mobility, heavier ones for strength.

Track progress: Add reps or resistance weekly.

Anchor safely: Avoid snapping by securing bands properly and checking for wear.

Final Thoughts

Resistance bands are one of the best tools men can use for strength, flexibility, and recovery—all without leaving home. Whether you’re just starting out or building serious muscle, there’s a band (or set) here that can match your goals.

Ready to ditch the excuses? Grab a band, follow the tips above, and take your home workout to the next level.

Categories
exercises fat loss Fitness fitness-tips flexibility & mobility Gym training workouts yoga

Fat Loss Yoga Poses for Better Flexibility

When it comes to fat loss, most people immediately think of high-intensity workouts or strict diets. But what if I told you that yoga — particularly poses designed to improve flexibility and mobility — can be a powerful tool to help shed fat while boosting your overall fitness?

Yoga isn’t just about stretching or calming your mind. Certain poses actively engage muscles, increase your heart rate, and improve your body’s ability to move efficiently. This combination supports fat loss and enhances your flexibility and mobility, creating a foundation for sustainable fitness.

Why Focus on Flexibility & Mobility for Fat Loss?

Flexibility and mobility are more than just buzzwords. They play a critical role in how your body performs everyday movements and exercises. When your joints and muscles move freely, you can work out more effectively and safely, reducing the risk of injury. This means you can stick to your fat loss plan longer and with better results.

Moreover, improved mobility encourages greater calorie burn by allowing more dynamic, full-range movements. Fat loss becomes a natural byproduct of moving well and consistently.

Key Yoga Poses for Fat Loss and Flexibility (With Instructions)

Here are some effective yoga poses that support fat loss while enhancing flexibility and mobility. Follow the step-by-step instructions to get the most out of each pose.

  1. Warrior II (Virabhadrasana II)

Instructions:

Stand with your feet about 3-4 feet apart

How to do it:

Stand with your feet spaced wide apart.

Turn your right foot outward to about a right angle, while angling your left foot slightly inward.

Slowly bend your right knee so it aligns directly above your ankle.

Reach your arms out wide at shoulder level, keeping them parallel to the ground with palms facing down.

Direct your eyes toward your right fingertips and maintain the position for 30 to 60 seconds.

Benefits:

This posture strengthens the muscles in your legs and core, while also stretching the hips and chest, which enhances joint flexibility and movement.

  1. Chair Pose (Utkatasana)

How to do it:

Stand with your feet about hip-distance apart.

As you breathe in, raise your arms above your head with your palms turned toward each other or facing inward.

With an exhale, bend your knees and lower your hips like you’re sitting back into a chair, while keeping your spine upright.

Keep your chest lifted and your weight rooted through your heels.

Why it helps:

This pose activates your thighs, glutes, and core muscles, promoting muscle endurance and encouraging fat burning.

  1. Downward Dog (Adho Mukha Svanasana)

How to do it:

Begin on all fours with your wrists beneath your shoulders and knees under your hips.

Fan your fingers apart and ground your palms firmly into the mat.

Curl your toes under and press your hips upward toward the ceiling, straightening your legs as far as feels comfortable.

Let your head relax naturally between your arms, and work toward bringing your heels down toward the floor.

Stay in this position for 30 to 60 seconds, maintaining slow, controlled breathing.

Why it helps:

Downward Dog stretches key muscle groups like the hamstrings, calves, and shoulders while strengthening the upper body and core.

  1. Plank Pose

How to do it:

Position yourself like you’re about to do a push-up, with your hands under your shoulders.

Engage your abdominal muscles and keep your body in one straight line from your head down to your heels.

Keep your hips aligned by preventing them from dropping too low or lifting too high.

Hold the plank for 20 to 60 seconds, breathing smoothly.

Why it helps:

This pose builds core strength, improves shoulder flexibility, and works multiple muscle groups at once.

  1. Bridge Pose (Setu Bandhasana)

How to do it:

Lie on your back with your knees bent and feet planted firmly on the floor, spaced about hip-width apart.

Place your arms by your sides, keeping your palms facing downward.

Press firmly through your feet and lift your hips toward the ceiling.

If comfortable, clasp your hands beneath your back and gently roll your shoulders under.

Hold the pose for 30 seconds to a minute, then slowly lower your hips back down.

Why it helps:

Bridge strengthens the gluteal muscles and lower back while opening the chest and hip flexors, improving posture and flexibility.

Tips to Maximize Benefits

Consistency is key: Aim to include these poses in your routine 3-4 times a week to see noticeable improvements in flexibility and fat loss.

Breathe deeply: Proper breathing enhances oxygen flow, which supports muscle function and calorie burning.

Combine with cardio: Yoga alone helps, but pairing it with cardio or strength training can accelerate fat loss.

Listen to your body: Flexibility develops over time. Avoid pushing too hard, which can cause injury.

The Long-Term Benefits

Beyond fat loss, integrating flexibility and mobility-focused yoga into your fitness plan improves posture, reduces stress, and enhances recovery from other workouts. The mind-body connection cultivated through yoga also supports mindful eating and healthier lifestyle choices, reinforcing your fat loss goals.

Incorporating yoga poses that focus on flexibility and mobility is a gentle yet effective way to accelerate fat loss. It’s not just about burning calories—it’s about building a strong, supple body that moves with ease and supports your overall fitness journey.

Categories
beginners Fitness nutrition & meal snacks workouts

High-Protein Snacks for Beginners Workouts

If you’re new to working out, you’ve likely heard that protein is important—but figuring out how to include it in your day without overcomplicating things can feel confusing. This guide breaks down easy, beginner-friendly high-protein snacks, explains why they matter, and gives you step-by-step instructions to make them at home or prep ahead of time.

Whether you’re exercising to build strength, lose fat, or improve endurance, your results start in the kitchen—with smart nutrition & meal prep.

Why Protein Matters in Fitness for Beginners

For beginners in fitness, protein plays a major role in:

Repairing and building muscle

Supporting metabolism

Reducing post-workout soreness

Preventing excess hunger later

Snacking on high-protein foods helps you recover from workouts and avoid overeating between meals. Now let’s look at how to prepare some beginner-friendly options.

6 High-Protein Snack Ideas (with Instructions)

  1. Greek Yogurt + Berries

Protein per serving: ~15g

What you need:

1 cup plain Greek yogurt (2% or full-fat)

½ cup mixed berries (fresh or frozen)

Optional: sprinkle of chia seeds or honey

Instructions:

Scoop yogurt into a bowl or container.

Add berries on top.

Stir in chia seeds or drizzle honey if desired.

Store in the fridge or eat immediately.

  1. Boiled Eggs

Protein per egg: ~6g

What you need:

6 large eggs

Salt, pepper, or paprika

Instructions:

Place eggs in a pot, cover with water.

Heat until the water starts boiling, then lower the temperature and let the eggs cook gently for about 9 to 12 minutes.

Transfer to cold water and peel when cooled.

Store in the fridge up to 1 week.

Meal Prep Tip: Boil a batch on Sunday and grab 1–2 each day.

3.Cottage Cheese + Pineapple

Protein per serving: ~14g

What you need:

½ cup cottage cheese (low-fat or full-fat)

¼ cup diced pineapple (fresh or canned in juice)

Instructions:

Spoon cottage cheese into a bowl or container.

Add pineapple chunks on top.

Eat cold—no prep required!

  1. Hummus + Veggie Sticks

Protein per serving: ~6–8g

What you need:

½ cup hummus

1 cup raw veggies (carrots, bell peppers, cucumber, etc.)

Instructions:

Wash and slice your vegetables.

Portion into containers with hummus.

Keep chilled until snack time.

Prep multiple servings at once for the week.

  1. Nut Butter on Rice Cakes

Protein per serving: ~7g

What you need:

1–2 plain rice cakes

2 tbsp natural peanut or almond butter

Optional: banana slices or cinnamon

Instructions:

Spread nut butter evenly across rice cakes.

Top with banana slices or cinnamon if desired.

Eat immediately or prep in advance and wrap.

  1. Tuna Packet with Avocado

Protein per serving: ~18–20g

What you need:

One 3-ounce pouch of tuna packed in either water or olive oil

¼ mashed avocado

Salt, pepper, squeeze of lemon

Instructions:

Open tuna packet and place in a bowl.

Mix in mashed avocado and season to taste.

Pair with whole-grain crackers or wrap in crisp lettuce for a fresh, easy bite.

Ready in 2 minutes and ideal for post-workout protein!

Meal Prep Tips for Beginners

Start small: Pick 2 snacks to prep this week.

Use transparent containers and portion your snacks to keep things tidy and easy to find

Balance is key: Pair protein with fiber or healthy fats.

Don’t overthink it: Keep ingredients simple and affordable.

Benefits of High-Protein Snacking

Supports muscle recovery

Reduces cravings between meals

Improves satiety and energy

Helps regulate blood sugar

Final Thoughts

When you’re starting out, the goal isn’t perfection—it’s consistency. These protein-rich snack options are simple, hassle-free, and perfect for anyone just starting out. By incorporating them into your nutrition & meal prep routine, you’ll build a strong foundation for your fitness journey—one bite at a time.

Categories
athletes beginners Budget-Friendly busy schedules cardio cardio & endurance exercises Fitness fitness-tips flexibility flexibility & mobility gear & reviews Gym home workout men mobility Muscle Gain recovery & wellness strength training stretching training women workouts yogis

Gym Equipment Must-Haves for Yogis

Yoga is a deeply personal and transformative practice. Whether you’re perfecting your Warrior II or just finding time to breathe, the right tools can make all the difference. This guide highlights gym equipment essentials for yogis—complete with reviews, tips, and step-by-step instructions—to help you build a well-rounded, supportive yoga space.

Why Equipment Matters for Your Yoga Practice

The right yoga gear does more than make your setup look good. It offers comfort, support, and structure, helping you move more freely while reducing the risk of injury. With this list, you’ll be able to practice smarter and safer.

  1. Premium Yoga Mat

Purpose: A yoga mat offers a stable, cushioned surface to support comfort and traction during your sessions.

How to Use:

Roll out the mat on a flat surface.

Ensure the grippy or textured side of the mat is facing upward for better traction during your practice.

Use alignment lines (if available) to position hands and feet in poses like Downward Dog.

Suggested: Manduka PRO Yoga Mat – Known for its dense cushioning, it’s ideal for joint support and designed for long-term use.

  1. Yoga Blocks

Purpose: Yoga blocks are useful tools for enhancing stability, improving flexibility, and supporting proper posture during poses.

How to Use:

For hamstring stretches: Place one block under each hand in a forward fold if your hands don’t touch the floor.

For support: Use under your sacrum in Bridge Pose for a supported version.

For seated poses: Use a block to elevate your hips, which can help alleviate strain on your knees and hips.

Suggested: Gaiam Cork Yoga Blocks — Durable, environmentally friendly, and offering a comfortable, natural texture for grip.

  1. Yoga Strap

Purpose: A yoga strap helps you reach farther and hold stretches longer without putting undue strain on your muscles.

How to Use:

Seated Forward Stretch: Sit with your legs extended straight ahead. Wrap the strap around the bottoms of your feet and carefully pull yourself forward, maintaining a long, straight spine.

Shoulder Stretch: Grasp the strap behind your back with both hands and gradually raise it to gently open and stretch your shoulders.

Reclined Leg Stretch: While lying on your back, loop the strap around one foot and slowly raise your leg toward the ceiling, keeping it straight for an effective hamstring stretch.

Recommended: Jade Yoga Strap — Known for its durability and adjustable metal D-rings.

  1. Foam Roller

Purpose: Foam rollers are excellent for muscle recovery, helping to ease tightness and improve blood flow.

How to Use:

To ease tight quadriceps: Lie face down and position the foam roller beneath your thighs. Gently roll from your hips toward your knees to help loosen the muscles.

For back relief: Sit on the floor with the roller positioned behind you. Carefully lean back and move slowly along your spine to massage and relax the muscles.

Pre- or Post-Yoga: Spend 5 to 10 minutes rolling key muscle groups to enhance flexibility and reduce soreness.

Recommended: TriggerPoint GRID Foam Roller — Features a firm, textured surface designed for deep muscle relief.

  1. Meditation Cushion

Purpose: Meditation cushions support correct posture and increase comfort during longer sitting sessions.

How to Use:

Zafu (round cushion): Sit upright near the front edge of the cushion, crossing your legs comfortably before you.

Benefit: Raising the hips slightly tilts the pelvis forward, helping to maintain a natural and upright spinal alignment.

Suggested: Hugger Mugger Zafu & Zabuton Set — Provides sturdy support and includes a removable, washable cover for convenience.

Tips for Choosing Your Yoga Gear

Test materials: When trying out new gear, make sure to check the return policy, especially if you’re unsure about the feel or firmness.

Consider portability: If you often practice at different locations, opt for equipment that’s lightweight and easy to transport.

Research gear & reviews: Reading what fellow yogis have to say can give you valuable insights into a product’s performance and durability.

Stick with essentials first: Begin with a good mat, one block, and a strap—then build out as your practice deepens.

The Benefits of Having the Right Gear

Injury prevention: Props allow you to ease into poses safely.

Improved alignment: You’ll hold better posture without forcing your body.

Enhanced flexibility: Over time, supportive gear can help deepen your range of motion.

Increased consistency: When practice feels better, you’re more likely to return to the mat.

Final Word

The journey of a yogi is unique, but the tools that support it are often shared. Whether you’re seeking balance, flexibility, or peace of mind, these gym equipment must-haves offer exactly that. With trusted gear & reviews to guide your choices, your yoga practice can become not only more accessible—but more powerful.

Remember, it’s not about having everything. It’s about having the right things. Invest in your wellness, take your time exploring what fits, and enjoy the process. Namaste.

Categories
athletes exercises Fitness fitness-tips flexibility Gym home workout men mobility recovery & wellness strength training stretching training women workouts yoga

Mindfulness Techniques for Flexibility Athletes

Flexibility athletes—whether you’re a yoga enthusiast, dancer, gymnast, or contortionist—know the importance of maintaining and improving range of motion. But flexibility is about more than just stretching; it’s deeply connected to recovery and wellness, and mindfulness plays a pivotal role in this holistic approach to fitness.

Why Mindfulness Matters for Flexibility Athletes

Incorporating mindfulness into your routine isn’t just a trendy wellness buzzword. Mindfulness—being fully present and aware during movement and recovery—helps athletes connect with their bodies on a deeper level. This connection promotes better control, reduces injury risk, and enhances recovery times.

Mindfulness Techniques That Boost Flexibility and Recovery (with Instructions)

  1. Focused Breathing During Stretching

Breathing deeply and mindfully during stretches relaxes muscles and improves flexibility. Here’s how to do it:

Find a comfortable stretch position that you can hold for 20-30 seconds without pain.

When you’re comfortable, softly close your eyes to improve your focus.

Slowly inhale through your nose for a count of four, feeling your stomach lift as you breathe in.

Hold the breath gently for around two seconds.

Then, release the air steadily through your mouth over a count of six, imagining the muscle tension melting away as you exhale.

Repeat this breathing cycle 3–5 times while maintaining the stretch.

  1. Body Scan Meditation Post-Workout

A body scan helps identify and release muscle tension after training. Follow these steps:

Lie down comfortably on your back in a quiet space.

Close your eyes and take three deep breaths, relaxing your body with each exhale.

Slowly bring your attention to your toes. Notice any sensations—warmth, tightness, or ease.

Gradually move your focus upward to your feet, ankles, calves, knees, thighs, hips, abdomen, chest, back, shoulders, arms, neck, and finally your head.

As you notice tension, imagine breathing into that area and releasing the tightness on each exhale.

Spend 5–10 minutes completing the scan.

  1. Mindful Movement Practices

Deliberate, gentle movements help improve both your body’s awareness and its ability to stretch. Try this simple routine:

Choose 5–10 minutes for a gentle flow, such as a slow yoga sequence or tai chi basics.

Move deliberately from one posture to another, paying attention to how each joint feels.

Breathe naturally and keep your focus on the sensation of movement.

If your mind wanders, gently bring it back to your body.

Take your time, letting your breathing and movements flow together naturally.

  1. Visualization Techniques

Mental imagery supports physical flexibility by calming the mind and motivating your practice. Here’s how to practice:

Sit or lie down in a relaxed position. Close your eyes.

Take a few deep breaths to center yourself.

Picture your muscles lengthening and becoming supple as you stretch. Visualize your joints moving freely without resistance or pain.

Imagine warmth and healing energy flowing into any tight or sore areas.

Spend 3–5 minutes in this visualization before or after your workout.

The Benefits of Combining Mindfulness with Flexibility Training

Enhanced Recovery & Wellness: Mindfulness promotes relaxation and reduces stress hormones, which accelerates muscle repair and decreases soreness.

Improved Flexibility & Performance: Being mindful during stretches encourages you to listen to your body’s limits, avoiding overstretching while gradually expanding your range.

Better Mental Clarity & Focus: Mindfulness helps reduce distractions, allowing you to fully engage with your fitness routine and maintain consistency.

Injury Prevention: Awareness of body sensations helps detect early signs of strain or fatigue, leading to smarter training decisions.

Getting Started: Practical Tips

Spend 5 to 10 minutes daily focusing on mindful breathing or performing a body scan.

Explore mindfulness apps designed specifically for athletes or flexibility exercises to guide your practice.

Make mindfulness a regular part of both your warm-up and cool-down sessions.

Keep a journal to track how mindfulness impacts your flexibility progress and recovery.

By weaving mindfulness into your flexibility routine, you’re investing in your body’s long-term health and performance. With these easy-to-follow instructions, recovery and wellness become a natural and enjoyable part of your fitness journey.