Categories
Uncategorized

Macros Explained: How Much Flexibility Do You Need?

You’ve probably heard about macros—short for macronutrients—but do you really know how to use them to fuel your goals and enjoy your meals? Whether you’re prepping meals for the week or trying to stay consistent during a busy schedule, understanding how to balance flexibility with structure is key to making nutrition sustainable.

Here’s your guide to figuring out how much flexibility is right for you, plus practical steps to make it work.

Step 1: Understand What Macros Are

Macronutrients are the three core components of food that provide energy:

Carbohydrates – Quick energy source (e.g., rice, fruit, oats)

Proteins – Essential for muscle repair and growth (e.g., chicken, tofu, eggs)

Fats – Needed for hormones, cell health, and nutrient absorption (e.g., avocado, nuts, olive oil)

Instruction: To begin, look at the nutrition labels on food you eat today. Identify how many grams of carbs, proteins, and fats are in each item.

Step 2: Calculate Your Macros Based on Your Goals

Your macro needs vary depending on your activity level, goals (fat loss, muscle gain, maintenance), and body type.

Instruction:

Use a free macro calculator (try Precision Nutrition, IIFYM, or Cronometer).

Enter your personal details—such as your age, current weight, height, daily activity level, and fitness objective—to get tailored macro recommendations.

Record your daily macro targets.

Example:

Carbs: 200g

Protein: 150g

Fat: 60g

Step 3: Start Tracking Your Macros (Without Getting Stressed)

Flexible eating allows you to enjoy a wide variety of foods, as long as they align with your daily macronutrient goals. That includes both “clean” meals and the occasional treat.

Instruction:

Download an app like MyFitnessPal, Macrofactor, or Lose It!

Log everything you eat for a full day—even snacks and drinks.

Compare your intake to your macro targets.

Adjust your next meal to help you get closer to your daily goals.

Tip: Scan barcodes to make tracking quicker.

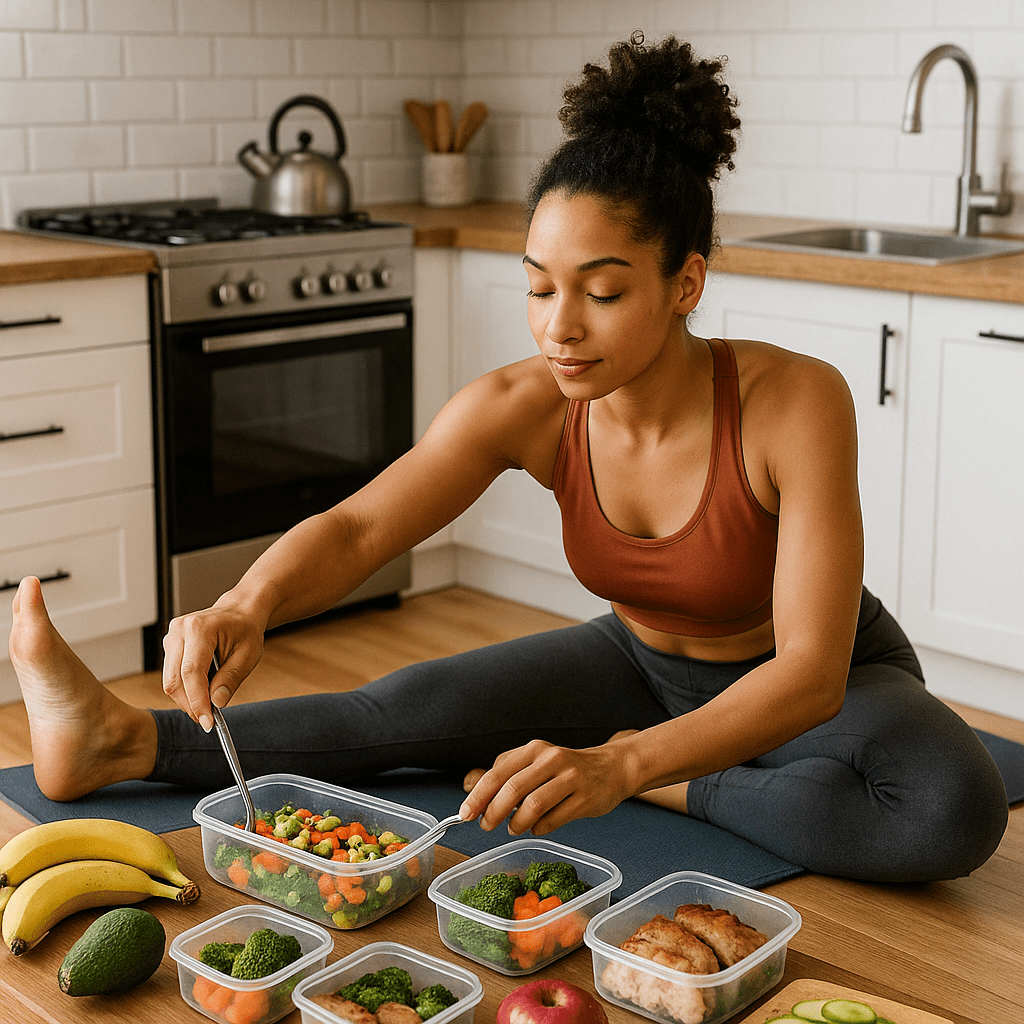
Step 4: Meal Prep for Macro Flexibility

Meal prep isn’t about eating the same bland meals—it’s about planning with purpose so you can make better decisions during the week.

Instruction:

Choose 2–3 protein sources, 2 carb sources, and 2 veggie options to prep in bulk.

Portion meals into containers and label them with macro estimates (optional but helpful).

Keep a few “wild card” items (like wraps, sauces, or cheese) on hand for flavor variety.

Example Meal Prep Combo:

Grilled chicken + quinoa + broccoli (400 calories | 35g protein | 30g carbs | 15g fat)

Step 5: Use the 80/20 Rule for Real-Life Flexibility

Achieving results doesn’t require a flawless diet. Following the 80/20 approach allows you to maintain consistency while avoiding overwhelm or burnout.

Instruction:

80% of your meals: Focus on whole foods like lean proteins, veggies, fruits, and whole grains.

20% of your meals: Allow room for foods you enjoy—ice cream, pizza, wine—as long as they fit your macro goals.

Step 6: Adjust and Reflect Weekly

Your macro needs might shift over time—especially if your weight, activity level, or goals change.

Instruction:

Take a few minutes each week to look over your food log and assess your progress.

Ask: “Did I hit my macros most days? Where did I struggle?”

Make small changes: Add more snacks, prep larger portions, or swap ingredients.

Final Thoughts: What’s the Right Level of Flexibility for You?
Flexibility looks different for everyone. If you’re a beginner, tracking every macro might help build awareness. If you’ve been doing this a while, you may prefer a more intuitive approach. There’s no perfect method—just what works best for your lifestyle and fitness journey.

Quick Recap of Instructions
Step Action
1 Read food labels and identify macro content

2 Use a macro calculator to get your targets

3 Track your food using an app

4 Meal prep proteins, carbs, and veggies in advance

5 Follow the 80/20 rule for balance

6 Reflect weekly and adjust as needed

Nutrition & Meal Prep for Flexibility = Empowerment, Not Restriction.
Once you understand macros and give yourself room to enjoy the process, your diet becomes a tool, not a chore. That’s where real, lasting change begins.

Categories
athletes exercises home workout men Muscle Gain recovery & wellness strength training training Uncategorized yogis

Full Body Strength Workout with Yogis

For yogis, strength training can be a powerful complement to a regular yoga practice. While yoga develops flexibility, balance, and breath awareness, strength training enhances muscle support, stability, and joint health. When these practices are combined, they build a more functional, injury-resistant, and balanced body.

Why Strength Training Benefits Yogis
Many yogis assume strength training might “bulk them up” or reduce flexibility, but the truth is the opposite. Mindful resistance work helps deepen poses, stabilize transitions, and prevent injury by reinforcing the muscles that support joints. Strength doesn’t interfere with yoga—it enhances it.

Full Body Strength Workout for Yogis
No machines or barbells required. Just your bodyweight, a pair of light-to-medium dumbbells, and optional resistance bands. Here’s a yogi-friendly routine to target all major muscle groups.

  1. Chair Pose to Overhead Press
    Muscles: Quads, glutes, shoulders
    Equipment: Dumbbells (optional)

Instructions:

Plant your feet about hip-width apart and bring the dumbbells up to shoulder level, keeping your elbows bent and close to your body.

Inhale as you sink into Chair Pose (Utkatasana), keeping weight in your heels.

Let the air out as you press the weights overhead, rising up tall with a straight, strong posture.

If you want it more poetic or more direct, just say the word!

Lower weights back to shoulders and repeat.

Reps: 3 sets of 10

  1. Plank Rows (Renegade Rows)
    Targets: Core, back, arms
    Gear: Dumbbells

Get into a solid high plank position, gripping the dumbbells just beneath your shoulders, and keep your whole body in a straight line from head to heels.

Engage your core and shift weight slightly to the left.

Row the right dumbbell toward your rib cage, elbow close to body.

Lower it with control and repeat on the other side.

Reps: 3 sets of 8 per side

  1. Glute Bridges
    Muscles: Glutes, hamstrings, lower back
    Equipment: Bodyweight or resistance band

Instructions:

Lie on your back with knees bent, feet flat and hip-width apart.

Arms down by your sides, palms facing the mat.

Inhale, then exhale as you press through your heels to lift hips.

Squeeze your glutes at the top, hold for a breath, then lower slowly.

Reps: 3 sets of 15

  1. Crescent Lunge with Bicep Curl
    Muscles: Legs, glutes, biceps, core
    Equipment: Dumbbells

Instructions:

Step the right foot forward into a deep lunge, back heel lifted.

Hold dumbbells at your sides, elbows close.

As you lower into the lunge, bring those weights up with a smooth curl.

Lower weights and switch sides after each set.

Reps: 3 sets of 10 per side

  1. Wall Sit Hold
    Muscles: Quads, glutes, calves
    Equipment: Wall

Instructions:

Position yourself with your back flat against a wall and step your feet forward about two feet, keeping them hip-width apart.

Slide gently down the wall until your thighs are parallel to the floor, like you’re sitting in an invisible chair, with your knees bent around a right angle.

Keep knees over ankles, core tight, and back flat.

Maintain the pose, keeping your hands free and off your legs for support.

Hold: 3 sets of 30 seconds

Tips for Integration into a Yoga Practice
Begin with breath: Approach each movement as a mindful flow, not a task.

Do this 1–2x per week: You don’t need daily lifting to see results.

Use yoga as recovery: Incorporate restorative flows on rest days.

Listen to your body: Just like yoga, strength work requires self-awareness.

Final Thoughts
When yogis begin strength training with intention and body awareness, it becomes an extension of their practice—not a disruption. Strength brings stability into postures, endurance into sequences, and resilience into daily life. Fitness doesn’t have to be a competition; it can be an exploration. With the right balance, your mat becomes both a place of flexibility and power.

Categories
Fitness Uncategorized

Ultimate Guide to Foam Rolling for Sore Muscles

No matter if you’re a longtime athlete or starting your fitness journey, sore muscles can easily throw off your momentum and hinder your progress. Enter foam rolling: an incredibly simple, affordable, and effective tool for muscle recovery that’s often overlooked. This foam rolling guide will walk you through the what, why, and how—so you can bounce back faster and feel better post-workout.

What Is Foam Rolling?
Foam rolling is a self-massage method known as self-myofascial release (SMR) that focuses on loosening tight or knotted muscles to ease tension and boost flexibility. Using a foam roller—a firm cylindrical tool—you apply controlled pressure to specific muscle groups, helping to break up adhesions in the fascia (the connective tissue surrounding muscles).

Why Foam Rolling Matters for Muscle Recovery
When we exercise, especially during resistance training or high-intensity intervals, we create microscopic damage in our muscle fibers. That’s what leads to soreness, stiffness, and that sluggish “day-after-leg-day” feeling. While soreness is a normal part of building strength, recovery is where the real gains happen.

Foam rolling aids muscle recovery by:

Increasing blood flow to sore areas

Reducing inflammation

Loosening tight muscles

Enhancing flexibility and range of motion

Preventing long-term injury or muscle imbalances

How to Foam Roll: A Step-by-Step Breakdown
Pick the Right Roller:
Beginners should start with a softer roller. More advanced users may opt for firmer or textured options for deeper pressure.

Target Sore Muscle Groups:
Common spots include quads, hamstrings, calves, glutes, IT band, and upper back.

Apply Slow, Steady Pressure:
Roll over the muscle slowly—about 1 inch per second—and pause over tender spots for 20–30 seconds.

Don’t Roll Over Joints or Bones:
Avoid areas like your spine or knees. Focus on soft tissue only.

Breathe and Relax:
Holding your breath tenses the body. Breathe deeply and allow your muscles to melt into the pressure.

When and How Often to Foam Roll
Before a workout: Helps activate muscles and improve movement efficiency.

Post-exercise: Helps eliminate lactic acid buildup and speeds up the healing process.

During rest days: Maintains muscle flexibility and mobility, promoting better overall function.

Even just 10–15 minutes a few times per week can make a noticeable difference in how your body feels and performs.

Tips for Best Results
Stay hydrated—foam rolling works best when your muscles are well-hydrated.

Be consistent. Like any practice, results come with regular use.

If something feels sharp or causes shooting pain, stop. Foam rolling should be intense but not unbearable.

Final Thoughts
Foam rolling isn’t just a trend—it’s a science-backed, accessible way to keep your body functioning at its best. Whether you’re training for a marathon or just trying to stay active, this simple tool could be the secret to faster recovery, fewer injuries, and stronger performance.

Use this foam rolling guide as your go-to resource anytime your muscles start complaining. Your future, pain-free self will thank you.

Categories
Fitness Uncategorized

HIIT vs. Steady-State Cardio: Which Is Right for You?

When it comes to getting in shape, two of the most popular approaches are High-Intensity Interval Training (HIIT) and steady-state cardio. The real question is: which one aligns with your needs and goals? It all comes down to what you’re aiming for, how you live, and what you enjoy. Let’s break down the pros, cons, and use-cases in this cardio comparison.

What Is HIIT?
HIIT consists of quick, high-intensity workouts paired with short rest intervals. For example, sprinting for 30 seconds and walking for 1 minute — repeated in cycles for 15–30 minutes.

Benefits of HIIT:

Time-efficient: Ideal for busy schedules — you can burn calories in half the time.

Boosts metabolism: HIIT increases post-exercise calorie burn (the “afterburn effect”).

Improves anaerobic capacity: Great for athletes or anyone training for speed and power.

Drawbacks of HIIT:

Higher risk of injury: The intensity can be hard on joints and muscles if not done correctly.

Best suited for experienced individuals, as it calls for proper form and decent conditioning.

What Is Steady-State Cardio?
This form of cardio focuses on sustaining a uniform level of effort, typically through activities such as cycling, running, or swimming at a moderate pace.

Benefits of Steady-State:

Easier to sustain: Great for beginners or those who enjoy longer workouts.

Lower risk of injury: Less stressful on joints and muscles.

Clear-headed and calm: This type of cardio can ease stress and create a peaceful, focused mindset.

Drawbacks of Steady-State:

Time-consuming: You’ll need longer sessions to match HIIT’s calorie burn.

Plateau potential: Your body can adapt over time, reducing its effectiveness without variation.

Which One Is Right for You?
It comes down to your personal goals and lifestyle:

Goal Better Option
Fat loss with limited time HIIT
Improving endurance Steady-Cardio
Beginner to fitness Steady-Cardio
Maximizing calorie burn fast HIIT
Reducing stress Steady-Cardio

Some people blend both into their weekly routine — for example, HIIT two days a week and steady-state on alternate days. This balance can prevent burnout and promote well-rounded fitness.

Final Thoughts
In the HIIT vs steady-state debate, there’s no clear winner — only what works best for your body, goals, and schedule. If you’re short on time and want fast results, HIIT might be your match. If you enjoy longer workouts and a more relaxed pace, steady-state cardio could be your go-to. Or, try both and let your body decide.

Categories
Uncategorized

Introduce Yourself (Example Post)

This is an example post, originally published as part of Blogging University. Enroll in one of our ten programs, and start your blog right.

You’re going to publish a post today. Don’t worry about how your blog looks. Don’t worry if you haven’t given it a name yet, or you’re feeling overwhelmed. Just click the “New Post” button, and tell us why you’re here.

Why do this?

  • Because it gives new readers context. What are you about? Why should they read your blog?
  • Because it will help you focus your own ideas about your blog and what you’d like to do with it.

The post can be short or long, a personal intro to your life or a bloggy mission statement, a manifesto for the future or a simple outline of your the types of things you hope to publish.

To help you get started, here are a few questions:

  • Why are you blogging publicly, rather than keeping a personal journal
  • What topics do you think you’ll write about?
  • Who would you love to connect with via your blog?
  • If you blog successfully throughout the next year, what would you hope to have accomplished?

You’re not locked into any of this; one of the wonderful things about blogs is how they constantly evolve as we learn, grow, and interact with one another — but it’s good to know where and why you started, and articulating your goals may just give you a few other post ideas.

Can’t think how to get started? Just write the first thing that pops into your head. Anne Lamott, author of a book on writing we love, says that you need to give yourself permission to write a “crappy first draft”. Anne makes a great point — just start writing, and worry about editing it later.

When you’re ready to publish, give your post three to five tags that describe your blog’s focus — writing, photography, fiction, parenting, food, cars, movies, sports, whatever. These tags will help others who care about your topics find you in the Reader. Make sure one of the tags is “zerotohero,” so other new bloggers can find you, too.