Categories
Fitness fitness-tips flexibility flexibility & mobility Gym home workout mobility Muscle Gain recovery recovery & wellness seniors strength training training women

Build Muscle with These Seniors Compound Exercises

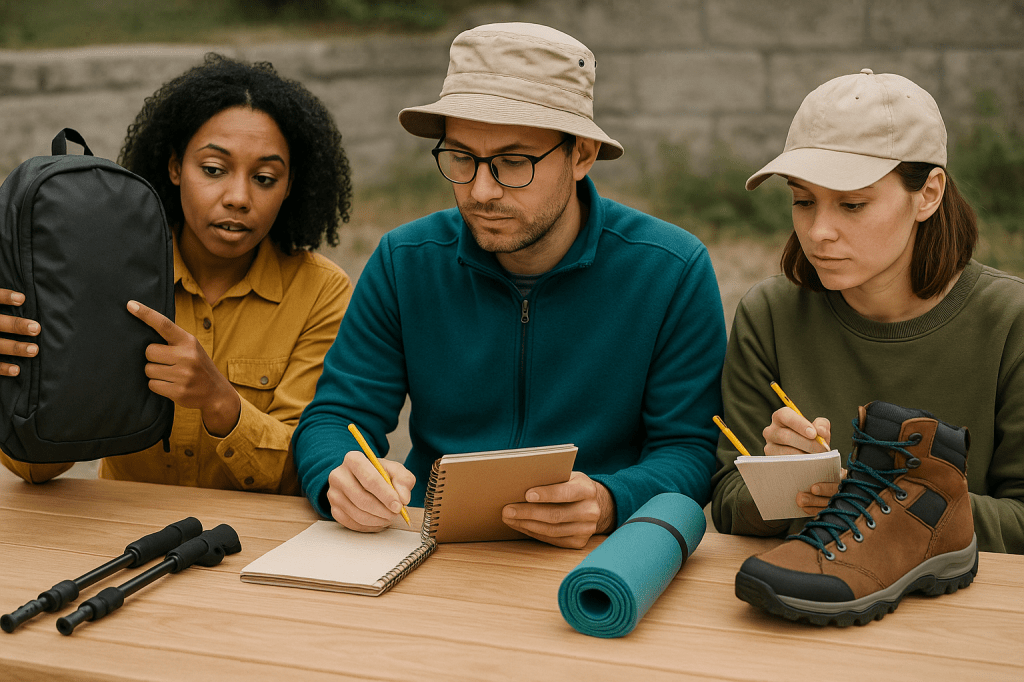
Staying active as we get older isn’t about doing more — it’s about moving with purpose. For older adults, strength training is one of the most effective ways to maintain muscle, boost vitality, and stay independent. One of the best ways to do that? Compound exercises.

These exercises work several muscles and joints at the same time, helping you build practical, full-body strength while improving coordination and balance. Whether you’re just starting out or easing back into a routine, this guide offers simple, senior-friendly exercises to help you gain strength safely and confidently.

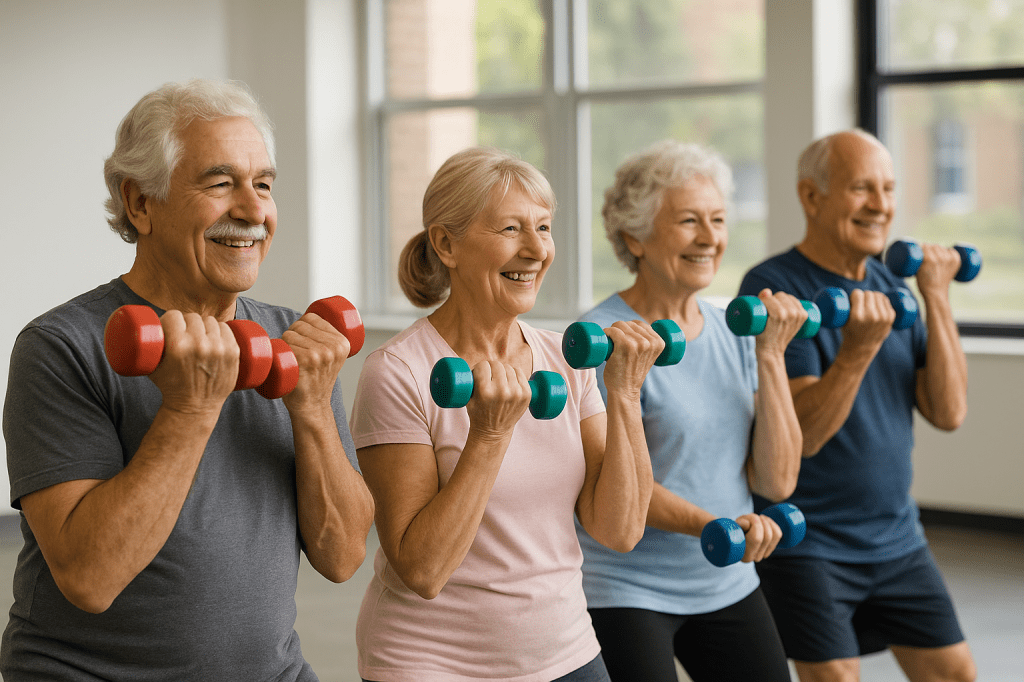
Why Strength Training Is So Important for Seniors

As we get older, we naturally begin to lose muscle — a process that can affect how we move, balance, and even how efficiently our bodies burn calories. Adding strength training to your regular schedule can provide benefits such as:

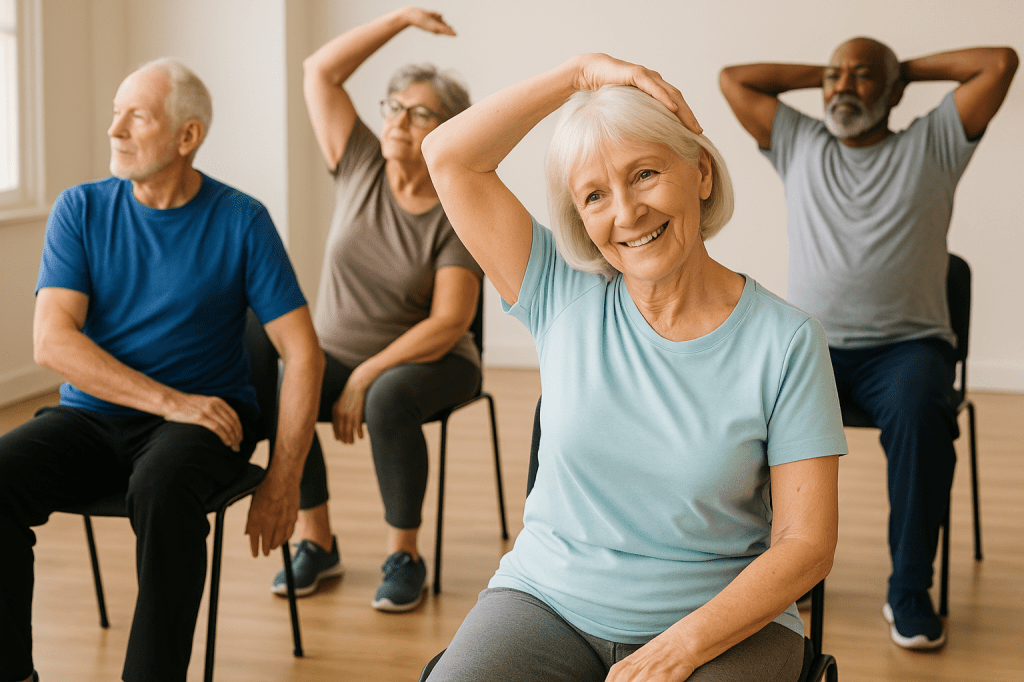
Improve stability and reduce fall risk

Maintain or increase muscle mass

Support better posture and joint health

Boost metabolism and energy levels

Prevent falls and injuries

Strengthen bones and joints

Improve posture and reduce back pain

Boost confidence and mental clarity

And here’s the good news — it doesn’t take hours in the gym to feel stronger. With the right approach, a few short sessions per week can deliver real results.

Top Compound Exercises for Seniors (with Instructions)

You can perform these exercises either at home or in a fitness center, using minimal or no equipment. Always start with a short warm-up like marching in place or gentle arm swings for 3–5 minutes.

  1. Chair Squats

Muscles Worked: Legs, glutes, core

Instructions:

Stand facing a sturdy chair with your feet positioned hip-width apart.

Extend your arms straight ahead to help maintain balance as you move.

Slowly bend your knees and lower your body toward the chair.

Gently touch the seat with your hips — don’t sit fully — then press through your heels to stand back up.

Repeat 8–12 times.

Tip: Keep your back straight, and make sure your knees follow the direction of your toes as you lower down.

  1. Wall Push-Ups

Muscles Worked: Chest, shoulders, arms

Instructions:

Stand facing a wall, arms-length away.

Press your palms against the wall so they’re level with your shoulders.

Slowly bend your elbows and lean your body toward the wall with control.

Push back to your starting position.

Repeat 8–15 times.

Tip: Maintain a straight line from your head down to your heels throughout the movement. Don’t let your hips sag.

  1. Seated Band Rows

Muscles Worked: Upper back, biceps

Instructions:

Sit tall on a stable chair or bench with a resistance band firmly placed around the bottoms of your feet.

Grip the ends of the band with your hands, keeping your palms facing inward.

Draw the band toward your waist while keeping your elbows tucked in close to your body.

Squeeze your shoulder blades together, then slowly return.

Repeat 8–12 times.

Tip: Avoid shrugging your shoulders. Focus on your back doing the work.

  1. Step-Ups

Muscles Worked: Legs, glutes, balance

Instructions:

Stand facing a solid, low-height step or platform.

Place one foot on the step, press through your heel, and lift your other foot up.

Step back down, one foot at a time.

Alternate the leading leg.

Do 8–10 reps per leg.

Tip: Use a wall or railing for balance if needed. Go slow and controlled.

  1. Dumbbell or Bodyweight Deadlifts

Muscles Worked: Hamstrings, glutes, lower back

Instructions:

Stand with feet hip-width apart, holding light dumbbells (or with arms hanging naturally if using bodyweight).

With a flat back, hinge at your hips and lower the weights toward your knees or shins.

Squeeze your glutes and return to standing.

Repeat 8–12 times.

Tip: Think “hips back” rather than “bend over.” Don’t round your spine.

Getting Started: Safety Tips for Seniors

Check with your healthcare provider before beginning any new workout program.

Warm up first with gentle movement to get your blood flowing.

Use proper form — quality matters more than quantity.

Stay hydrated and rest between sets if needed.

Start slow — 2 to 3 sessions per week is a great beginning.

Stop if you feel pain (a little soreness is normal, but sharp pain isn’t).

Final Thoughts

Building strength doesn’t require bulky weights or specialized gear. With the right exercises — done consistently — you’ll feel stronger, more balanced, and more capable in everyday life. Strength training is one of the most effective ways seniors can protect their health, independence, and confidence.

Start where you are. Progress at your pace. And remember: every rep is a step toward a stronger you.

Categories
Dinner Fitness fitness-tips Meals nutrition nutrition & meal seniors training

Budget-Friendly Meals for Seniors Nutrition

Maintaining good nutrition is essential for seniors to support overall health, fitness, and well-being. However, eating healthily doesn’t have to be expensive or complicated. With a little planning and smart meal prep, seniors can enjoy nutritious, budget-friendly meals that fuel their bodies and promote vitality.

Why Nutrition & Meal Prep Matter for Seniors

As we age, our nutritional needs change. Seniors often require fewer calories but more vitamins, minerals, and protein to preserve muscle mass and support immune function. Meal prep can be a game-changer—helping seniors avoid unhealthy convenience foods and make the most of their food budget by cooking in batches and reducing waste.

How to Get Started: Step-by-Step Instructions

  1. Plan Your Meals Weekly

Dedicate a brief 15 to 30 minutes each week to organize your upcoming meals.

Choose simple recipes with affordable ingredients.

Make sure to include plenty of vegetables, lean protein sources, and whole grains in your meals.

Write a grocery list based on your plan to avoid impulse buys.

  1. Shop Smart

Buy seasonal fruits and vegetables—they’re fresher and cheaper.

Keep an eye out for deals on essentials such as beans, lentils, and frozen vegetables.

Purchase bulk items that freeze well, such as chicken breasts or brown rice.

  1. Prep Ingredients in Advance

Wash and chop vegetables right after shopping.

Cook grains like rice or quinoa in large batches and store portions in the fridge or freezer.

Prepare protein options like hard-boiled eggs or baked chicken breasts to add to meals quickly.

  1. Cook in Batches

Make larger portions of soups, stews, or casseroles.

Divide cooked meals into single-serving containers.

Freeze or refrigerate portions for easy grab-and-go meals during the week.

  1. Use Simple Seasonings

Keep a small selection of herbs and spices such as garlic powder, paprika, and dried oregano.

These add flavor without extra cost or calories.

Simple, Budget-Friendly Meal Ideas with Instructions

Hearty Lentil Soup

Ingredients: lentils, carrots, onions, garlic, vegetable broth, canned tomatoes, and spices.

Rinse 1 cup of lentils.

Sauté diced onions, garlic, and carrots in a pot until soft.

Combine the lentils, 4 cups of vegetable broth, and a can of diced tomatoes in the pot, stirring thoroughly.

Simmer for 30-40 minutes until lentils are tender.

Season with salt, pepper, and herbs. Portion and refrigerate or freeze leftovers.

Oatmeal with Fruit and Nuts

What you’ll need: rolled oats, either water or milk, fresh or frozen fruit, and a small handful of nuts.

Instructions:

Prepare ½ cup of oats by cooking them in 1 cup of water or milk until soft.

Top with your choice of sliced fruit and a handful of nuts to enhance flavor and nutrition.

Vegetable Stir-Fry with Brown Rice

Ingredients: frozen mixed vegetables, cooked brown rice, soy sauce, and olive oil.

Heat 1 tablespoon olive oil in a pan.

Add frozen vegetables and sauté until heated through.

Stir in 1 cup cooked brown rice.

Add a splash of soy sauce for flavor.

Serve hot as a quick, balanced meal.

Egg and Spinach Wraps

Ingredients: eggs, fresh spinach, whole wheat wraps.

Scramble 2 eggs in a pan.

Add a handful of spinach and cook until wilted.

Lay the egg and spinach mixture onto a whole wheat wrap and roll it up securely.

A simple, protein-rich meal ready in minutes.

Benefits of Staying Fit and Eating Well for Seniors

Good nutrition combined with regular physical activity supports muscle strength, bone health, and cognitive function. Meal prepping reduces stress around mealtime, ensures consistent nutrient intake, and can encourage social interaction when meals are shared with friends or family.

Categories
beginners Fitness gear & reviews runners seniors strength training

Best Beginners Shoes for Beginners

Starting a new fitness routine? One of the most important pieces of gear you’ll need is a good pair of shoes. But with so many options available, choosing the right pair can feel like guesswork—especially if you’re new to it all. This guide simplifies the process by focusing on what really matters, offering gear & reviews for beginners with step-by-step instructions on how to choose the right shoes for your fitness goals.

Step 1: Understand Why Good Shoes Matter

Your shoes are your foundation. Whether you’re walking, running, or just moving more during the day, beginner-friendly shoes protect your feet and joints. They can also boost confidence and make workouts feel easier.

What happens if you wear the wrong shoes?

Pain or blisters

Shin splints

Poor posture

Early fatigue

Bottom line: A good shoe supports your effort—and prevents early setbacks.

Step 2: Know What to Look For

Every feature contributes to overall comfort and helps reduce the risk of injury.

Feature Why It Matters What to Look For
Cushioning Absorbs impact, especially during cardio Foam midsoles, gel inserts
Support Protects arches and prevents overpronation Firm heel cup structured side wall Fit Prevents blisters and discomfort Roomy toe box, snug midfoot
Breathability Keeps feet cool and reduces sweat Mesh or knit uppers
Activity Fit Matches the shoe to your primary activity Running, walking, gym, etc.

Step 3: Try Shoes the Right Way

When trying on shoes, follow these simple steps:

Shop in the late afternoon. Your feet swell during the day, mimicking post-workout size.

Put on the same socks you intend to use during your workouts. This ensures a realistic fit.

Test movement. Walk or jog around the store. Your heel shouldn’t slip, and your toes shouldn’t hit the front.

Try both feet. One foot is often slightly larger. Fit the larger foot.

Step 4: Choose One of These Beginner-Friendly Shoes

Here are a few top-rated models we’ve tested and reviewed, ideal for beginners in fitness:

  1. Brooks Ghost 15

A tried-and-true neutral running shoe, great for walking or jogging. Known for its soft cushioning and stable ride.

Best for: General fitness, outdoor running, walking

  1. Nike Revolution 6

Lightweight and budget-friendly, this model offers a flexible fit and decent support for everyday workouts.

Best for: Casual gym use, light cardio

  1. ASICS Gel-Contend 8

Reliable support and a well-cushioned sole make this ideal for low-impact activity.

Best for: Walking, treadmill use

  1. New Balance Fresh Foam Arishi v4

A balance of comfort and style, this shoe features a responsive feel and breathable material.

Best for: Daily walks, gym classes

  1. Reebok Nano X3

If you plan to lift weights or try cross-training, this is a sturdy, gym-ready option.

Best for: Strength training, mixed workouts

Step 5: Avoid Common Beginner Mistakes

Don’t choose based on looks alone. Style is great, but support matters more.

Avoid too-small sizes. Your feet need room to expand while moving.

Skip worn-out hand-me-downs. Cushioning and support wear out faster than you think.

Bonus Tip: Track Your Shoe Mileage

If you’re logging frequent miles through running or walking, it’s a good idea to swap out your shoes every 300 to 500 miles—or roughly every 6 to 12 months, based on how often you use them. Even if they appear to be in good condition, the cushioning and support may have worn down, increasing your risk of injury.

Final Thoughts

Finding the best beginner shoes for beginners doesn’t have to be complicated. With the right instructions and a few trusted recommendations, you’re well on your way to making a smart, supportive choice. Good gear helps build good habits—and that’s what lasting fitness is all about.

So lace up, take that first step, and let your feet thank you later.

Categories
Fitness gear & reviews seniors

What to Look for in a Seniors Gym Bag

Keeping physically active is a powerful way to maintain both body and mind as we grow older. But before you head to your fitness class or take a brisk walk at the park, it’s important to be prepared. Preparing your gym bag thoughtfully helps ensure your workouts are safe, comfortable, and pleasant.

This guide breaks down exactly what seniors should pack, why it matters, and how to organize it all—with a few product reviews and safety tips along the way.

Step 1: Choose the Right Gym Bag
Look for:

Lightweight design

Padded shoulder strap or handles

Wide zippered opening

At least 2–3 compartments

Water-resistant or easy-clean material

Instruction: Try the bag on (even at home) and check that you can lift and carry it without strain. If it’s uncomfortable empty, it will be worse when full.

Gear & Reviews Tip: Consider brands like Everest or Fitdom that make ergonomic bags with easy-access zippers.

Step 2: Pack a Hydration Bottle

Dehydration is a common issue among older adults, especially during exercise.

What to Pack:

1 spill-proof water bottle with easy-grip

Optional: Electrolyte drink packets (check with your doctor first)

Instruction: Fill your water bottle before leaving home. If possible, choose one with a flip straw or push-button lid for easier use.

Suggested Gear: Contigo AutoSeal bottles are leak-proof and senior-friendly.

Step 3: Include Proper Footwear and Socks

Healthy feet play a key role in maintaining balance, reducing discomfort, and lowering the risk of injuries.

What to Pack:

Clean gym shoes or supportive sneakers

Compression or cushioned socks

Small laundry pouch for used socks

Tip: Store your workout shoes in their own compartment or a dedicated shoe pouch to keep things clean and organized. After each session, store used socks in a sealable pouch or mesh bag to keep your bag fresh.

Step 4: Add Personal Care Essentials

Don’t underestimate the value of staying fresh and comfortable post-workout.

What to Pack:

Microfiber towel

Travel-size deodorant

Body wipes or facial cloths

Lip balm

Hand sanitizer

Instruction: Use small, leak-proof toiletry containers and place them in a zippered pouch to prevent spills.

Skin-Friendly Tip: Choose fragrance-free, sensitive-skin products.

Step 5: Prepare Medical and Emergency Items

Be ready for anything with a small health kit.

What to Pack:

Any medications you may need (in labeled containers)

Inhaler, EpiPen, or glucose tablets if required

ID card and emergency contact info

Copy of insurance card

Instruction: Store these in a small, clearly labeled pouch and put it in an easy-to-reach compartment of your bag.

Safety Tip: Include a written note of your known conditions, allergies, and medications in case of emergency.

Step 6: Add Fitness Gear for Warmups or Cooldowns

Even light equipment can boost your workout.

What to Pack:

Resistance band or stretch strap

Small foam roller or massage ball (optional)

Notebook or workout log

Instruction: Use your notebook to track how you feel before and after workouts, and jot down any exercises that help (or hurt).

Gear & Reviews Pick: TheraBand makes color-coded bands with varying resistance levels, great for all fitness levels.

Step 7: Pack for Motivation and Comfort

A little comfort goes a long way.

What to Pack:

Headphones and music or audiobook player

Light snack (like a granola bar or banana)

Extra pair of glasses or reading aids

Tip: Use a resealable bag for snacks and keep your glasses in a sturdy case to protect them from breaking. Download music or podcasts ahead of time if you’ll be in a low-signal area.

Before You Go – Final Bag Check:

Use this checklist before each outing:

Water bottle full

Shoes & socks packed

Towel & hygiene items in place

Medications/ID included

Fitness gear ready

Music/snack/glasses packed

Why This Matters

When seniors are well-prepared, fitness becomes less of a chore and more of an empowering part of daily life. Organizing your gym bag thoughtfully can promote self-reliance, boost safety, and encourage consistency—key elements for staying well over time.

Remember: You don’t need to pack everything every time. But with these essentials on hand, you’ll be ready for almost any activity, from tai chi to strength training.

Categories
Fitness seniors strength training training

How to Increase Bench Press in Seniors Weeks

It’s never too late to get stronger. For seniors, strength training—especially compound movements like the bench press—can improve daily function, confidence, and overall health. This article breaks down how to increase your bench press in a matter of weeks, safely and effectively.

Why Strength Training Is Important for Seniors
Whether you’re 60 or 80, building muscle helps you:

Maintain independence

Support joint health and balance

Improve posture and bone density

Boost mood and mental clarity

Recover faster from illness or injury

Strength training is fitness with purpose.

Week-by-Week Bench Press Plan
Weeks 1–2: Foundation First
Begin with very light weights or even resistance bands.

Focus strictly on form, not weight.

Perform 2 to 3 sets of 8 to 10 repetitions, with about 90 seconds of rest between each set.

Work out 2x per week, leaving at least one rest day between.

Weeks 3–4: Progressive Overload
Increase the weight slightly—5% at most each week.

Add an extra set per session if recovery feels good.

Include grip and shoulder stability exercises (e.g., band pulls).

Weeks 5–6: Build Support and Control

Start adding movements like dumbbell bench presses, assisted tricep dips, and lat pulldowns to strengthen the muscles that support your main lift. These help build stability and push strength.

Pay close attention to how you move the weight: take 2–3 seconds to lower the bar, pause briefly at the bottom, then press it up smoothly. This “tempo training” builds control and muscle endurance.

Train the bench press two times per week, making sure to include active recovery in between—such as light walking, stretching, or an easy bike ride to help your body stay loose and recover well.

Weeks 7–8: Check Progress and Reset
If you’re feeling strong and confident, try testing a 5-rep max—but only with someone supervising, like a coach or experienced lifter who can spot you safely.

Recovery and Nutrition: Your Foundation for Strength
Ease off with purpose. After a few challenging weeks, take a deload” week where you drop your usual bench press weight by about 20%. Use this time to focus on smooth, controlled reps with excellent form.Reducing the load allows your muscles to heal while still keeping your progress on track.

Don’t overlook mobility. Make chest and shoulder stretches part of your weekly routine—not just an afterthought. Just a few minutes of focused mobility work post-workout can loosen up tight areas, improve range of motion, and support better posture.

Fuel your body with enough protein. For older adults in strength training, around 1.0 to 1.2 grams of protein per kilogram of body weight daily is a smart target. Your body relies on this to heal and gain strength after each exercise.

Protect your progress with real rest. Work toward getting between 7 and 9 hours of deep, restful sleep each night for optimal healing. Quality sleep isn’t just about feeling refreshed—it plays a vital role in repairing tissue, balancing hormones, and lowering inflammation.

Consistency in recovery is just as important as effort in training. Strength gains happen when your body is given the tools and time to adapt.

Hydration: Water supports joints and energy.

Supplements (with medical guidance): Consider Vitamin D, Omega-3, or collagen.

Categories
Fitness flexibility seniors

Improve Your Posture with These Seniors Stretches

As we age, maintaining good posture becomes more than a matter of appearance — it’s essential for overall health, balance, and quality of life. Poor posture can contribute to aches, fatigue, and even an increased risk of falls. The good news? With the right stretches and a consistent routine, seniors can significantly improve both flexibility and mobility — two critical components of fitness that support healthy posture.

Why Posture Matters for Seniors
Good posture is essential for your body to function efficiently. When your spine is properly aligned, it allows your muscles, joints, and ligaments to move together smoothly and support each other effectively. But with age, muscles tend to tighten, and joint mobility may decline, making it harder to stand or sit upright. Over time, this may contribute to ongoing pain, impaired balance, and a loss of physical independence.

Stretching: A Simple Tool for Lasting Benefits
Incorporating gentle stretching into your daily routine can help restore mobility and ease muscular tension. The best part?

Best Stretches to Support Better Posture
Below are several targeted stretches designed to help seniors enhance their posture and boost overall fitness.

  1. Chest Opener
    Slouching tends to tighten the chest muscles.

Position yourself in a doorway and rest your hands on the doorframe aligned with your shoulders.Step forward with one foot until you notice a light stretch across your chest.

Hold for: 15–30 seconds.

  1. Seated Spinal Twist
    This movement enhances the spine’s flexibility while strengthening the muscles that help you maintain an upright position. Start by settling into a chair with your feet firmly on the floor to ensure balance. Turn your upper body to the right, placing your left hand on your right knee for support. Hold, then switch sides.

Hold for: 20 seconds on each side.

  1. Neck Stretch
    Releases tension from the neck, a common problem area for those who spend time reading or watching screens.

How to do it: Sit upright. Gently tilt your head toward one shoulder without raising the shoulder. To increase the stretch gently, place your hand on your head and apply slight pressure.

Hold for: 15–20 seconds per side.

  1. Cat-Cow Stretch
    A gentle movement that improves spinal flexibility and brings awareness to posture.

How to do it: On hands and knees, alternate between arching your back up (cat) and lowering it with your head up (cow).

Repeat: 8–10 times, moving slowly.

  1. Wall Angels
    Great for improving shoulder mobility and encouraging a straight spine.

How to do it: Stand against a wall with your back, arms, and head touching it. Slowly raise and lower your arms in a “snow angel” motion, keeping contact with the wall.

Repeat: 10–12 reps.

Tips for Safe Stretching
Warm up with light walking or arm circles.

Remember to take steady, deep breaths — avoid holding your breath while stretching.

Never push into pain; stretching should feel like a gentle pull.

Stay consistent: even 10 minutes a day makes a difference.

Final Thoughts
Improving posture doesn’t require drastic changes — just a little daily movement that promotes flexibility and mobility. These simple, senior-friendly stretches can support better balance, ease tension, and help you stand tall with confidence. Whether you’re just beginning your fitness journey or looking to stay active well into your golden years, adding these stretches to your routine is a powerful, preventative step toward lifelong wellness.