Categories
athletes exercises Fitness fitness-tips flexibility Gym home workout men mobility recovery & wellness strength training stretching training women workouts yoga

Mindfulness Techniques for Flexibility Athletes

Flexibility athletes—whether you’re a yoga enthusiast, dancer, gymnast, or contortionist—know the importance of maintaining and improving range of motion. But flexibility is about more than just stretching; it’s deeply connected to recovery and wellness, and mindfulness plays a pivotal role in this holistic approach to fitness.

Why Mindfulness Matters for Flexibility Athletes

Incorporating mindfulness into your routine isn’t just a trendy wellness buzzword. Mindfulness—being fully present and aware during movement and recovery—helps athletes connect with their bodies on a deeper level. This connection promotes better control, reduces injury risk, and enhances recovery times.

Mindfulness Techniques That Boost Flexibility and Recovery (with Instructions)

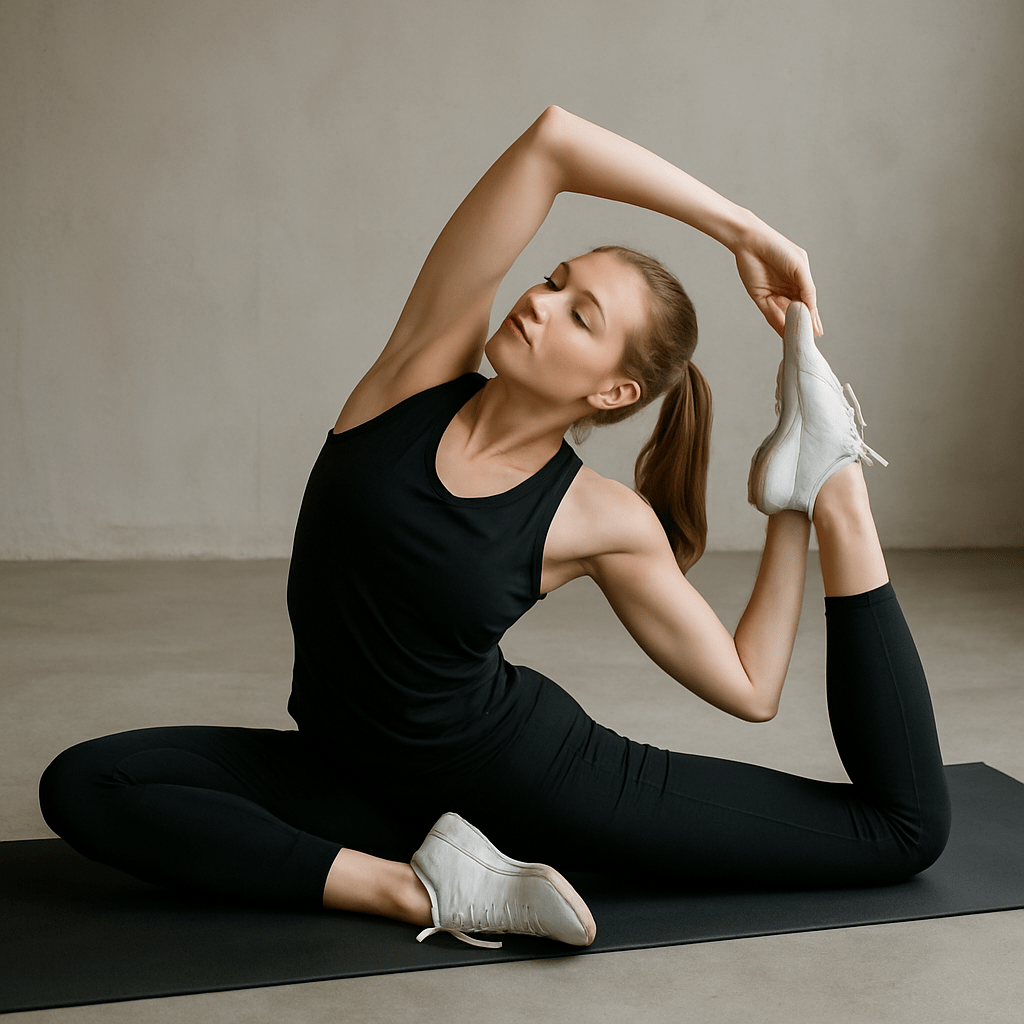
  1. Focused Breathing During Stretching

Breathing deeply and mindfully during stretches relaxes muscles and improves flexibility. Here’s how to do it:

Find a comfortable stretch position that you can hold for 20-30 seconds without pain.

When you’re comfortable, softly close your eyes to improve your focus.

Slowly inhale through your nose for a count of four, feeling your stomach lift as you breathe in.

Hold the breath gently for around two seconds.

Then, release the air steadily through your mouth over a count of six, imagining the muscle tension melting away as you exhale.

Repeat this breathing cycle 3–5 times while maintaining the stretch.

  1. Body Scan Meditation Post-Workout

A body scan helps identify and release muscle tension after training. Follow these steps:

Lie down comfortably on your back in a quiet space.

Close your eyes and take three deep breaths, relaxing your body with each exhale.

Slowly bring your attention to your toes. Notice any sensations—warmth, tightness, or ease.

Gradually move your focus upward to your feet, ankles, calves, knees, thighs, hips, abdomen, chest, back, shoulders, arms, neck, and finally your head.

As you notice tension, imagine breathing into that area and releasing the tightness on each exhale.

Spend 5–10 minutes completing the scan.

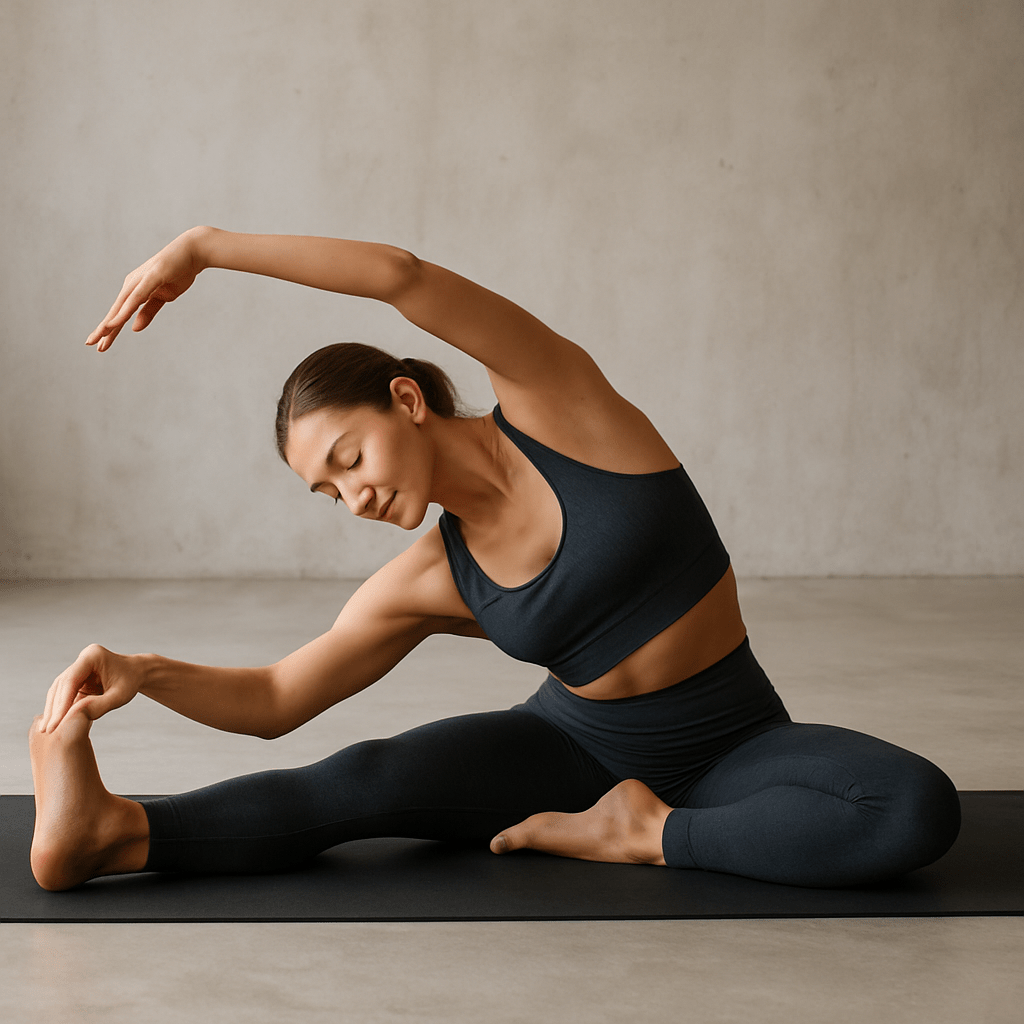
  1. Mindful Movement Practices

Deliberate, gentle movements help improve both your body’s awareness and its ability to stretch. Try this simple routine:

Choose 5–10 minutes for a gentle flow, such as a slow yoga sequence or tai chi basics.

Move deliberately from one posture to another, paying attention to how each joint feels.

Breathe naturally and keep your focus on the sensation of movement.

If your mind wanders, gently bring it back to your body.

Take your time, letting your breathing and movements flow together naturally.

  1. Visualization Techniques

Mental imagery supports physical flexibility by calming the mind and motivating your practice. Here’s how to practice:

Sit or lie down in a relaxed position. Close your eyes.

Take a few deep breaths to center yourself.

Picture your muscles lengthening and becoming supple as you stretch. Visualize your joints moving freely without resistance or pain.

Imagine warmth and healing energy flowing into any tight or sore areas.

Spend 3–5 minutes in this visualization before or after your workout.

The Benefits of Combining Mindfulness with Flexibility Training

Enhanced Recovery & Wellness: Mindfulness promotes relaxation and reduces stress hormones, which accelerates muscle repair and decreases soreness.

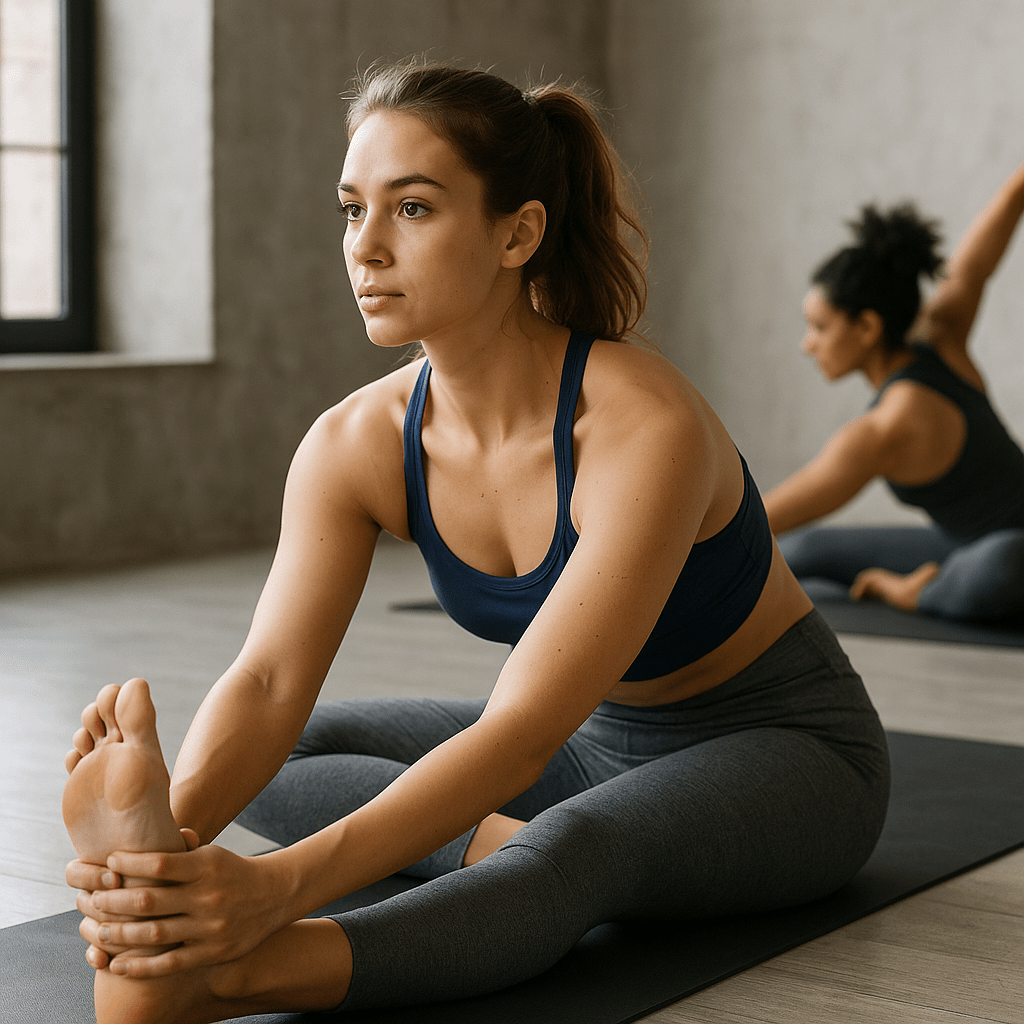
Improved Flexibility & Performance: Being mindful during stretches encourages you to listen to your body’s limits, avoiding overstretching while gradually expanding your range.

Better Mental Clarity & Focus: Mindfulness helps reduce distractions, allowing you to fully engage with your fitness routine and maintain consistency.

Injury Prevention: Awareness of body sensations helps detect early signs of strain or fatigue, leading to smarter training decisions.

Getting Started: Practical Tips

Spend 5 to 10 minutes daily focusing on mindful breathing or performing a body scan.

Explore mindfulness apps designed specifically for athletes or flexibility exercises to guide your practice.

Make mindfulness a regular part of both your warm-up and cool-down sessions.

Keep a journal to track how mindfulness impacts your flexibility progress and recovery.

By weaving mindfulness into your flexibility routine, you’re investing in your body’s long-term health and performance. With these easy-to-follow instructions, recovery and wellness become a natural and enjoyable part of your fitness journey.

Categories
Fitness fitness-tips flexibility flexibility & mobility home workout mobility recovery recovery & wellness strength training yoga

Flexibility Yoga Poses for Better Flexibility

If you’ve ever felt stiff after a long day or sore from a workout, you know how important flexibility is for overall fitness and well-being. Flexibility improves your mobility, reduces injury risk, and helps your body feel more relaxed. Incorporating specific yoga poses into your routine can transform how you move—and feel.

Here’s a guide to six effective yoga poses designed to enhance your flexibility & mobility, complete with step-by-step instructions to get you started safely and confidently.

Why Flexibility Matters

Tight muscles limit your movement and can cause discomfort. Increasing flexibility doesn’t just help you touch your toes—it improves circulation, balance, and even stress relief.

6 Yoga Poses to Improve Flexibility (with Instructions)

  1. Downward Facing Dog (Adho Mukha Svanasana)

Instructions:

Begin on all fours, making sure your wrists line up right under your shoulders and your knees sit directly beneath your hips.

Spread your fingers wide to get a good grip on the floor, pressing down through your palms.

Curl your toes under, then slowly lift your hips up and back toward the ceiling, straightening your legs as much as feels good—no need to push it.

Let your head hang naturally between your arms and keep your eyes looking toward your feet.

Stay here for about 30 seconds to a minute, taking slow, deep breaths to really settle in.

To release, gently lower your knees back down.

Benefits: Lengthens spine, calves, hamstrings, and shoulders.

  1. Low Lunge (Anjaneyasana)

Instructions:

Low Lunge (Anjaneyasana)

Start in Downward Dog, then bring your right foot forward, planting it right between your hands. Make sure your right knee sits comfortably over your ankle.

Lower your left knee down to the floor and untuck those toes so your foot can rest easy.

Lift your chest up and reach your arms overhead, palms facing each other like you’re reaching for the sky.

Keep your core tight and hips facing forward—don’t let them twist.

Hold this pose for about 30 seconds, then switch sides and do the same on your left leg.

Why it’s great: This move opens up your hip flexors and gives your quads and groin a nice stretch.

Seated Forward Fold (Paschimottanasana)

Sit down on the floor with your legs stretched out straight in front of you.

Take a deep breath in and sit tall, lengthening your spine.

As you breathe out, gently fold forward from your hips, reaching toward your feet. If you can’t reach your toes comfortably, grab a strap or towel around your feet to help.

Keep your back nice and straight—try not to round your shoulders or collapse forward.

Hold here for 30 seconds to a minute, breathing steadily and calmly.

When you’re ready to come back up, take a deep breath and slowly roll your spine up bit by bit—like stacking building blocks from the base up.

Why it’s great: This stretch works wonders for your hamstrings and lower back.

Cat-Cow Stretch (Marjaryasana-Bitilasana)

Start on your hands and knees with your wrists lined up under your shoulders and knees under your hips.

Take a big inhale and arch your back, lifting your tailbone and head toward the ceiling — this is Cow Pose.

Exhale, round your spine, tucking your chin and tailbone (Cat Pose).

Flow smoothly between these two positions with your breath for 1-2 minutes.

Benefits: Warms up and increases spinal flexibility.

  1. Pigeon Pose (Eka Pada Rajakapotasana)

Instructions:

Pigeon Pose (Eka Pada Rajakapotasana)

From Downward Dog, swing your right knee forward and set it just behind your right wrist.

Stretch your left leg straight out behind you, keeping your hips facing forward and even.

Slowly lower your chest down toward your right shin, using your hands to support your upper body.

Hang out here for 30 seconds to a minute, then switch sides and do the same on the left.

If you need extra support, pop a folded blanket under your hip to keep things comfy and balanced.

Why it rocks: This pose is a deep hip opener that really helps release built-up tension.

Bridge Pose (Setu Bandhasana)

Sprawl out on your mat and get comfy. Bend your knees and plant your feet hip-width apart—close enough that your fingertips can just skim your heels.

Press your feet down firmly and gradually raise your hips, as if you’re gently lifting off the ground.

Keep your thighs parallel and close together, gently activating your glutes to stay balanced and steady

Hold the stretch for anywhere between 30 seconds and a minute, keeping your breath steady and relaxed.

When it feels right, slowly lower your hips back down, gently stacking your spine back onto the mat.

Why it’s awesome: Bridge strengthens your glutes and gives your chest and spine a nice stretch.

Tips for Building Flexibility

Always start with some light movement or dynamic stretches to warm up your muscles before you dive in.

Use props like straps or blankets to support your body.

Breathe deeply — steady breath helps muscles relax.

Avoid pushing beyond your limits; flexibility builds gradually.

The Benefits Go Beyond the Mat

Greater flexibility & mobility enhances your everyday movements, improves posture, and speeds recovery after workouts. When your body moves with ease, life feels better.

Final Thoughts

These yoga poses offer a practical and gentle approach to boosting flexibility and supporting your overall fitness. Consistent practice, patience, and mindful breathing will help you unlock a freer, more agile body.

Start today, and watch how your flexibility transforms your wellness journey.

Categories
exercises Fitness flexibility flexibility & mobility mobility stretching

Dynamic vs. Static Stretching: What’s Best for Flexibility?

When it comes to improving flexibility & mobility, understanding the difference between dynamic and static stretching can be a game-changer for your fitness routine. Both types of stretching serve important roles, but knowing when and how to use them can maximize your performance, prevent injuries, and enhance your overall flexibility.

What is Dynamic Stretching?
Dynamic stretching is all about moving your body in a smooth, controlled way that wakes up your muscles and gets them ready to move freely. Imagine things like leg swings, arm circles, or walking lunges — simple moves that get your blood pumping and muscles warmed up before you dive into your workout or any physical activity.

How to Do Dynamic Stretching:
Leg Swings: Find a wall or something sturdy to hold onto. Swing one leg forward and backward in a relaxed rhythm, gradually lifting it higher as you go. Aim for about 10 to 15 swings per leg.

Arm Circles: Stretch your arms out to the sides and start making circles — first small, then bigger — moving forward for about 20 seconds, then switch to backward circles for the same amount of time.

Walking Lunges:
Step forward like you mean it, then sink down into a lunge so your back knee hovers just above the floor. Push through your front heel to stand up and step into the next lunge with the opposite leg. Keep that rhythm going for 10 to 12 lunges per side — think of it as a walking stretch with bonus strength work.

This kind of movement gets your muscles loose, your joints moving smoothly, and your body ready to crush whatever workout you’ve got planned.

Benefits of Dynamic Stretching for Flexibility:
Improves mobility by preparing joints for movement

Enhances muscle activation and coordination

Reduces muscle stiffness and risk of injury

Boosts overall performance in sports and fitness

What’s Static Stretching, Anyway?

Static stretching is the chill side of flexibility work. It’s basically hitting pause and sinking into a stretch, holding it still for about 20 to 60 seconds. This gives your muscles and tendons time to gently open up and let go of tension. Think of it as your body’s way of exhaling after a workout — the calm, feel-good moment where tight spots get some much-needed attention and your flexibility gets a little boost.

How to Do Static Stretching (Without Overthinking It):

Seated Hamstring Reach:

Find a comfy spot on the floor. Stretch one leg out in front of you and fold the other so the sole of your foot rests near your opposite thigh. Lean gently toward your extended foot — no need to yank yourself forward — and hold for about 30 seconds. Then switch sides and repeat. Breathe deeply and let gravity help you out.

Chest Opener in a Doorway:

Stand in a doorway and place your forearms or hands on either side of the frame, elbows bent. Take a small step forward and let the stretch open up across your chest and shoulders — you’ll feel it kick in as you ease into it. Hold for 20 to 30 seconds while keeping your posture relaxed.

Standing Quad Stretch:

Stand up tall and balance on one leg. Bend the other knee, bringing your heel up toward your butt. Grab your ankle with your hand and hold the stretch through the front of your thigh. Hang out in the stretch for about 20 to 30 seconds, then switch it up and do the other leg. Tip: if you’re feeling a bit wobbly, grab a wall or chair for support — no shame in staying steady!

Static stretching is a great way to wrap up your workout or simply give your body some love on a rest day. It’s all about slowing down, tuning in, and giving your muscles time to breathe and recover.

Benefits of Static Stretching for Flexibility:
Increases muscle length and joint range of motion over time

Helps cool down muscles and aids recovery

Promotes relaxation and reduces muscle tension

Supports long-term flexibility gains when practiced consistently

Which One Should You Choose?

The simple answer: both! But timing and purpose matter.

Before your workout or physical activity, dynamic stretching is your best bet. It preps your body by increasing mobility and circulation, which can enhance performance and reduce injury risk.

After your workout or during dedicated flexibility sessions, static stretching helps elongate muscles and improve flexibility in a calm, controlled way.

For anyone serious about fitness, incorporating both dynamic and static stretching will build a solid foundation for mobility and flexibility that supports your goals.

Tips for Maximizing Flexibility & Mobility

Warm up with dynamic stretches tailored to your activity.

Use static stretches to target tight or overworked muscles post-exercise.

Be consistent—flexibility improves gradually over time.

Pay attention to what your body’s telling you — stretching shouldn’t feel like a battle. If it hurts, ease up. Discomfort is okay; pain is your cue to back off.

Combine stretching with strength training for balanced fitness.

Final Thoughts

Flexibility and mobility aren’t just extras — they’re just as important as lifting weights or doing cardio. Mixing in the right balance of dynamic and static stretching can seriously improve how you move, help you steer clear of injuries, and just make your body feel better overall.

Take the time to understand what your body needs at each moment—dynamic stretches to wake it up, static stretches to calm and lengthen it. Your muscles will thank you, and your fitness journey will become more enjoyable and sustainable.

Categories
Fitness flexibility mobility Muscle Gain

Muscle Gain Yoga Poses for Better Flexibility

Muscle gain isn’t just about lifting heavy or eating big—it’s also about how well your body moves. Incorporating yoga into your routine can significantly boost flexibility & mobility, which directly supports muscle development, recovery, and injury prevention.

This guide explores key yoga poses that improve flexibility while activating and supporting muscle growth. Each pose includes step-by-step instructions to help you practice safely and effectively.

Why Flexibility & Mobility Matter for Muscle Gain
Improved mobility means your muscles can move through a full range of motion, allowing for more efficient lifts and reduced injury risk. Tight, immobile joints lead to compensation, overuse, and plateaus in your fitness journey. Yoga helps by:

Increasing blood flow to muscles

Enhancing joint stability and alignment

Supporting recovery through active stretching

Enhancing movement quality so your muscles fire efficiently and safely under load.

Yoga Poses for Muscle Gain & Flexibility
Below are six beginner-to-intermediate poses, each selected to target areas crucial for strength training.

  1. Downward-Facing Dog (Adho Mukha Svanasana)
    This full-body stretch targets the entire back side of the body—from calves and hamstrings up through the spine—while also building strength in the shoulders, arms, and core. It’s a great pose for releasing tension and boosting circulation after a tough workout.

How to Do It:

Place your hands shoulder-width apart on the mat, with knees directly under your hips to establish a neutral stance.

Tuck your toes, lift your knees, and raise your hips toward the ceiling.

Work on straightening your legs gently, avoiding hyperextension of the knees.

Press your hands into the mat, keeping your spine long.

Maintain deep, steady breathing as you remain in the position for 30 to 60 seconds, allowing your muscles to ease and lengthen.

  1. Chair Pose (Utkatasana)
    Benefits:

    Activates quads, glutes, and back muscles while improving balance and core strength.

How to Do It:

Stand tall with feet together.

On your inhale, stretch both arms overhead, palms gently turned inward in a neutral position.

Exhale as you bend your knees, lowering your hips like sitting in a chair.

Focus on keeping your torso upright as you shift your weight toward your heels.

Hold for 30–60 seconds, then rise back up slowly.

  1. Low Lunge (Anjaneyasana)
    Benefits:

    Stretches tight hip flexors and strengthens legs—critical for squat depth and stride mobility.

How to Do It:

Step your right foot forward into a lunge, left knee down on the mat.

Ensure the right knee is directly above the ankle.

Raise both arms overhead and lift your chest.

Press your hips gently forward while keeping your back straight.

Hold for 30–45 seconds per side.

  1. Plank Pose
    Benefits:

    Develops strong, stable shoulders and a powerful core, while sharpening mental concentration—key elements for effective heavy lifting.

How to Perform:

Begin in a high plank position, with your arms straight and wrists aligned right under your shoulders.

Engage your core muscles and squeeze your glutes to maintain a strong, straight line from head to heels.

Avoid letting your hips dip or rise too high—aim for alignment.

Hold this position for 30 to 60 seconds, breathing evenly and with control.

  1. Pigeon Pose (Eka Pada Rajakapotasana)

Benefits:

This pose deeply stretches the glutes and hip rotators, helping to ease tension and improve lower-body mobility—perfect for post-training recovery.

How to Do It:

From Tabletop or Downward-Facing Dog, bring your right knee forward so it lands behind your right wrist.

Gently slide your right foot over toward your left wrist, allowing the shin to rest at an angle.

Extend your left leg straight behind you, keeping your toes pointing back.

Make sure your hips stay level—if they tilt, place a block under your right hip for support.

Gently lean forward, allowing your forearms to support you or letting your forehead rest softly on the mat.

Stay in the stretch for 1 to 2 minutes on each side, breathing deeply and allowing your body to release.

  1. Bridge Pose (Setu Bandha Sarvangasana)

Benefits:

It builds strength in the glutes and hamstrings, expands the chest, and enhances the mobility of the spine.

How to Do It:

Lie comfortably on your back, knees bent, and feet placed about hip-width apart.

Allow your arms to relax by your sides, palms resting softly on the mat with your shoulders grounded.

Push firmly through your heels to elevate your hips, using your glutes for a controlled, fluid movement.

Hold the pose for several breaths, then slowly lower down.

Hold for 1–2 minutes per side.

  1. Bridge Pose (Setu Bandha Sarvangasana)
    Benefits:

    This pose activates and strengthens the glutes and hamstrings, lifts and opens the chest, and promotes greater flexibility and extension through the spine.

How to Do It:

Start by lying flat on your back, knees bent, and feet planted on the floor roughly hip-distance apart.

Allow your arms to lie gently along your torso, pressing your palms lightly into the ground.

Anchor your feet firmly and lift your hips upward in a smooth, controlled motion toward the ceiling.

Squeeze your glutes and engage your core.

Hold for 30–45 seconds, then lower down slowly.

How to Add Yoga to Your Fitness Plan
Beginner’s Strategy:

Frequency: 2–3 times per week

Duration: 10–15 minutes post-workout or on rest days

Tip: Use yoga as active recovery—don’t push into pain, and focus on breath

Advanced Tip: Combine yoga with resistance band work or bodyweight drills to activate stabilizers and improve mind-muscle connection.

Final Thoughts
Rather than replacing weightlifting, yoga serves as a potent ally in your fitness journey.

Incorporating flexibility & mobility work into your routine can unlock deeper strength, faster recovery, and long-term muscle gain.

Whether you’re an experienced lifter or just starting your fitness journey, give these poses a try. Your body—and your gains—will thank you.

Categories
Fitness flexibility mobility women

Dynamic vs. Static Stretching: What’s Best for Women?

Whether you’re just starting your fitness journey or you’re a seasoned athlete, you’ve probably heard conflicting advice about stretching. Should you go for slow, deep holds—or quick, active moves? The truth is, both dynamic and static stretching play important roles in supporting flexibility & mobility, especially for women navigating unique fitness goals, body changes, and energy demands.

Let’s clear up the confusion, and help you build a stretch routine that works with your body, not against it.

Dynamic Stretching: Best Before Workouts
What it is:
Dynamic stretching involves purposeful, movement-driven exercises that guide your joints through their entire range of motion in a smooth, controlled way.

It boosts circulation, wakes up your muscles, and gets your body physically and neurologically ready to perform.

Why it’s great for women:
It improves mobility, wakes up underused muscles, and supports balance—especially important for women dealing with tight hips, pelvic floor imbalances, or postural shifts.

Try This 5-Minute Dynamic Warm-Up (Before Workouts)
Leg Swings (30 sec/leg)

Stand tall, swing one leg forward and back. Keep your core engaged.

Arm Circles (30 sec)

Begin with small, steady circles and gradually increase their diameter. Move in one direction first, then switch to the other to even out the motion.

Hip Openers (1 min)

March in place, lifting your knee and circling it out to the side.

Walking Lunges with Reach (1 min)

Step forward into a lunge, reaching arms overhead. Alternate legs.

Torso Twists (1 min)

Stand tall, rotate side to side with soft knees and a steady rhythm.

Tip: Keep it fluid and controlled—this isn’t about speed but about prepping the body.

Static Stretching: Best After Workouts or on Rest Days
What it is:
Static stretching means staying in one position for 20 to 60 seconds, allowing your muscles to gradually extend and release tension.

Why it’s great for women:
It’s perfect for improving long-term flexibility, reducing soreness, and relaxing the nervous system—especially after high-stress workouts or long hours sitting at a desk.

Try This 5-Minute Static Cool-Down (After Workouts)
Seated Hamstring Stretch (30 sec/leg)

Sit on the floor, extend one leg, reach toward your foot. Keep your spine long.

Figure Four Stretch (30 sec/leg)

Lie flat on your back, cross one ankle over the other knee, and gently pull the leg that’s still on the ground toward your chest to stretch your hips deeply.

Chest Opener (1 min)

Clasp your hands behind your back, gently draw your arms away from your body, and open up through your chest.

Child’s Pose (1 min)

Sink down onto your knees, reach your arms forward along the floor, and softly rest your forehead down, allowing your body to unwind. Take slow, deep breaths.

Side-Lying Quad Stretch (30 sec/leg)

Lie on your side, pull your top foot toward your glutes. Keep knees close together.

Tip: Don’t bounce—stay relaxed, and breathe deeply into each stretch.

How to Know What You Need
Here’s a quick cheat sheet:

Goal/Activity Do This Before Do This After
Strength Training Dynamic (activation) Static (lengthening)
Running or Cardio Dynamic (mobility) Static (recovery)
Yoga or Pilates Gentle dynamic (flow) Deep static
Stress Relief Skip dynamic Static (relaxation)

Bonus Tips Just for Women
Pay attention to your cycle: During certain phases (like ovulation), your ligaments may be looser. Stretch gently.

Prioritize hips and spine: Women tend to carry tightness in the hips and low back, so make those areas a regular focus.

Be consistent: A few minutes each day makes a bigger impact than a 30-minute session once a week.

Conclusion: It’s Not One vs. the Other—It’s Both
Instead of asking “which is better?”, ask “when should I use each?”
Incorporating both dynamic and static stretching into your routine helps you build a more resilient, mobile, and flexible body—so you can move with confidence in your workouts and your everyday life.

Take 5–10 minutes before and after your workouts to care for your body. It’s a small investment with long-lasting rewards.