Categories
athletes beginners Fitness fitness-tips flexibility flexibility & mobility gear & reviews Gym home workout men mobility Muscle Gain recovery recovery & wellness training yogis

Best Yogis Shoes for Beginners: A Guide to Gear & Reviews for Yogis

If you’re just starting your yoga journey, choosing the right gear can make all the difference — especially when it comes to footwear. While traditional yoga is often practiced barefoot, beginner yogis exploring various fitness styles or hybrid workouts might benefit from specialized shoes designed to enhance comfort, stability, and performance. In this guide, we’ll explore the best yogis shoes for beginners, sharing gear insights, reviews, and practical instructions to help you elevate your practice safely and effectively.

Why Consider Shoes for Yoga Beginners?

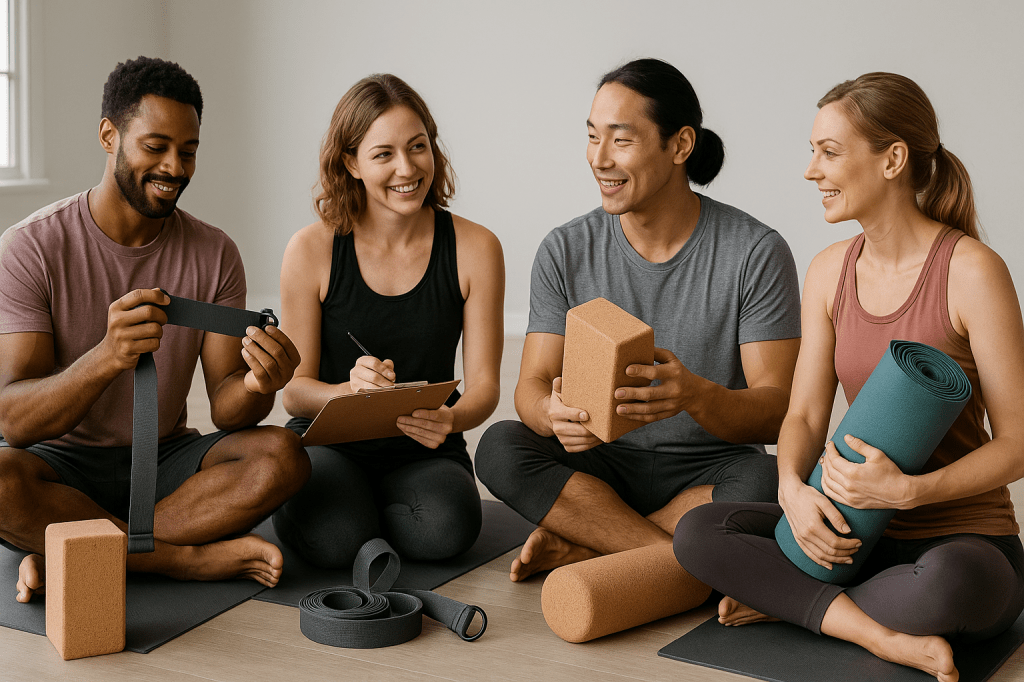
Yoga is more than just poses — it’s about balance, alignment, and connection to your body and surroundings. Although barefoot practice is classic, some beginner yogis prefer lightweight, flexible shoes that offer grip, protection, and support. This is especially true if you:

Practice outdoors or in chilly environments

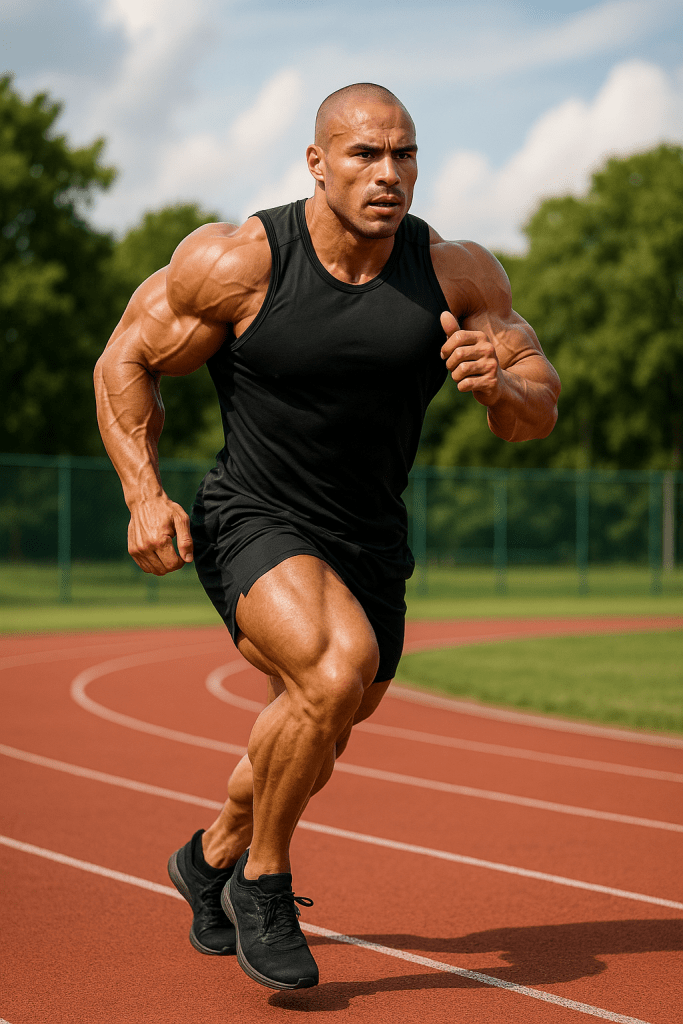
Combine yoga with fitness routines like Pilates, barre, or light cardio

Have foot sensitivity or injuries that need extra cushioning

Want to enhance stability during standing or balancing poses

The right yogi shoes can provide traction on slippery surfaces, help maintain proper foot alignment, and boost confidence in your movements.

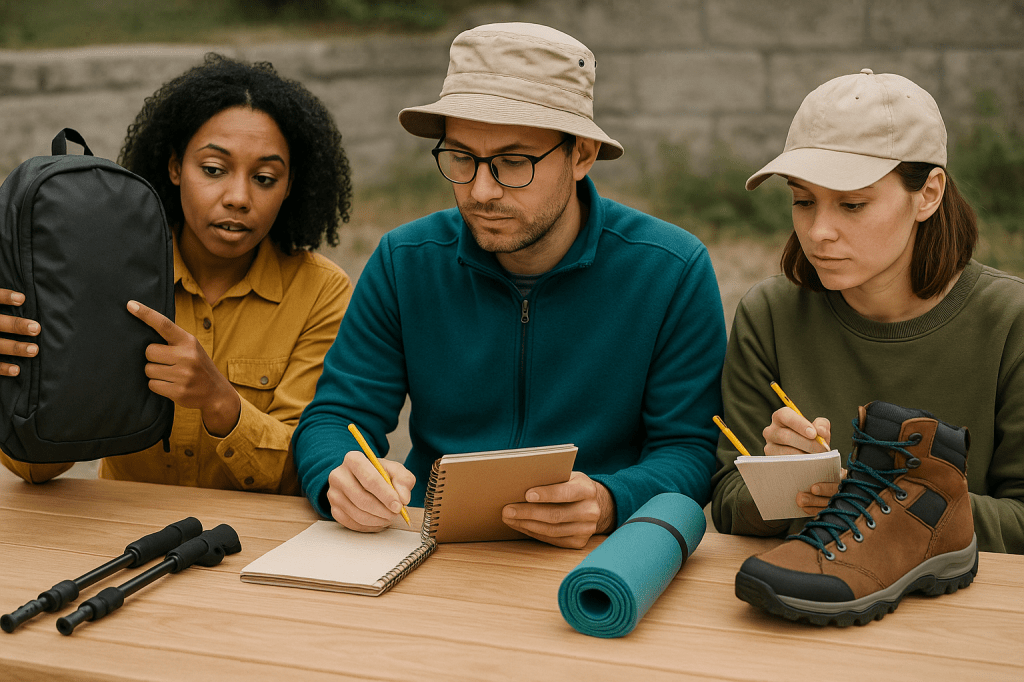
What to Look for in Beginner Yoga Shoes

When choosing shoes for yoga, prioritize these features:

Flexibility: The shoe should bend and move naturally with your foot.

Grip: Look for soles with excellent traction to prevent slipping.

Breathability: Yoga can get sweaty, so breathable materials keep your feet cool and dry.

Lightweight: Heavy shoes restrict movement; aim for light designs.

Minimal Cushioning: Too much padding can reduce your sense of connection to the floor.

Instructions: How to Choose and Use Yoga Shoes for Beginners

Step 1: Assess Your Needs

Consider why you want yoga shoes. Are you practicing outdoors, combining yoga with other workouts, or needing foot protection? This will guide your choice.

Step 2: Try Them On

Visit a store or order online with a flexible return policy. When trying shoes on:

Wear thin socks or practice barefoot to simulate yoga conditions.

Check that toes can move freely and that the shoe feels snug but not tight.

Step 3: Break Them In

Use your shoes around the house or during light warm-ups before wearing them in full sessions. This helps the materials soften and molds to your feet.

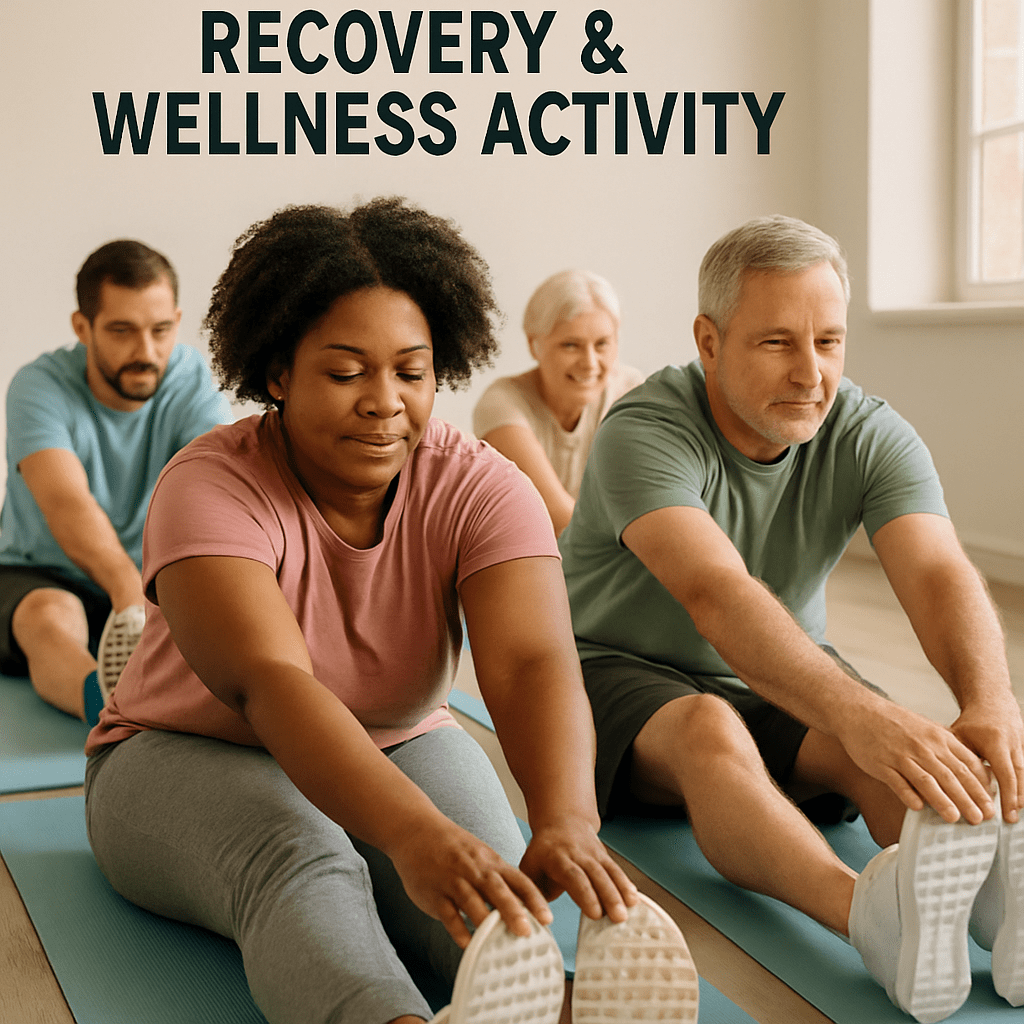
Step 4: Practice Mindfully

Use shoes primarily for hybrid workouts or outdoor yoga. Avoid wearing them during traditional barefoot sequences to maintain foot strength and natural movement.

Step 5: Care for Your Shoes

Clean your shoes after use according to manufacturer instructions. Air them out to prevent odors and maintain hygiene.

Top Picks: Best Yogis Shoes for Beginners

  1. Nike Free RN Flyknit

Flexible soles and breathable knit uppers give a barefoot feel with protection, perfect for yoga and fitness cross-training.

  1. Vibram FiveFingers KSO EVO

Toe-separated design promotes natural foot function and balance — great for enhancing proprioception in yoga.

  1. Adidas Adipure Trainer

Lightweight, breathable, and grippy, this trainer is ideal for indoor and outdoor yoga sessions.

  1. FREETOO Minimalist Shoes

An affordable option offering flexibility, breathability, and slip resistance for beginner yogis on a budget.

Final Thoughts: Elevate Your Practice with the Right Gear

Starting yoga is a rewarding step toward better fitness and mindfulness, and your gear can support this journey in meaningful ways. While yogi shoes aren’t mandatory, they offer practical benefits for beginners venturing into fitness hybrids or those needing extra foot support. By following these simple instructions, you can select and use shoes that enhance comfort, flexibility, and grip—helping you build a strong foundation for a fulfilling and balanced yoga practice.

Remember, yoga is ultimately about connecting with your body and breath, whether barefoot or shod. Gear is just one piece of the puzzle, but it can help you step confidently onto your mat.

Categories
beginners bench press exercises fat loss Fitness fitness-tips Gym home workout

How to Increase Bench Press in Beginners Weeks

If you’re just starting out in the gym and looking to increase your bench press, you’re not alone. Bench pressing is a go-to exercise in strength training because it effectively targets multiple upper body muscles and delivers solid results It builds upper body strength, improves posture, and is a great confidence booster. This guide walks beginners through the first few weeks with clear steps, simple instructions, and helpful techniques.

Week-by-Week Plan to Increase Bench Press

Week 1: Learn the Basics

Goal: Focus on proper form, setup, and confidence under the bar.

Instructions:

Kick off your training session with 5–10 minutes of low-intensity cardio—like an easy walk or light pedaling—to warm up your body.

Start practicing with an unloaded barbell or a lighter bar if needed; a standard bar typically weighs around 45 pounds.

Set up correctly on the bench:

Position yourself on the bench

Feet flat on the ground.

Grip the bar slightly wider than shoulder-width.

Keep your shoulder blades pulled back and down.

Lower the bar slowly to the middle of your chest, then press it back up with control.

Perform 3 sets of 8–10 reps. Rest 60–90 seconds between sets.

Tip: Practice with a trainer or ask a gym staff member to spot you and give feedback.

Week 2–3: Build Consistency and Volume

Goal: Increase control and start lifting slightly heavier weights.

Instructions:

Continue warming up before each session.

Add small weights (2.5–5 lbs per side) to the bar as long as your form is perfect.

Perform 3–4 sets of 8 reps at a weight that feels challenging by the last few reps.

Rest 1–2 minutes between sets.

Introduce accessory exercises like:

Push-ups: 3 sets of 10–12

Dumbbell Chest Press: 3 sets of 10

Resistance Band Pull-Aparts: 2 sets of 15 (for shoulder health)

Tip: Track your weights and reps in a notebook or app. This helps you stay consistent and motivated.

Week 4: Start Progressive Overload

Goal: Increase strength by adding small, steady weight increments.

Instructions:

Warm up with 2 sets using light weights.

Increase working weight slightly (5 lbs total per week).

Change your rep scheme to 4 sets of 5–6 reps with longer rest (2–3 minutes).

Keep strict form—no bouncing the bar or lifting your feet.

Add these accessories:

Incline Dumbbell Press: 3 sets of 8

Triceps Pushdowns or Dips: 3 sets of 10

Bent-Over Rows or Lat Pulldowns: 3 sets of 8–10

Tip: If you fail a rep, reduce the weight slightly next time and try again.

General Guidelines for Beginners

How Often Should You Bench Press?

2–3 times per week is ideal for beginners.

Alternate bench press days with rest or lower-body workouts.

Recovery & Nutrition Tips

Get 7–9 hours of sleep every night.

Aim to consume adequate protein—roughly 0.7 to 1 gram per pound of your body weight—to help your muscles recover and grow after training

Stay hydrated and stretch post-workout.

Take rest days seriously—your body gets stronger while resting.

Benefits of Bench Press for Beginners

Increases upper body strength and muscle tone

Improves shoulder and chest stability

Builds confidence in other lifts and workouts

Helps develop a consistent fitness habit

Final Thoughts

Progress on the bench press doesn’t happen overnight—but if you follow the steps above and stay consistent, you’ll see gains within your first few weeks. Remember: good form, gradual progress, and recovery are more important than lifting heavy too soon.

Everyone starts somewhere—your first successful rep is just the beginning of your strength training journey.

Categories
beginners Fitness nutrition & meal snacks workouts

High-Protein Snacks for Beginners Workouts

If you’re new to working out, you’ve likely heard that protein is important—but figuring out how to include it in your day without overcomplicating things can feel confusing. This guide breaks down easy, beginner-friendly high-protein snacks, explains why they matter, and gives you step-by-step instructions to make them at home or prep ahead of time.

Whether you’re exercising to build strength, lose fat, or improve endurance, your results start in the kitchen—with smart nutrition & meal prep.

Why Protein Matters in Fitness for Beginners

For beginners in fitness, protein plays a major role in:

Repairing and building muscle

Supporting metabolism

Reducing post-workout soreness

Preventing excess hunger later

Snacking on high-protein foods helps you recover from workouts and avoid overeating between meals. Now let’s look at how to prepare some beginner-friendly options.

6 High-Protein Snack Ideas (with Instructions)

  1. Greek Yogurt + Berries

Protein per serving: ~15g

What you need:

1 cup plain Greek yogurt (2% or full-fat)

½ cup mixed berries (fresh or frozen)

Optional: sprinkle of chia seeds or honey

Instructions:

Scoop yogurt into a bowl or container.

Add berries on top.

Stir in chia seeds or drizzle honey if desired.

Store in the fridge or eat immediately.

  1. Boiled Eggs

Protein per egg: ~6g

What you need:

6 large eggs

Salt, pepper, or paprika

Instructions:

Place eggs in a pot, cover with water.

Heat until the water starts boiling, then lower the temperature and let the eggs cook gently for about 9 to 12 minutes.

Transfer to cold water and peel when cooled.

Store in the fridge up to 1 week.

Meal Prep Tip: Boil a batch on Sunday and grab 1–2 each day.

3.Cottage Cheese + Pineapple

Protein per serving: ~14g

What you need:

½ cup cottage cheese (low-fat or full-fat)

¼ cup diced pineapple (fresh or canned in juice)

Instructions:

Spoon cottage cheese into a bowl or container.

Add pineapple chunks on top.

Eat cold—no prep required!

  1. Hummus + Veggie Sticks

Protein per serving: ~6–8g

What you need:

½ cup hummus

1 cup raw veggies (carrots, bell peppers, cucumber, etc.)

Instructions:

Wash and slice your vegetables.

Portion into containers with hummus.

Keep chilled until snack time.

Prep multiple servings at once for the week.

  1. Nut Butter on Rice Cakes

Protein per serving: ~7g

What you need:

1–2 plain rice cakes

2 tbsp natural peanut or almond butter

Optional: banana slices or cinnamon

Instructions:

Spread nut butter evenly across rice cakes.

Top with banana slices or cinnamon if desired.

Eat immediately or prep in advance and wrap.

  1. Tuna Packet with Avocado

Protein per serving: ~18–20g

What you need:

One 3-ounce pouch of tuna packed in either water or olive oil

¼ mashed avocado

Salt, pepper, squeeze of lemon

Instructions:

Open tuna packet and place in a bowl.

Mix in mashed avocado and season to taste.

Pair with whole-grain crackers or wrap in crisp lettuce for a fresh, easy bite.

Ready in 2 minutes and ideal for post-workout protein!

Meal Prep Tips for Beginners

Start small: Pick 2 snacks to prep this week.

Use transparent containers and portion your snacks to keep things tidy and easy to find

Balance is key: Pair protein with fiber or healthy fats.

Don’t overthink it: Keep ingredients simple and affordable.

Benefits of High-Protein Snacking

Supports muscle recovery

Reduces cravings between meals

Improves satiety and energy

Helps regulate blood sugar

Final Thoughts

When you’re starting out, the goal isn’t perfection—it’s consistency. These protein-rich snack options are simple, hassle-free, and perfect for anyone just starting out. By incorporating them into your nutrition & meal prep routine, you’ll build a strong foundation for your fitness journey—one bite at a time.

Categories
beginners Fitness gear & reviews runners seniors strength training

Best Beginners Shoes for Beginners

Starting a new fitness routine? One of the most important pieces of gear you’ll need is a good pair of shoes. But with so many options available, choosing the right pair can feel like guesswork—especially if you’re new to it all. This guide simplifies the process by focusing on what really matters, offering gear & reviews for beginners with step-by-step instructions on how to choose the right shoes for your fitness goals.

Step 1: Understand Why Good Shoes Matter

Your shoes are your foundation. Whether you’re walking, running, or just moving more during the day, beginner-friendly shoes protect your feet and joints. They can also boost confidence and make workouts feel easier.

What happens if you wear the wrong shoes?

Pain or blisters

Shin splints

Poor posture

Early fatigue

Bottom line: A good shoe supports your effort—and prevents early setbacks.

Step 2: Know What to Look For

Every feature contributes to overall comfort and helps reduce the risk of injury.

Feature Why It Matters What to Look For
Cushioning Absorbs impact, especially during cardio Foam midsoles, gel inserts
Support Protects arches and prevents overpronation Firm heel cup structured side wall Fit Prevents blisters and discomfort Roomy toe box, snug midfoot
Breathability Keeps feet cool and reduces sweat Mesh or knit uppers
Activity Fit Matches the shoe to your primary activity Running, walking, gym, etc.

Step 3: Try Shoes the Right Way

When trying on shoes, follow these simple steps:

Shop in the late afternoon. Your feet swell during the day, mimicking post-workout size.

Put on the same socks you intend to use during your workouts. This ensures a realistic fit.

Test movement. Walk or jog around the store. Your heel shouldn’t slip, and your toes shouldn’t hit the front.

Try both feet. One foot is often slightly larger. Fit the larger foot.

Step 4: Choose One of These Beginner-Friendly Shoes

Here are a few top-rated models we’ve tested and reviewed, ideal for beginners in fitness:

  1. Brooks Ghost 15

A tried-and-true neutral running shoe, great for walking or jogging. Known for its soft cushioning and stable ride.

Best for: General fitness, outdoor running, walking

  1. Nike Revolution 6

Lightweight and budget-friendly, this model offers a flexible fit and decent support for everyday workouts.

Best for: Casual gym use, light cardio

  1. ASICS Gel-Contend 8

Reliable support and a well-cushioned sole make this ideal for low-impact activity.

Best for: Walking, treadmill use

  1. New Balance Fresh Foam Arishi v4

A balance of comfort and style, this shoe features a responsive feel and breathable material.

Best for: Daily walks, gym classes

  1. Reebok Nano X3

If you plan to lift weights or try cross-training, this is a sturdy, gym-ready option.

Best for: Strength training, mixed workouts

Step 5: Avoid Common Beginner Mistakes

Don’t choose based on looks alone. Style is great, but support matters more.

Avoid too-small sizes. Your feet need room to expand while moving.

Skip worn-out hand-me-downs. Cushioning and support wear out faster than you think.

Bonus Tip: Track Your Shoe Mileage

If you’re logging frequent miles through running or walking, it’s a good idea to swap out your shoes every 300 to 500 miles—or roughly every 6 to 12 months, based on how often you use them. Even if they appear to be in good condition, the cushioning and support may have worn down, increasing your risk of injury.

Final Thoughts

Finding the best beginner shoes for beginners doesn’t have to be complicated. With the right instructions and a few trusted recommendations, you’re well on your way to making a smart, supportive choice. Good gear helps build good habits—and that’s what lasting fitness is all about.

So lace up, take that first step, and let your feet thank you later.

Categories
beginners busy schedules cardio cardio & endurance exercises fat loss Fitness fitness-tips flexibility flexibility & mobility Gym home workout men mobility Muscle Gain strength training stretching training Treadmill

Treadmill Workout for Muscle Gain

When most people think of treadmill workouts, they imagine cardio and endurance sessions focused on weight loss or heart health. But with the right approach, treadmill training can also play a key role in muscle gain. This article explores how to optimize treadmill workouts to build muscle, improve cardio & endurance, and enhance your overall fitness.

Why Cardio & Endurance Matter for Muscle Gain

Building muscle isn’t just about lifting heavy weights — your cardiovascular system plays a vital supporting role. Improved endurance means you can sustain harder, longer workouts, which boosts muscle growth. Plus, better circulation from cardio helps deliver oxygen and nutrients to muscles, aiding recovery and hypertrophy.

Step-by-Step Treadmill Workout Instructions for Muscle Gain

Ready to start? Here’s a practical treadmill routine designed to target muscle building while boosting endurance:

  1. Warm-Up (5-10 minutes)

Start walking at a comfortable pace (2.5–3.5 mph).

Gradually increase the incline to 1-2%.

This helps get your muscles and heart ready for the upcoming exercise.

  1. Incline Walking for Muscle Activation (10 minutes)

Set the treadmill incline between 5-10%.

Walk briskly at 3.5–4.5 mph.

Maintain an upright posture while actively working your glute and hamstring muscles.

This targets lower-body muscles deeply, promoting strength and endurance.

  1. Interval Sprints (15 minutes)

Sprint at 7–9 mph for 30 seconds.

Slow down to a walk or light jog between 2.5 and 3.5 mph for about 90 seconds to catch your breath.

Repeat this cycle 6-8 times.

Sprinting recruits fast-twitch muscle fibers essential for muscle gain.

  1. Weighted Vest or Resistance Bands (Optional, 10 minutes)

If you have a weighted vest, wear it during walking or incline segments.

Alternatively, use resistance bands around your thighs while walking.

This extra resistance challenges muscles further, enhancing growth.

  1. Cool Down (5-10 minutes)

Slow down to a comfortable walk (2–3 mph).

Reduce the incline gradually to zero.

This aids recovery and prevents stiffness.

Additional Tips for Maximizing Muscle Gain

Consistency is key: Perform this workout 2-3 times per week alongside your strength training.

Proper nutrition is essential: provide your body with enough protein and energy to help muscles recover and grow.

Rest and recovery: Allow muscle groups time to recover between intense treadmill sessions.

Listen to your body: Adjust speed and incline based on your fitness level and goals.

Benefits of This Treadmill Approach

Builds leg muscle strength and endurance simultaneously.

Enhances cardiovascular fitness, allowing longer and more intense resistance workouts.

Speeds up recovery with active blood flow.

Boosts metabolism to support lean muscle gain.

Categories
athletes beginners Budget-Friendly busy schedules cardio cardio & endurance exercises Fitness fitness-tips flexibility flexibility & mobility gear & reviews Gym home workout men mobility Muscle Gain recovery & wellness strength training stretching training women workouts yogis

Gym Equipment Must-Haves for Yogis

Yoga is a deeply personal and transformative practice. Whether you’re perfecting your Warrior II or just finding time to breathe, the right tools can make all the difference. This guide highlights gym equipment essentials for yogis—complete with reviews, tips, and step-by-step instructions—to help you build a well-rounded, supportive yoga space.

Why Equipment Matters for Your Yoga Practice

The right yoga gear does more than make your setup look good. It offers comfort, support, and structure, helping you move more freely while reducing the risk of injury. With this list, you’ll be able to practice smarter and safer.

  1. Premium Yoga Mat

Purpose: A yoga mat offers a stable, cushioned surface to support comfort and traction during your sessions.

How to Use:

Roll out the mat on a flat surface.

Ensure the grippy or textured side of the mat is facing upward for better traction during your practice.

Use alignment lines (if available) to position hands and feet in poses like Downward Dog.

Suggested: Manduka PRO Yoga Mat – Known for its dense cushioning, it’s ideal for joint support and designed for long-term use.

  1. Yoga Blocks

Purpose: Yoga blocks are useful tools for enhancing stability, improving flexibility, and supporting proper posture during poses.

How to Use:

For hamstring stretches: Place one block under each hand in a forward fold if your hands don’t touch the floor.

For support: Use under your sacrum in Bridge Pose for a supported version.

For seated poses: Use a block to elevate your hips, which can help alleviate strain on your knees and hips.

Suggested: Gaiam Cork Yoga Blocks — Durable, environmentally friendly, and offering a comfortable, natural texture for grip.

  1. Yoga Strap

Purpose: A yoga strap helps you reach farther and hold stretches longer without putting undue strain on your muscles.

How to Use:

Seated Forward Stretch: Sit with your legs extended straight ahead. Wrap the strap around the bottoms of your feet and carefully pull yourself forward, maintaining a long, straight spine.

Shoulder Stretch: Grasp the strap behind your back with both hands and gradually raise it to gently open and stretch your shoulders.

Reclined Leg Stretch: While lying on your back, loop the strap around one foot and slowly raise your leg toward the ceiling, keeping it straight for an effective hamstring stretch.

Recommended: Jade Yoga Strap — Known for its durability and adjustable metal D-rings.

  1. Foam Roller

Purpose: Foam rollers are excellent for muscle recovery, helping to ease tightness and improve blood flow.

How to Use:

To ease tight quadriceps: Lie face down and position the foam roller beneath your thighs. Gently roll from your hips toward your knees to help loosen the muscles.

For back relief: Sit on the floor with the roller positioned behind you. Carefully lean back and move slowly along your spine to massage and relax the muscles.

Pre- or Post-Yoga: Spend 5 to 10 minutes rolling key muscle groups to enhance flexibility and reduce soreness.

Recommended: TriggerPoint GRID Foam Roller — Features a firm, textured surface designed for deep muscle relief.

  1. Meditation Cushion

Purpose: Meditation cushions support correct posture and increase comfort during longer sitting sessions.

How to Use:

Zafu (round cushion): Sit upright near the front edge of the cushion, crossing your legs comfortably before you.

Benefit: Raising the hips slightly tilts the pelvis forward, helping to maintain a natural and upright spinal alignment.

Suggested: Hugger Mugger Zafu & Zabuton Set — Provides sturdy support and includes a removable, washable cover for convenience.

Tips for Choosing Your Yoga Gear

Test materials: When trying out new gear, make sure to check the return policy, especially if you’re unsure about the feel or firmness.

Consider portability: If you often practice at different locations, opt for equipment that’s lightweight and easy to transport.

Research gear & reviews: Reading what fellow yogis have to say can give you valuable insights into a product’s performance and durability.

Stick with essentials first: Begin with a good mat, one block, and a strap—then build out as your practice deepens.

The Benefits of Having the Right Gear

Injury prevention: Props allow you to ease into poses safely.

Improved alignment: You’ll hold better posture without forcing your body.

Enhanced flexibility: Over time, supportive gear can help deepen your range of motion.

Increased consistency: When practice feels better, you’re more likely to return to the mat.

Final Word

The journey of a yogi is unique, but the tools that support it are often shared. Whether you’re seeking balance, flexibility, or peace of mind, these gym equipment must-haves offer exactly that. With trusted gear & reviews to guide your choices, your yoga practice can become not only more accessible—but more powerful.

Remember, it’s not about having everything. It’s about having the right things. Invest in your wellness, take your time exploring what fits, and enjoy the process. Namaste.

Categories
athletes beginners cardio & endurance cycling exercises fat loss Fitness fitness-tips flexibility flexibility & mobility home workout men mobility Muscle Gain recovery & wellness runners strength training stretching women

Cycling vs. Running: Which Is Better for Athletes?

For athletes serious about fitness and performance, cardio & endurance training is non-negotiable. Two of the most effective—and debated—methods are cycling and running. Each offers unique benefits, but the best choice depends on your body, your sport, and your training goals.

Below, we break down the benefits of each and include step-by-step instructions so you can integrate them into your fitness routine effectively.

Running: High-Impact, High-Return

Why athletes use it: Running is a classic way to build cardio endurance, shed fat, and enhance mental resilience.

How to Use Running for Athletic Training

  1. Start with short, slow runs:

Beginner: 2–3 runs per week, 20–30 minutes each.

Focus on easy pace, where you can still hold a conversation.

  1. Build endurance safely:

Increase your distance by no more than 10% per week to avoid injury.

Add one longer run per week for endurance-building.

  1. Add intervals for performance:

1–2x/week, include short sprints (e.g., 30s fast, 90s recovery x 6 rounds).

This improves speed and cardiovascular capacity.

  1. Recovery is key:

Use foam rolling, stretching, and rest days.

Always listen to your body—shin splints and knee pain are early warning signs.

Cycling: Low-Impact Power Builder

Why athletes use it: Cycling builds serious leg strength and cardio fitness with less impact on joints.

How to Use Cycling for Athletic Training

  1. Choose your setup:

Outdoor bike for long rides and natural terrain challenges.

Stationary or spin bike for convenience and interval workouts.

  1. Begin with base rides:

3x/week, 45–60 minutes at a steady, moderate pace.

Keep RPMs (cadence) between 80–100 for efficiency.

  1. Incorporate interval training:

Example: 5 rounds of 1-minute sprint + 2 minutes easy pedaling.

Builds both speed and endurance while staying joint-friendly.

  1. Add resistance:

Use hills or gear tension to simulate climbing.

Great for strength and sport-specific conditioning (e.g., soccer, skiing).

  1. Don’t skip recovery rides:

Easy 30-minute spin sessions on off-days help promote blood flow and aid muscle repair.

Choosing What’s Best for You

Here’s a quick guide to help you decide:

Goal Go With Why
Max calorie burn Running Higher energy output per minute
Joint health Cycling Less impact on knees/ankles
Build mental toughness Running Pushes through physical discomfort
Cross-train or rehab Cycling Safe for injured or sore athletes
Explosive leg strength Cycling Simulates power output sports like sprinting or skating

Tips for Balancing Both in Your Routine

  1. Mix it up:

Alternate running and cycling days to avoid burnout or injury.

  1. Prioritize based on season:

In off-season? Use cycling to maintain endurance with lower impact.

Pre-season? Focus more on running for sport-specific conditioning.

  1. Track progress:

Use a fitness tracker or app to monitor distance, pace, heart rate, and recovery.

  1. Hydrate and fuel properly:

Endurance workouts demand serious nutrition. Don’t neglect pre- and post-training meals.

Final Thoughts

There’s no universal winner between running and cycling—they’re both powerful tools for building cardio & endurance. The smart athlete knows when and how to use each to complement performance, reduce injury risk, and meet specific fitness goals.

Whether you’re sprinting down a track or grinding up a hill on two wheels, the key is consistency, smart programming, and listening to your body.

Categories
beginners Fitness Meals nutrition

Top Beginners Supplements for Muscle Growth

Building muscle as a beginner is exciting — you’re making real changes to your body, gaining strength, and stepping into a new fitness lifestyle. But between gym sessions and meal prepping, the world of supplements can feel overwhelming. Which ones actually work? Which are safe for beginners? And how do you fit them into your nutrition and meal prep routine?

Let’s break it down with a beginner-friendly guide that’s simple, effective, and based on real science — not hype.

  1. Whey Protein: Your Go-To for Gains
    Why it matters:
    Think of whey protein as your post-workout wingman — it’s fast, effective, and gets straight to work helping your muscles bounce back and grow stronger. Super clutch on days when your meals are a little light on protein.

How to use it:

Mix 1 scoop with water or milk post-workout.

Add it to smoothies for a nutrition boost.

Aim for 20–30g of protein per serving.

Meal prep tip:
Use whey protein in overnight oats, protein pancakes, or even baking for extra muscle-friendly meals.

  1. Creatine Monohydrate: Strength and Size
    Why it matters:
    Creatine’s that no-nonsense supplement that actually pulls its weight. It gives your muscles an energy kick during those tough sets and helps you pack on strength and size as you stay consistent.

How to use it:

Take 3–5g daily, with or without food.

No need to “load” — just be consistent.

Stay hydrated!

Quick tip: Mix your creatine with a post-workout shake or something carby — like a banana or oatmeal — to help your body soak it up better.

  1. Omega-3 Fish Oil: Recovery and Wellness
    Why it matters:
    Omega-3s reduce inflammation, improve joint health, and may even support muscle recovery. They’re often overlooked but essential — especially if you’re new to intense workouts.

How to use it:

Take 1–2 grams of combined EPA/DHA daily.

Choose high-quality fish oil (look for purity-tested labels).

Meal prep tip:
Add fatty fish like salmon to your weekly meals to boost natural intake.

  1. Vitamin D3: Energy and Immunity Support
    Why it matters:
    Many beginners don’t realize low vitamin D levels can affect energy, mood, and recovery. If you’re indoors a lot or live in a place with limited sun, supplementing is smart.

How to use it:

Take 1000–2000 IU daily (with a meal that has fat).

Consider a blood test for personalized dosing.

  1. A Quality Multivitamin: Nutritional Insurance
    Why it matters:
    Even with solid nutrition & meal prep, beginners often miss micronutrients that help the body function properly. A multivitamin ensures you’re not running low on key nutrients while you focus on fitness.

How to use it:

Take once daily with food.

Don’t rely on it — whole food should still be your priority.

Instructions for Beginners: Getting Started
Start with the basics: Begin with whey protein and creatine. They offer the biggest bang for your buck.

Keep it simple: Don’t overload your stack. More isn’t always better.

Pay attention to how you’re feeling — more energy, better recovery, extra strength? That’s your progress showing.

Match your supplements with solid meals — they’re there to back up your nutrition and meal prep, not take over.

And remember, don’t expect overnight miracles — supplements work best when you stick with them, just like hitting the gym regularly.

Final Thoughts
Supplements can enhance your muscle growth journey, but only when paired with proper training, recovery, and meal prep. For beginners, sticking to proven basics — like whey protein, creatine, and omega-3s — sets a strong foundation without overwhelming your routine.

Fitness is a journey. Take it one smart step at a time.

Categories
beginners Fitness recovery & wellness

Cold Showers vs. Ice Baths: What’s Better for Beginners?

If you’re just starting your fitness journey or looking to improve your recovery and wellness routine, you’ve likely heard about the buzz around cold showers and ice baths. Both are popular recovery techniques used by athletes and fitness enthusiasts to reduce muscle soreness, boost circulation, and promote overall well-being. But which is better for beginners? Let’s dive into the benefits, practical tips, and clear instructions on how to safely get started with each method.

Understanding Recovery & Wellness in Fitness
Recovery is an essential part of any fitness routine, especially for beginners. It allows your muscles to repair, reduces inflammation, and helps prevent injury. Wellness goes beyond just physical recovery—it’s about creating habits that enhance your body’s natural ability to heal and recharge. Cold exposure methods like cold showers and ice baths have gained traction because they offer accessible, natural ways to support recovery and improve mental resilience.

Cold Showers: An Easy Start for Beginners
If you’re just beginning to explore cold therapy, starting with cold showers is an excellent and approachable way to ease into it. They’re simple, convenient, and can be integrated easily into your daily routine without special equipment.

Benefits of cold showers for beginners:

Enhanced Blood Flow: Exposure to cold water prompts your blood vessels to tighten, followed by expansion as your body warms, which helps stimulate healthier circulation.

Mood Boost: Cold showers can trigger the release of endorphins, helping reduce stress and increase alertness.

Mild Muscle Relief: Taking cold showers can soothe post-workout muscle aches and decrease inflammation for a quicker recovery.

How to take a cold shower safely as a beginner:

Begin with warmth: Kick off your shower using water at a pleasantly warm temperature.

Gradually Cool Down: Slowly lower the temperature over 1–2 minutes until the water feels cold but tolerable.

Focus on Breathing: Take slow, deep breaths to stay calm and reduce the shock of cold water.

Recommended Duration: Begin with 30 seconds to 2 minutes of cold water to gently ease your body into the experience.

Goal is to practice this routine 3 to 4 times a week to boost your tolerance and enhance your recovery.

Ice Baths: A Powerful Recovery Tool with Caution
An ice bath involves sitting in a tub of cold, icy water, typically kept between 50 and 59°F (10 to 15°C), to boost muscle recovery and reduce inflammation. They are more intense but offer deeper recovery benefits.

Benefits of ice baths:

Effective Inflammation Reduction: Immersing yourself in cold water is a highly efficient method for easing muscle inflammation.

Relieves Muscle Discomfort: Ice baths can significantly reduce the ache and stiffness that come with delayed onset muscle soreness (DOMS).

Builds Mental Strength: Withstanding the cold water challenge fosters greater discipline and enhances mental toughness.

Getting Started with Ice Baths Safely:
Start by filling your bathtub with cold water, then slowly add ice until the temperature settles around 50–59°F (10–15°C).

Getting Started: Limit your first few ice baths to just 3 to 5 minutes to let your body slowly get used to the cold temperatures without overdoing it.

Enter Slowly: Ease into the bath gradually to let your body adjust.

Stay Calm and Breathe: Focus on slow, controlled breathing to manage the cold shock.

Exit Carefully: When time’s up, get out slowly and dry off immediately. Warm up gradually afterward, avoiding hot showers right away.

Frequency: Limit ice baths to 1–2 times per week initially.

Caution: If you experience heart issues or circulatory concerns, be sure to speak with your healthcare professional before attempting ice baths.

Which is Better for Beginners?
Cold showers are usually the safer, more manageable starting point. They offer many recovery and wellness benefits without the intense shock of full immersion. Once you’ve developed some tolerance, ice baths can offer deeper recovery benefits and may become a more suitable option.

Final Thoughts
Both cold showers and ice baths play important roles in recovery and wellness for beginners and experienced athletes alike. Starting with cold showers helps ease your body into cold therapy, while ice baths can amplify recovery and build mental strength when used correctly.

Always listen to your body, start slow, and find what works best on your fitness and wellness journey.

Categories
athletes beginners Fitness home workout strength training

Full Body Strength Workout with Beginners

Starting strength training can feel overwhelming if you’re new to fitness, but it’s one of the most effective ways to build muscle, boost metabolism, and improve overall health. Whether your goal is to tone up, gain strength, or simply feel more energized, a full body strength workout designed for beginners is a fantastic place to start.

In this guide, we’ll cover essential tips, simple techniques, and the many benefits of strength training for beginners, helping you kick off your fitness journey with confidence.

Why Strength Training Matters for Beginners
Strength training isn’t just for athletes or bodybuilders — it’s a fundamental part of staying healthy at any age. For beginners, incorporating strength exercises can:

Increase muscle mass and bone density

Enhance metabolic rate, helping with weight management

Improve balance, coordination, and posture

Reduce risk of injury in daily activities

Boost mood and energy levels

Understanding these benefits can help you stay motivated and committed to your routine.

Getting Started: Tips for Beginners

Focus on Form First
Proper technique is crucial to prevent injury and maximize results. Start with light weights or just your body weight and practice movements slowly and deliberately.

Choose Compound Movements
Exercises that work multiple muscle groups at once, like squats, push-ups, and rows, are perfect for beginners. They build overall strength efficiently and create a balanced physique.

Start with 2-3 Sessions Per Week
Allow your muscles time to recover between workouts. Consistency matters more than intensity at the beginning.

Listen to Your Body
Feeling a bit of muscle stiffness is expected, but any sudden or intense pain should never be ignored. Don’t push through discomfort—modify or rest as needed.

Warm-Up and Cool Down
Prepare your muscles with a 5-10 minute warm-up (like light cardio or dynamic stretches), and finish with gentle stretching to aid recovery.

Sample Full Body Strength Workout for Beginners
Here’s a simple routine to get you started — all you need is a pair of dumbbells or resistance bands and some space:

Bodyweight Squats — 3 sets of 12 reps

Push-Ups (Knee or Wall if needed) — 3 sets of 10 reps

Single-arm dumbbell rows — perform 12 repetitions on each side for 3 sets.

Glute Bridges — 3 sets of 15 reps

Plank Hold — 3 rounds of 20-30 seconds

Standing Dumbbell Shoulder Press — 3 sets of 12 reps

Take a 30-60 second break between sets, and remember to keep your core engaged throughout each exercise.

Benefits You’ll Notice Over Time
By sticking with it regularly, you’ll start noticing progress in:

Strength and endurance

Muscle tone and definition

Posture and functional movement

Confidence and overall wellbeing

Building strength is an enduring investment in your body that continues to benefit you over time.

Final Thought: Starting your strength training journey doesn’t need to be intimidating. Welcome the journey with steady focus and perseverance, and you’ll establish a solid groundwork for enduring health and fitness. Ready to get started? Grab some weights, clear a space, and enjoy your full body workout!