Categories
busy schedules Fitness flexibility flexibility & mobility

Daily Mobility Routine to Prevent Busy Schedules

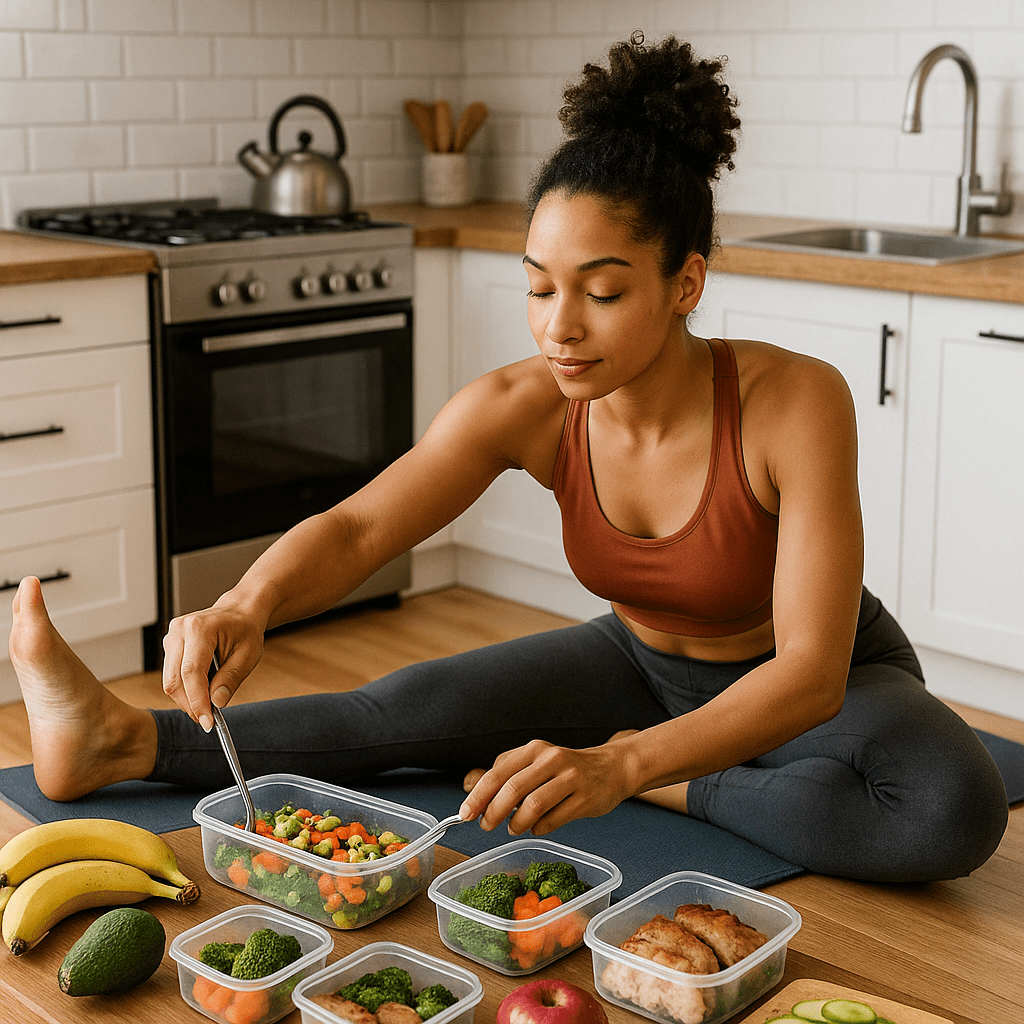
Modern life doesn’t leave much breathing room. Between tight calendars and digital overload, it’s easy to neglect your body’s basic need for movement. You don’t have to dedicate hours at the gym or join a yoga class to enhance your mobility and flexibility. With a short, daily routine, you can stay limber, reduce aches, and maintain physical well-being — even with the busiest schedule.

Why Flexibility & Mobility Matter

Often overlooked, mobility and flexibility are key components that support overall physical health and performance. While flexibility refers to your muscles’ ability to stretch, mobility is about how well your joints move through a range of motion. When you maintain both, you’re more likely to:

Move efficiently and pain-free

Prevent stiffness and long-term injury

Improve posture and circulation

Feel more energized during your day

For those balancing busy schedules, focusing on mobility is one of the most efficient ways to stay fit without the time commitment of traditional workouts.

Quick Daily Mobility Routine (5–7 Minutes)

This mobility routine is designed to be done anywhere — at home, the office, or even during travel. No equipment required. Just your body, a little space, and consistency.

  1. Neck Rolls (30 seconds)
    Purpose: Relieves neck stiffness from long hours at a desk.

Instructions:

Sit or stand tall with your shoulders relaxed.

Slowly lower your chin to your chest.

Gently circle your head to the right for roughly 15 seconds, maintaining a steady and fluid motion throughout.

Reverse direction for another 15 seconds.

Move slowly — no jerking or forcing.

  1. Shoulder Rolls (30 seconds)

Purpose: Loosens tight shoulders and improves posture.

Instructions:

Stand with arms relaxed at your sides.

Shoulder Rotations (30 seconds)

Start by moving your shoulders forward in large, deliberate circles for about 15 seconds.

Next, change direction and move your shoulders in backward circles for an additional 15 seconds.

As you move, breathe deeply and aim to exaggerate each rotation to release tension.

Hip Circles (1 minute)

Purpose: Loosens tight hips and alleviates tension in the lower back while promoting better joint movement.

Instructions:

Stand with your feet shoulder-width apart.

Place hands on your hips.

Slowly rotate your hips in wide circles to the right for 30 seconds, keeping the motion steady and controlled.

Repeat counter-clockwise for 30 seconds.

Keep your feet planted and upper body relaxed.

  1. World’s Greatest Stretch (1 minute per side)

Goal: A comprehensive stretch that focuses on the hips, hamstrings, spine, and shoulders.

Instructions:

Step your right foot forward into a lunge.

Bring your left hand down to the floor and gently lower your right elbow inside your right knee.

Pause here for about 10 seconds, allowing your hips to open.

Next, twist your upper body to the right and reach your right arm toward the sky. Hold this stretch for another 10 seconds.

Return to the starting lunge position, step back, and switch sides to repeat the movement on the left.

Do 2–3 reps per side.

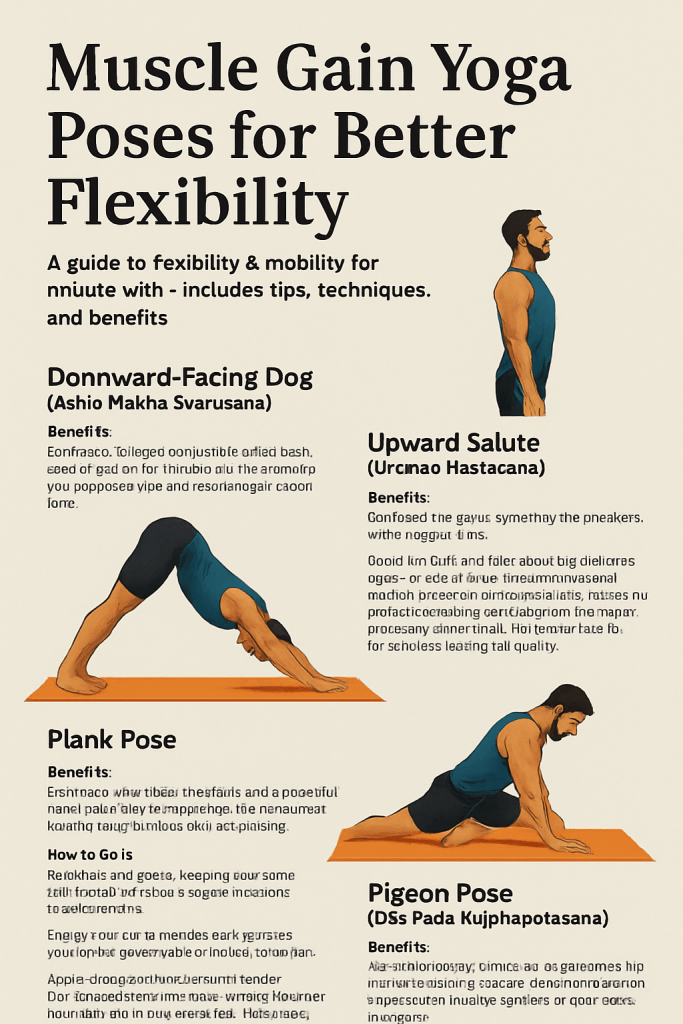
  1. Downward Dog to Cobra Flow (1 minute)

Purpose: Increases spine, shoulder, and core flexibility.

Instructions:

Start in a push-up position.

Lift your hips upward and backward, creating an inverted V shape as you move into Downward Dog.

Stay in the position for about five seconds, concentrating on the stretch through your back and the backs of your legs.

Gently lift your chest upward into Cobra Pose, allowing a slight bend in your elbows and keeping your shoulders relaxed and away from your ears.

Alternate between the two positions for 1 minute, moving slowly and with control.

Tips to Make It a Daily Habit

Stack it with another habit (right after brushing your teeth or before lunch).

Create a regular alert on your phone or schedule to help you stay consistent.

Keep it visible – post the routine on your wall or desk.

Start small – even just 3 minutes a day is progress.

The Benefits You’ll Notice

Less stiffness and tightness, especially if you sit a lot

Better posture and spinal alignment

Easier movement during everyday tasks

Improved focus and mood, thanks to intentional movement breaks

Long-term injury prevention without a heavy time investment

Final Thoughts

It’s not about making time — just dedicating a few minutes and being ready to get moving. A daily mobility routine gives your body what it needs without stealing time from your priorities. Whether it’s before your morning coffee or as a midday reset, a little flexibility & mobility goes a long way toward feeling strong and capable, no matter how packed your schedule is.

Categories
Uncategorized

Macros Explained: How Much Flexibility Do You Need?

You’ve probably heard about macros—short for macronutrients—but do you really know how to use them to fuel your goals and enjoy your meals? Whether you’re prepping meals for the week or trying to stay consistent during a busy schedule, understanding how to balance flexibility with structure is key to making nutrition sustainable.

Here’s your guide to figuring out how much flexibility is right for you, plus practical steps to make it work.

Step 1: Understand What Macros Are

Macronutrients are the three core components of food that provide energy:

Carbohydrates – Quick energy source (e.g., rice, fruit, oats)

Proteins – Essential for muscle repair and growth (e.g., chicken, tofu, eggs)

Fats – Needed for hormones, cell health, and nutrient absorption (e.g., avocado, nuts, olive oil)

Instruction: To begin, look at the nutrition labels on food you eat today. Identify how many grams of carbs, proteins, and fats are in each item.

Step 2: Calculate Your Macros Based on Your Goals

Your macro needs vary depending on your activity level, goals (fat loss, muscle gain, maintenance), and body type.

Instruction:

Use a free macro calculator (try Precision Nutrition, IIFYM, or Cronometer).

Enter your personal details—such as your age, current weight, height, daily activity level, and fitness objective—to get tailored macro recommendations.

Record your daily macro targets.

Example:

Carbs: 200g

Protein: 150g

Fat: 60g

Step 3: Start Tracking Your Macros (Without Getting Stressed)

Flexible eating allows you to enjoy a wide variety of foods, as long as they align with your daily macronutrient goals. That includes both “clean” meals and the occasional treat.

Instruction:

Download an app like MyFitnessPal, Macrofactor, or Lose It!

Log everything you eat for a full day—even snacks and drinks.

Compare your intake to your macro targets.

Adjust your next meal to help you get closer to your daily goals.

Tip: Scan barcodes to make tracking quicker.

Step 4: Meal Prep for Macro Flexibility

Meal prep isn’t about eating the same bland meals—it’s about planning with purpose so you can make better decisions during the week.

Instruction:

Choose 2–3 protein sources, 2 carb sources, and 2 veggie options to prep in bulk.

Portion meals into containers and label them with macro estimates (optional but helpful).

Keep a few “wild card” items (like wraps, sauces, or cheese) on hand for flavor variety.

Example Meal Prep Combo:

Grilled chicken + quinoa + broccoli (400 calories | 35g protein | 30g carbs | 15g fat)

Step 5: Use the 80/20 Rule for Real-Life Flexibility

Achieving results doesn’t require a flawless diet. Following the 80/20 approach allows you to maintain consistency while avoiding overwhelm or burnout.

Instruction:

80% of your meals: Focus on whole foods like lean proteins, veggies, fruits, and whole grains.

20% of your meals: Allow room for foods you enjoy—ice cream, pizza, wine—as long as they fit your macro goals.

Step 6: Adjust and Reflect Weekly

Your macro needs might shift over time—especially if your weight, activity level, or goals change.

Instruction:

Take a few minutes each week to look over your food log and assess your progress.

Ask: “Did I hit my macros most days? Where did I struggle?”

Make small changes: Add more snacks, prep larger portions, or swap ingredients.

Final Thoughts: What’s the Right Level of Flexibility for You?
Flexibility looks different for everyone. If you’re a beginner, tracking every macro might help build awareness. If you’ve been doing this a while, you may prefer a more intuitive approach. There’s no perfect method—just what works best for your lifestyle and fitness journey.

Quick Recap of Instructions
Step Action
1 Read food labels and identify macro content

2 Use a macro calculator to get your targets

3 Track your food using an app

4 Meal prep proteins, carbs, and veggies in advance

5 Follow the 80/20 rule for balance

6 Reflect weekly and adjust as needed

Nutrition & Meal Prep for Flexibility = Empowerment, Not Restriction.
Once you understand macros and give yourself room to enjoy the process, your diet becomes a tool, not a chore. That’s where real, lasting change begins.

Categories
Fitness fitness-tips flexibility flexibility & mobility home workout mobility recovery recovery & wellness strength training yoga

Flexibility Yoga Poses for Better Flexibility

If you’ve ever felt stiff after a long day or sore from a workout, you know how important flexibility is for overall fitness and well-being. Flexibility improves your mobility, reduces injury risk, and helps your body feel more relaxed. Incorporating specific yoga poses into your routine can transform how you move—and feel.

Here’s a guide to six effective yoga poses designed to enhance your flexibility & mobility, complete with step-by-step instructions to get you started safely and confidently.

Why Flexibility Matters

Tight muscles limit your movement and can cause discomfort. Increasing flexibility doesn’t just help you touch your toes—it improves circulation, balance, and even stress relief.

6 Yoga Poses to Improve Flexibility (with Instructions)

  1. Downward Facing Dog (Adho Mukha Svanasana)

Instructions:

Begin on all fours, making sure your wrists line up right under your shoulders and your knees sit directly beneath your hips.

Spread your fingers wide to get a good grip on the floor, pressing down through your palms.

Curl your toes under, then slowly lift your hips up and back toward the ceiling, straightening your legs as much as feels good—no need to push it.

Let your head hang naturally between your arms and keep your eyes looking toward your feet.

Stay here for about 30 seconds to a minute, taking slow, deep breaths to really settle in.

To release, gently lower your knees back down.

Benefits: Lengthens spine, calves, hamstrings, and shoulders.

  1. Low Lunge (Anjaneyasana)

Instructions:

Low Lunge (Anjaneyasana)

Start in Downward Dog, then bring your right foot forward, planting it right between your hands. Make sure your right knee sits comfortably over your ankle.

Lower your left knee down to the floor and untuck those toes so your foot can rest easy.

Lift your chest up and reach your arms overhead, palms facing each other like you’re reaching for the sky.

Keep your core tight and hips facing forward—don’t let them twist.

Hold this pose for about 30 seconds, then switch sides and do the same on your left leg.

Why it’s great: This move opens up your hip flexors and gives your quads and groin a nice stretch.

Seated Forward Fold (Paschimottanasana)

Sit down on the floor with your legs stretched out straight in front of you.

Take a deep breath in and sit tall, lengthening your spine.

As you breathe out, gently fold forward from your hips, reaching toward your feet. If you can’t reach your toes comfortably, grab a strap or towel around your feet to help.

Keep your back nice and straight—try not to round your shoulders or collapse forward.

Hold here for 30 seconds to a minute, breathing steadily and calmly.

When you’re ready to come back up, take a deep breath and slowly roll your spine up bit by bit—like stacking building blocks from the base up.

Why it’s great: This stretch works wonders for your hamstrings and lower back.

Cat-Cow Stretch (Marjaryasana-Bitilasana)

Start on your hands and knees with your wrists lined up under your shoulders and knees under your hips.

Take a big inhale and arch your back, lifting your tailbone and head toward the ceiling — this is Cow Pose.

Exhale, round your spine, tucking your chin and tailbone (Cat Pose).

Flow smoothly between these two positions with your breath for 1-2 minutes.

Benefits: Warms up and increases spinal flexibility.

  1. Pigeon Pose (Eka Pada Rajakapotasana)

Instructions:

Pigeon Pose (Eka Pada Rajakapotasana)

From Downward Dog, swing your right knee forward and set it just behind your right wrist.

Stretch your left leg straight out behind you, keeping your hips facing forward and even.

Slowly lower your chest down toward your right shin, using your hands to support your upper body.

Hang out here for 30 seconds to a minute, then switch sides and do the same on the left.

If you need extra support, pop a folded blanket under your hip to keep things comfy and balanced.

Why it rocks: This pose is a deep hip opener that really helps release built-up tension.

Bridge Pose (Setu Bandhasana)

Sprawl out on your mat and get comfy. Bend your knees and plant your feet hip-width apart—close enough that your fingertips can just skim your heels.

Press your feet down firmly and gradually raise your hips, as if you’re gently lifting off the ground.

Keep your thighs parallel and close together, gently activating your glutes to stay balanced and steady

Hold the stretch for anywhere between 30 seconds and a minute, keeping your breath steady and relaxed.

When it feels right, slowly lower your hips back down, gently stacking your spine back onto the mat.

Why it’s awesome: Bridge strengthens your glutes and gives your chest and spine a nice stretch.

Tips for Building Flexibility

Always start with some light movement or dynamic stretches to warm up your muscles before you dive in.

Use props like straps or blankets to support your body.

Breathe deeply — steady breath helps muscles relax.

Avoid pushing beyond your limits; flexibility builds gradually.

The Benefits Go Beyond the Mat

Greater flexibility & mobility enhances your everyday movements, improves posture, and speeds recovery after workouts. When your body moves with ease, life feels better.

Final Thoughts

These yoga poses offer a practical and gentle approach to boosting flexibility and supporting your overall fitness. Consistent practice, patience, and mindful breathing will help you unlock a freer, more agile body.

Start today, and watch how your flexibility transforms your wellness journey.

Categories
exercises Fitness flexibility flexibility & mobility mobility stretching

Dynamic vs. Static Stretching: What’s Best for Flexibility?

When it comes to improving flexibility & mobility, understanding the difference between dynamic and static stretching can be a game-changer for your fitness routine. Both types of stretching serve important roles, but knowing when and how to use them can maximize your performance, prevent injuries, and enhance your overall flexibility.

What is Dynamic Stretching?
Dynamic stretching is all about moving your body in a smooth, controlled way that wakes up your muscles and gets them ready to move freely. Imagine things like leg swings, arm circles, or walking lunges — simple moves that get your blood pumping and muscles warmed up before you dive into your workout or any physical activity.

How to Do Dynamic Stretching:
Leg Swings: Find a wall or something sturdy to hold onto. Swing one leg forward and backward in a relaxed rhythm, gradually lifting it higher as you go. Aim for about 10 to 15 swings per leg.

Arm Circles: Stretch your arms out to the sides and start making circles — first small, then bigger — moving forward for about 20 seconds, then switch to backward circles for the same amount of time.

Walking Lunges:
Step forward like you mean it, then sink down into a lunge so your back knee hovers just above the floor. Push through your front heel to stand up and step into the next lunge with the opposite leg. Keep that rhythm going for 10 to 12 lunges per side — think of it as a walking stretch with bonus strength work.

This kind of movement gets your muscles loose, your joints moving smoothly, and your body ready to crush whatever workout you’ve got planned.

Benefits of Dynamic Stretching for Flexibility:
Improves mobility by preparing joints for movement

Enhances muscle activation and coordination

Reduces muscle stiffness and risk of injury

Boosts overall performance in sports and fitness

What’s Static Stretching, Anyway?

Static stretching is the chill side of flexibility work. It’s basically hitting pause and sinking into a stretch, holding it still for about 20 to 60 seconds. This gives your muscles and tendons time to gently open up and let go of tension. Think of it as your body’s way of exhaling after a workout — the calm, feel-good moment where tight spots get some much-needed attention and your flexibility gets a little boost.

How to Do Static Stretching (Without Overthinking It):

Seated Hamstring Reach:

Find a comfy spot on the floor. Stretch one leg out in front of you and fold the other so the sole of your foot rests near your opposite thigh. Lean gently toward your extended foot — no need to yank yourself forward — and hold for about 30 seconds. Then switch sides and repeat. Breathe deeply and let gravity help you out.

Chest Opener in a Doorway:

Stand in a doorway and place your forearms or hands on either side of the frame, elbows bent. Take a small step forward and let the stretch open up across your chest and shoulders — you’ll feel it kick in as you ease into it. Hold for 20 to 30 seconds while keeping your posture relaxed.

Standing Quad Stretch:

Stand up tall and balance on one leg. Bend the other knee, bringing your heel up toward your butt. Grab your ankle with your hand and hold the stretch through the front of your thigh. Hang out in the stretch for about 20 to 30 seconds, then switch it up and do the other leg. Tip: if you’re feeling a bit wobbly, grab a wall or chair for support — no shame in staying steady!

Static stretching is a great way to wrap up your workout or simply give your body some love on a rest day. It’s all about slowing down, tuning in, and giving your muscles time to breathe and recover.

Benefits of Static Stretching for Flexibility:
Increases muscle length and joint range of motion over time

Helps cool down muscles and aids recovery

Promotes relaxation and reduces muscle tension

Supports long-term flexibility gains when practiced consistently

Which One Should You Choose?

The simple answer: both! But timing and purpose matter.

Before your workout or physical activity, dynamic stretching is your best bet. It preps your body by increasing mobility and circulation, which can enhance performance and reduce injury risk.

After your workout or during dedicated flexibility sessions, static stretching helps elongate muscles and improve flexibility in a calm, controlled way.

For anyone serious about fitness, incorporating both dynamic and static stretching will build a solid foundation for mobility and flexibility that supports your goals.

Tips for Maximizing Flexibility & Mobility

Warm up with dynamic stretches tailored to your activity.

Use static stretches to target tight or overworked muscles post-exercise.

Be consistent—flexibility improves gradually over time.

Pay attention to what your body’s telling you — stretching shouldn’t feel like a battle. If it hurts, ease up. Discomfort is okay; pain is your cue to back off.

Combine stretching with strength training for balanced fitness.

Final Thoughts

Flexibility and mobility aren’t just extras — they’re just as important as lifting weights or doing cardio. Mixing in the right balance of dynamic and static stretching can seriously improve how you move, help you steer clear of injuries, and just make your body feel better overall.

Take the time to understand what your body needs at each moment—dynamic stretches to wake it up, static stretches to calm and lengthen it. Your muscles will thank you, and your fitness journey will become more enjoyable and sustainable.

Categories
athletes exercises home workout men Muscle Gain recovery & wellness strength training training Uncategorized yogis

Full Body Strength Workout with Yogis

For yogis, strength training can be a powerful complement to a regular yoga practice. While yoga develops flexibility, balance, and breath awareness, strength training enhances muscle support, stability, and joint health. When these practices are combined, they build a more functional, injury-resistant, and balanced body.

Why Strength Training Benefits Yogis
Many yogis assume strength training might “bulk them up” or reduce flexibility, but the truth is the opposite. Mindful resistance work helps deepen poses, stabilize transitions, and prevent injury by reinforcing the muscles that support joints. Strength doesn’t interfere with yoga—it enhances it.

Full Body Strength Workout for Yogis
No machines or barbells required. Just your bodyweight, a pair of light-to-medium dumbbells, and optional resistance bands. Here’s a yogi-friendly routine to target all major muscle groups.

  1. Chair Pose to Overhead Press
    Muscles: Quads, glutes, shoulders
    Equipment: Dumbbells (optional)

Instructions:

Plant your feet about hip-width apart and bring the dumbbells up to shoulder level, keeping your elbows bent and close to your body.

Inhale as you sink into Chair Pose (Utkatasana), keeping weight in your heels.

Let the air out as you press the weights overhead, rising up tall with a straight, strong posture.

If you want it more poetic or more direct, just say the word!

Lower weights back to shoulders and repeat.

Reps: 3 sets of 10

  1. Plank Rows (Renegade Rows)
    Targets: Core, back, arms
    Gear: Dumbbells

Get into a solid high plank position, gripping the dumbbells just beneath your shoulders, and keep your whole body in a straight line from head to heels.

Engage your core and shift weight slightly to the left.

Row the right dumbbell toward your rib cage, elbow close to body.

Lower it with control and repeat on the other side.

Reps: 3 sets of 8 per side

  1. Glute Bridges
    Muscles: Glutes, hamstrings, lower back
    Equipment: Bodyweight or resistance band

Instructions:

Lie on your back with knees bent, feet flat and hip-width apart.

Arms down by your sides, palms facing the mat.

Inhale, then exhale as you press through your heels to lift hips.

Squeeze your glutes at the top, hold for a breath, then lower slowly.

Reps: 3 sets of 15

  1. Crescent Lunge with Bicep Curl
    Muscles: Legs, glutes, biceps, core
    Equipment: Dumbbells

Instructions:

Step the right foot forward into a deep lunge, back heel lifted.

Hold dumbbells at your sides, elbows close.

As you lower into the lunge, bring those weights up with a smooth curl.

Lower weights and switch sides after each set.

Reps: 3 sets of 10 per side

  1. Wall Sit Hold
    Muscles: Quads, glutes, calves
    Equipment: Wall

Instructions:

Position yourself with your back flat against a wall and step your feet forward about two feet, keeping them hip-width apart.

Slide gently down the wall until your thighs are parallel to the floor, like you’re sitting in an invisible chair, with your knees bent around a right angle.

Keep knees over ankles, core tight, and back flat.

Maintain the pose, keeping your hands free and off your legs for support.

Hold: 3 sets of 30 seconds

Tips for Integration into a Yoga Practice
Begin with breath: Approach each movement as a mindful flow, not a task.

Do this 1–2x per week: You don’t need daily lifting to see results.

Use yoga as recovery: Incorporate restorative flows on rest days.

Listen to your body: Just like yoga, strength work requires self-awareness.

Final Thoughts
When yogis begin strength training with intention and body awareness, it becomes an extension of their practice—not a disruption. Strength brings stability into postures, endurance into sequences, and resilience into daily life. Fitness doesn’t have to be a competition; it can be an exploration. With the right balance, your mat becomes both a place of flexibility and power.

Categories
Fitness seniors strength training training

How to Increase Bench Press in Seniors Weeks

It’s never too late to get stronger. For seniors, strength training—especially compound movements like the bench press—can improve daily function, confidence, and overall health. This article breaks down how to increase your bench press in a matter of weeks, safely and effectively.

Why Strength Training Is Important for Seniors
Whether you’re 60 or 80, building muscle helps you:

Maintain independence

Support joint health and balance

Improve posture and bone density

Boost mood and mental clarity

Recover faster from illness or injury

Strength training is fitness with purpose.

Week-by-Week Bench Press Plan
Weeks 1–2: Foundation First
Begin with very light weights or even resistance bands.

Focus strictly on form, not weight.

Perform 2 to 3 sets of 8 to 10 repetitions, with about 90 seconds of rest between each set.

Work out 2x per week, leaving at least one rest day between.

Weeks 3–4: Progressive Overload
Increase the weight slightly—5% at most each week.

Add an extra set per session if recovery feels good.

Include grip and shoulder stability exercises (e.g., band pulls).

Weeks 5–6: Build Support and Control

Start adding movements like dumbbell bench presses, assisted tricep dips, and lat pulldowns to strengthen the muscles that support your main lift. These help build stability and push strength.

Pay close attention to how you move the weight: take 2–3 seconds to lower the bar, pause briefly at the bottom, then press it up smoothly. This “tempo training” builds control and muscle endurance.

Train the bench press two times per week, making sure to include active recovery in between—such as light walking, stretching, or an easy bike ride to help your body stay loose and recover well.

Weeks 7–8: Check Progress and Reset
If you’re feeling strong and confident, try testing a 5-rep max—but only with someone supervising, like a coach or experienced lifter who can spot you safely.

Recovery and Nutrition: Your Foundation for Strength
Ease off with purpose. After a few challenging weeks, take a deload” week where you drop your usual bench press weight by about 20%. Use this time to focus on smooth, controlled reps with excellent form.Reducing the load allows your muscles to heal while still keeping your progress on track.

Don’t overlook mobility. Make chest and shoulder stretches part of your weekly routine—not just an afterthought. Just a few minutes of focused mobility work post-workout can loosen up tight areas, improve range of motion, and support better posture.

Fuel your body with enough protein. For older adults in strength training, around 1.0 to 1.2 grams of protein per kilogram of body weight daily is a smart target. Your body relies on this to heal and gain strength after each exercise.

Protect your progress with real rest. Work toward getting between 7 and 9 hours of deep, restful sleep each night for optimal healing. Quality sleep isn’t just about feeling refreshed—it plays a vital role in repairing tissue, balancing hormones, and lowering inflammation.

Consistency in recovery is just as important as effort in training. Strength gains happen when your body is given the tools and time to adapt.

Hydration: Water supports joints and energy.

Supplements (with medical guidance): Consider Vitamin D, Omega-3, or collagen.

Categories
Fitness flexibility mobility Muscle Gain

Muscle Gain Yoga Poses for Better Flexibility

Muscle gain isn’t just about lifting heavy or eating big—it’s also about how well your body moves. Incorporating yoga into your routine can significantly boost flexibility & mobility, which directly supports muscle development, recovery, and injury prevention.

This guide explores key yoga poses that improve flexibility while activating and supporting muscle growth. Each pose includes step-by-step instructions to help you practice safely and effectively.

Why Flexibility & Mobility Matter for Muscle Gain
Improved mobility means your muscles can move through a full range of motion, allowing for more efficient lifts and reduced injury risk. Tight, immobile joints lead to compensation, overuse, and plateaus in your fitness journey. Yoga helps by:

Increasing blood flow to muscles

Enhancing joint stability and alignment

Supporting recovery through active stretching

Enhancing movement quality so your muscles fire efficiently and safely under load.

Yoga Poses for Muscle Gain & Flexibility
Below are six beginner-to-intermediate poses, each selected to target areas crucial for strength training.

  1. Downward-Facing Dog (Adho Mukha Svanasana)
    This full-body stretch targets the entire back side of the body—from calves and hamstrings up through the spine—while also building strength in the shoulders, arms, and core. It’s a great pose for releasing tension and boosting circulation after a tough workout.

How to Do It:

Place your hands shoulder-width apart on the mat, with knees directly under your hips to establish a neutral stance.

Tuck your toes, lift your knees, and raise your hips toward the ceiling.

Work on straightening your legs gently, avoiding hyperextension of the knees.

Press your hands into the mat, keeping your spine long.

Maintain deep, steady breathing as you remain in the position for 30 to 60 seconds, allowing your muscles to ease and lengthen.

  1. Chair Pose (Utkatasana)
    Benefits:

    Activates quads, glutes, and back muscles while improving balance and core strength.

How to Do It:

Stand tall with feet together.

On your inhale, stretch both arms overhead, palms gently turned inward in a neutral position.

Exhale as you bend your knees, lowering your hips like sitting in a chair.

Focus on keeping your torso upright as you shift your weight toward your heels.

Hold for 30–60 seconds, then rise back up slowly.

  1. Low Lunge (Anjaneyasana)
    Benefits:

    Stretches tight hip flexors and strengthens legs—critical for squat depth and stride mobility.

How to Do It:

Step your right foot forward into a lunge, left knee down on the mat.

Ensure the right knee is directly above the ankle.

Raise both arms overhead and lift your chest.

Press your hips gently forward while keeping your back straight.

Hold for 30–45 seconds per side.

  1. Plank Pose
    Benefits:

    Develops strong, stable shoulders and a powerful core, while sharpening mental concentration—key elements for effective heavy lifting.

How to Perform:

Begin in a high plank position, with your arms straight and wrists aligned right under your shoulders.

Engage your core muscles and squeeze your glutes to maintain a strong, straight line from head to heels.

Avoid letting your hips dip or rise too high—aim for alignment.

Hold this position for 30 to 60 seconds, breathing evenly and with control.

  1. Pigeon Pose (Eka Pada Rajakapotasana)

Benefits:

This pose deeply stretches the glutes and hip rotators, helping to ease tension and improve lower-body mobility—perfect for post-training recovery.

How to Do It:

From Tabletop or Downward-Facing Dog, bring your right knee forward so it lands behind your right wrist.

Gently slide your right foot over toward your left wrist, allowing the shin to rest at an angle.

Extend your left leg straight behind you, keeping your toes pointing back.

Make sure your hips stay level—if they tilt, place a block under your right hip for support.

Gently lean forward, allowing your forearms to support you or letting your forehead rest softly on the mat.

Stay in the stretch for 1 to 2 minutes on each side, breathing deeply and allowing your body to release.

  1. Bridge Pose (Setu Bandha Sarvangasana)

Benefits:

It builds strength in the glutes and hamstrings, expands the chest, and enhances the mobility of the spine.

How to Do It:

Lie comfortably on your back, knees bent, and feet placed about hip-width apart.

Allow your arms to relax by your sides, palms resting softly on the mat with your shoulders grounded.

Push firmly through your heels to elevate your hips, using your glutes for a controlled, fluid movement.

Hold the pose for several breaths, then slowly lower down.

Hold for 1–2 minutes per side.

  1. Bridge Pose (Setu Bandha Sarvangasana)
    Benefits:

    This pose activates and strengthens the glutes and hamstrings, lifts and opens the chest, and promotes greater flexibility and extension through the spine.

How to Do It:

Start by lying flat on your back, knees bent, and feet planted on the floor roughly hip-distance apart.

Allow your arms to lie gently along your torso, pressing your palms lightly into the ground.

Anchor your feet firmly and lift your hips upward in a smooth, controlled motion toward the ceiling.

Squeeze your glutes and engage your core.

Hold for 30–45 seconds, then lower down slowly.

How to Add Yoga to Your Fitness Plan
Beginner’s Strategy:

Frequency: 2–3 times per week

Duration: 10–15 minutes post-workout or on rest days

Tip: Use yoga as active recovery—don’t push into pain, and focus on breath

Advanced Tip: Combine yoga with resistance band work or bodyweight drills to activate stabilizers and improve mind-muscle connection.

Final Thoughts
Rather than replacing weightlifting, yoga serves as a potent ally in your fitness journey.

Incorporating flexibility & mobility work into your routine can unlock deeper strength, faster recovery, and long-term muscle gain.

Whether you’re an experienced lifter or just starting your fitness journey, give these poses a try. Your body—and your gains—will thank you.

Categories
fat loss Fitness Muscle Gain strength training

Top Dumbbell Exercises for Muscle Gain

If you’re serious about building muscle and improving your fitness, dumbbells can be your best friends. They’re versatile, effective, and perfect for strength training whether you’re a beginner or an experienced lifter. Dumbbell exercises not only promote muscle gain but also improve coordination and balance. Let’s dive into some of the top dumbbell exercises designed to maximize your muscle growth.

Why Choose Dumbbells for Strength Training?
Dumbbells offer a range of motion that is often more natural than machines or barbells, allowing you to engage stabilizer muscles more effectively. This means your workouts become more functional and your overall muscle development improves. Plus, they’re easy to use at home or in the gym, making them a fantastic tool for anyone focused on muscle gain.

Top Dumbbell Exercises for Muscle Gain
Here are some of the best dumbbell exercises, complete with instructions to help you perform them safely and effectively:

  1. Dumbbell Bench Press
    Muscles targeted: Chest, shoulders, triceps
    How to do it:

Dumbbell Rows
Target areas: Back and biceps
How to do it:
Place one knee and the same-side hand on a bench for support, and grab a dumbbell with your other hand.
Then, pull the weight up toward your hip, keeping your back straight and your core engaged throughout the movement.

Lower slowly and repeat.

Complete 3 sets of 10–12 reps per side.

  1. Dumbbell Shoulder Press
    Muscles targeted: Shoulders, triceps
    How to do it:

Whether you’re sitting down or on your feet, position a dumbbell in each hand right at shoulder level.

Next, thrust the dumbbells straight overhead, locking your arms out completely at the peak.

Lower the weights back down slowly.

Perform 3 sets of 8–12 reps.

  1. Dumbbell Squats
    Muscles targeted: Legs, glutes, core
    How to do it:

Hold a dumbbell in each hand, letting them hang comfortably by your sides.

Position your feet roughly shoulder-width apart.

Then, bend your knees and sit back into a squat, keeping your chest lifted and your knees from pushing past your toes.

Return to standing.

Complete 3 sets of 12–15 reps.

  1. Dumbbell Bicep Curls
    Muscles targeted: Biceps
    How to do it:

Hold a dumbbell in each hand with your palms facing forward, standing upright.

Now, bring the dumbbells up toward your shoulders, making sure your elbows stay tight to your body.

Lower slowly and repeat.

Aim for 3 sets of 10–15 reps.

Tips for Getting the Most Muscle Growth with Dumbbells

Keep pushing yourself by slowly adding more weight or extra reps to keep your muscles working harder.

Proper form: Always prioritize correct technique over heavy weights to avoid injury.

Rest and recovery: Muscles grow during rest, so allow 48 hours before targeting the same muscle group again.

Balanced routine: Combine dumbbell exercises with bodyweight or compound lifts for overall fitness.

Nutrition: Fuel your workouts with protein-rich meals to support muscle repair and growth.

Benefits of Dumbbell Strength Training
Incorporating dumbbells into your strength training routine not only promotes muscle gain but also enhances joint stability and muscular balance. Dumbbell exercises can reduce muscle imbalances since each side of your body works independently, leading to improved symmetry and fewer injuries. Additionally, dumbbells are excellent for people with limited space or those who prefer working out at home.

Final Thoughts
Dumbbell exercises are a cornerstone of effective strength training for muscle gain. They’re flexible, effective, and accessible for all fitness levels. Incorporate the exercises above into your routine, follow the tips, and you’ll be on your way to building stronger, bigger muscles in no time.

Remember, consistency and patience are key. Stay dedicated, and your hard work will pay off.

Categories
exercises Fitness men Muscle Gain strength training

Build Muscle with These Muscle Gain Compound Exercises

Building muscle isn’t just about lifting heavy—it’s about lifting smart. If you’re looking to increase muscle mass, improve overall fitness, and build lasting strength, compound exercises should be at the core of your workout routine.

These multi-joint movements engage multiple muscle groups at once, making them highly efficient for muscle gain and strength training. Whether you’re just starting out or looking to refine your program, here’s a guide to the best compound exercises and how to perform them correctly for maximum results.

Why Compound Exercises?
Compound exercises trigger greater hormonal responses (like testosterone and growth hormone), which are essential for hypertrophy (muscle growth). They also mirror natural body movements, promoting functional strength and minimizing imbalances.

Benefits:

Recruit more muscle fibers per lift

Improve coordination and balance

Burn more calories per session

Enhance total-body strength and fitness

Top Compound Exercises for Muscle Gain with Instructions
Squats
Muscles Worked: Quads, glutes, hamstrings, core
How to Do It:

Stand with feet shoulder-width apart.

Keep your chest up and spine neutral.

Shift your hips backward like you’re about to take a seat, while simultaneously bending your knees.

Descend until your thighs are roughly level with the ground—or go as low as feels natural for you.

Drive through your heels to stand back up.

Tips: Keep your knees tracking over your toes, avoid letting them collapse inward, and maintain core engagement throughout.

Deadlifts
Muscles Worked: Glutes, hamstrings, lower back, traps
How to Do It:

Stand with feet hip-width apart, barbell over mid-foot.

Hinge forward at the hips and bend your knees to grasp the barbell slightly outside your feet.

Maintain a neutral spine and lift your chest to keep your posture strong.

Tighten your core, then raise the bar by driving your hips and knees upward at the same time.

Maintain the barbell in close contact with your legs as you lift.

Bring the bar down slowly and with control to return to the starting position.

Tips: Keep your spine neutral, draw your shoulders back and down, and initiate the lift smoothly—avoid any sudden or jerky movements.

Bench Press
Muscles Worked: Chest, shoulders, triceps
How to Do It:

Lie flat on a bench, feet planted firmly on the floor.

Grip the bar slightly wider than shoulder-width.

Lower the bar slowly to your mid-chest.

Press the bar straight overhead until your arms lock out completely.

Tips: Retract your shoulder blades throughout the movement, resist letting the bar bounce off your chest, and focus on smooth, controlled motion.

Pull-Ups/Chin-Ups
Target Muscles: Lats, biceps, shoulders
How to Perform:

Grasp the pull-up bar using either an overhand grip for pull-ups or an underhand grip for chin-ups, positioning your hands just beyond shoulder width.

Hang fully extended with shoulders engaged.

Lift your body until your chin rises above the bar.

Lower yourself smoothly and deliberately until your arms are fully extended in the starting position.

Tips: Steer clear of swinging or using momentum; if necessary, incorporate resistance bands or assisted devices to help develop your strength.

Overhead Press (Standing)
Muscles Targeted: Shoulders, triceps, upper chest, core
How to Perform:

Position yourself with feet shoulder-width apart, holding the barbell at shoulder level.

Brace your core and glutes for stability.

Press the bar straight overhead until arms are fully extended.

Lower the bar back down under control.

Tips: Avoid arching your lower back, keep your head neutral, and engage your core throughout.

Barbell Rows
Muscles Worked: Lats, rhomboids, traps, biceps
How to Do It:

Stand with feet shoulder-width apart, hinge forward at the hips.

Hold the barbell with an overhand grip, arms extended.

Pull the barbell towards your lower chest/upper abdomen.

Lower it back down with control.

Tips: Maintain a straight back and engage your core throughout the movement, avoid swinging or jerking the weight, and keep your elbows tucked close to your sides.

General Guidelines for Safe and Effective Training
Warm-Up: Begin each session with 5 to 10 minutes of light cardio combined with dynamic stretches to activate your muscles and loosen your joints.

Start Light: Focus on mastering your form using lighter weights or just the bar before gradually adding more resistance.

Controlled Execution: Perform every repetition deliberately and steadily, steering clear of using momentum to complete the lift.

Breathing Technique: Breathe in as you lower the weight (eccentric phase) and exhale as you push or lift the weight (concentric phase).

Rest: Between sets, rest 60–90 seconds for hypertrophy focus; longer rest (2–3 mins) for maximal strength.

Progress Gradually: Increase weights or reps only when your form is perfect to avoid injury.

Recovery: Allow 48 hours between sessions targeting the same muscle groups for optimal recovery and growth.

Techniques for Effective Muscle Gain
Gradually challenge your muscles by steadily increasing the weight, number of repetitions, or workout intensity as you advance.

Perfect Form: Always prioritize technique over ego lifting.

Rest and Recovery: Muscles grow during rest—don’t skip sleep or recovery days.

Consistency: A long-term plan beats occasional bursts of hard training.

Nutrition Matters: Pair training with high-protein meals and smart carbs to fuel muscle growth.

Sample Weekly Routine (Push/Pull/Legs)
Day 1 – Push (Chest/Shoulders/Triceps)

Bench Press – 4×6

Overhead Press – 3×8

Dips – 3×10

Day 2 – Pull (Back/Biceps)

Deadlifts – 4×5

Pull-Ups – 3xAMRAP

Barbell Rows – 3×8

Day 3 – Legs/Core

Squats – 4×6

Romanian Deadlifts – 3×10

Plank – 3×1 min

Closing Thoughts
Building muscle through strength training doesn’t have to be complex—it requires dedication and a well-designed strategy. Compound movements form the foundation of any successful workout routine, helping you gain muscle efficiently while developing balanced, practical strength.

By integrating these compound lifts into your training, following the instructions closely, and focusing on recovery and nutrition, you’ll see impressive results. Stronger muscles, better fitness, and more confidence await.

Categories
beginners Fitness Meals nutrition

Top Beginners Supplements for Muscle Growth

Building muscle as a beginner is exciting — you’re making real changes to your body, gaining strength, and stepping into a new fitness lifestyle. But between gym sessions and meal prepping, the world of supplements can feel overwhelming. Which ones actually work? Which are safe for beginners? And how do you fit them into your nutrition and meal prep routine?

Let’s break it down with a beginner-friendly guide that’s simple, effective, and based on real science — not hype.

  1. Whey Protein: Your Go-To for Gains
    Why it matters:
    Think of whey protein as your post-workout wingman — it’s fast, effective, and gets straight to work helping your muscles bounce back and grow stronger. Super clutch on days when your meals are a little light on protein.

How to use it:

Mix 1 scoop with water or milk post-workout.

Add it to smoothies for a nutrition boost.

Aim for 20–30g of protein per serving.

Meal prep tip:
Use whey protein in overnight oats, protein pancakes, or even baking for extra muscle-friendly meals.

  1. Creatine Monohydrate: Strength and Size
    Why it matters:
    Creatine’s that no-nonsense supplement that actually pulls its weight. It gives your muscles an energy kick during those tough sets and helps you pack on strength and size as you stay consistent.

How to use it:

Take 3–5g daily, with or without food.

No need to “load” — just be consistent.

Stay hydrated!

Quick tip: Mix your creatine with a post-workout shake or something carby — like a banana or oatmeal — to help your body soak it up better.

  1. Omega-3 Fish Oil: Recovery and Wellness
    Why it matters:
    Omega-3s reduce inflammation, improve joint health, and may even support muscle recovery. They’re often overlooked but essential — especially if you’re new to intense workouts.

How to use it:

Take 1–2 grams of combined EPA/DHA daily.

Choose high-quality fish oil (look for purity-tested labels).

Meal prep tip:
Add fatty fish like salmon to your weekly meals to boost natural intake.

  1. Vitamin D3: Energy and Immunity Support
    Why it matters:
    Many beginners don’t realize low vitamin D levels can affect energy, mood, and recovery. If you’re indoors a lot or live in a place with limited sun, supplementing is smart.

How to use it:

Take 1000–2000 IU daily (with a meal that has fat).

Consider a blood test for personalized dosing.

  1. A Quality Multivitamin: Nutritional Insurance
    Why it matters:
    Even with solid nutrition & meal prep, beginners often miss micronutrients that help the body function properly. A multivitamin ensures you’re not running low on key nutrients while you focus on fitness.

How to use it:

Take once daily with food.

Don’t rely on it — whole food should still be your priority.

Instructions for Beginners: Getting Started
Start with the basics: Begin with whey protein and creatine. They offer the biggest bang for your buck.

Keep it simple: Don’t overload your stack. More isn’t always better.

Pay attention to how you’re feeling — more energy, better recovery, extra strength? That’s your progress showing.

Match your supplements with solid meals — they’re there to back up your nutrition and meal prep, not take over.

And remember, don’t expect overnight miracles — supplements work best when you stick with them, just like hitting the gym regularly.

Final Thoughts
Supplements can enhance your muscle growth journey, but only when paired with proper training, recovery, and meal prep. For beginners, sticking to proven basics — like whey protein, creatine, and omega-3s — sets a strong foundation without overwhelming your routine.

Fitness is a journey. Take it one smart step at a time.