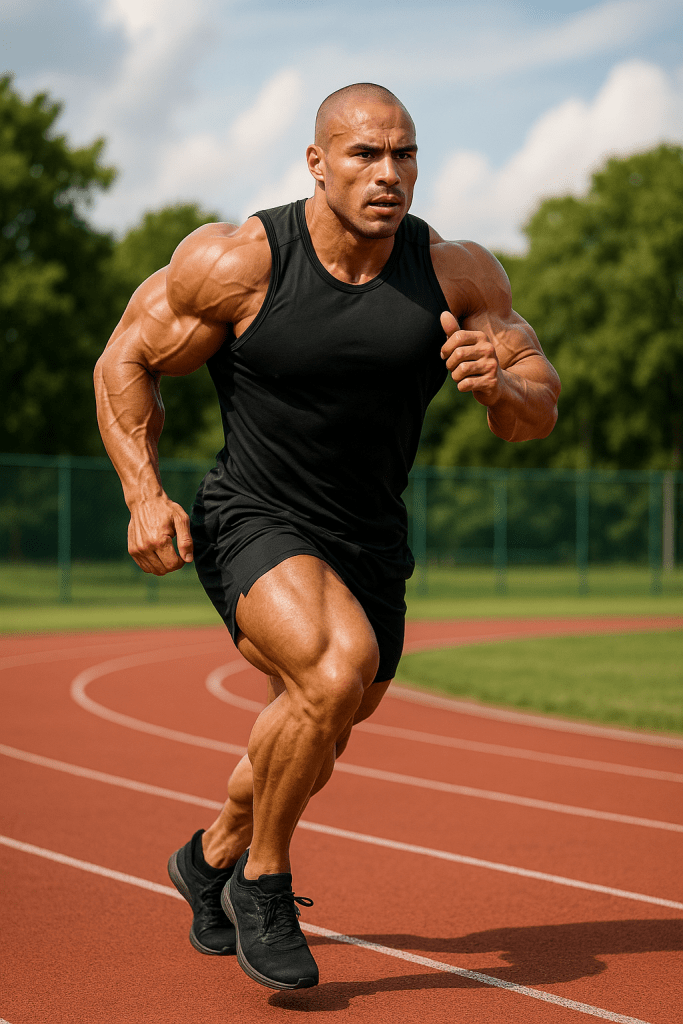
When most people think of treadmill workouts, they imagine cardio and endurance sessions focused on weight loss or heart health. But with the right approach, treadmill training can also play a key role in muscle gain. This article explores how to optimize treadmill workouts to build muscle, improve cardio & endurance, and enhance your overall fitness.
Why Cardio & Endurance Matter for Muscle Gain
Building muscle isn’t just about lifting heavy weights — your cardiovascular system plays a vital supporting role. Improved endurance means you can sustain harder, longer workouts, which boosts muscle growth. Plus, better circulation from cardio helps deliver oxygen and nutrients to muscles, aiding recovery and hypertrophy.
Step-by-Step Treadmill Workout Instructions for Muscle Gain
Ready to start? Here’s a practical treadmill routine designed to target muscle building while boosting endurance:
Warm-Up (5-10 minutes)
Start walking at a comfortable pace (2.5–3.5 mph).
Gradually increase the incline to 1-2%.
This helps get your muscles and heart ready for the upcoming exercise.
Incline Walking for Muscle Activation (10 minutes)
Set the treadmill incline between 5-10%.
Walk briskly at 3.5–4.5 mph.
Maintain an upright posture while actively working your glute and hamstring muscles.
This targets lower-body muscles deeply, promoting strength and endurance.
Interval Sprints (15 minutes)
Sprint at 7–9 mph for 30 seconds.
Slow down to a walk or light jog between 2.5 and 3.5 mph for about 90 seconds to catch your breath.
Repeat this cycle 6-8 times.
Sprinting recruits fast-twitch muscle fibers essential for muscle gain.
Weighted Vest or Resistance Bands (Optional, 10 minutes)
If you have a weighted vest, wear it during walking or incline segments.
Alternatively, use resistance bands around your thighs while walking.
This extra resistance challenges muscles further, enhancing growth.
Cool Down (5-10 minutes)
Slow down to a comfortable walk (2–3 mph).
Reduce the incline gradually to zero.
This aids recovery and prevents stiffness.
Additional Tips for Maximizing Muscle Gain
Consistency is key: Perform this workout 2-3 times per week alongside your strength training.
Proper nutrition is essential: provide your body with enough protein and energy to help muscles recover and grow.
Rest and recovery: Allow muscle groups time to recover between intense treadmill sessions.
Listen to your body: Adjust speed and incline based on your fitness level and goals.
Benefits of This Treadmill Approach
Builds leg muscle strength and endurance simultaneously.
Enhances cardiovascular fitness, allowing longer and more intense resistance workouts.
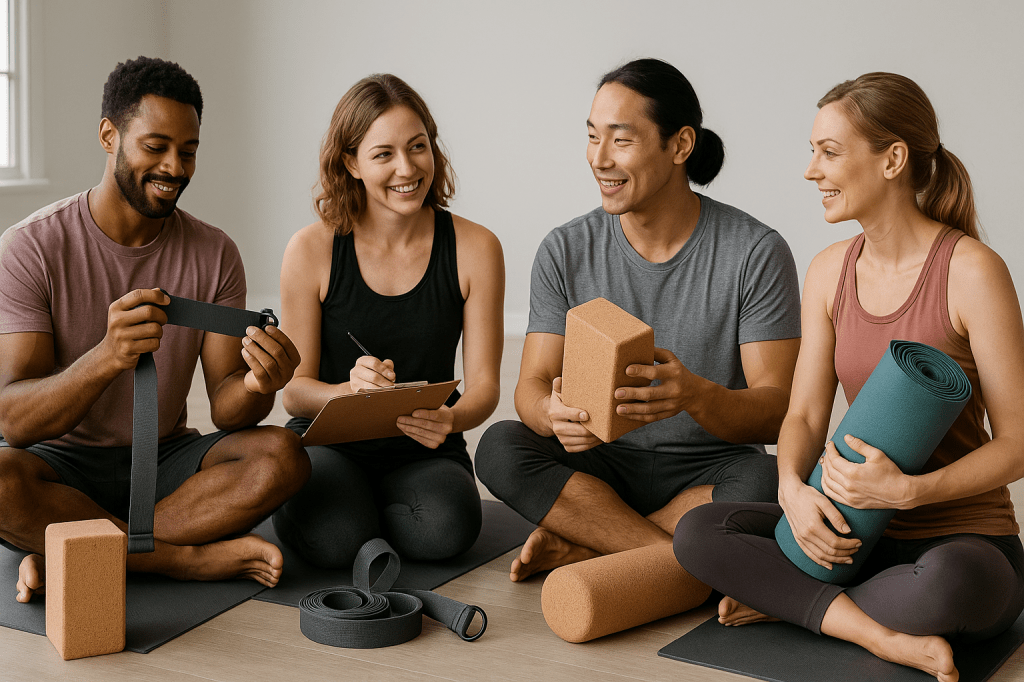
Yoga is a deeply personal and transformative practice. Whether you’re perfecting your Warrior II or just finding time to breathe, the right tools can make all the difference. This guide highlights gym equipment essentials for yogis—complete with reviews, tips, and step-by-step instructions—to help you build a well-rounded, supportive yoga space.
Why Equipment Matters for Your Yoga Practice
The right yoga gear does more than make your setup look good. It offers comfort, support, and structure, helping you move more freely while reducing the risk of injury. With this list, you’ll be able to practice smarter and safer.
Premium Yoga Mat
Purpose: A yoga mat offers a stable, cushioned surface to support comfort and traction during your sessions.
How to Use:
Roll out the mat on a flat surface.
Ensure the grippy or textured side of the mat is facing upward for better traction during your practice.
Use alignment lines (if available) to position hands and feet in poses like Downward Dog.
Suggested: Manduka PRO Yoga Mat – Known for its dense cushioning, it’s ideal for joint support and designed for long-term use.
Yoga Blocks
Purpose: Yoga blocks are useful tools for enhancing stability, improving flexibility, and supporting proper posture during poses.
How to Use:
For hamstring stretches: Place one block under each hand in a forward fold if your hands don’t touch the floor.
For support: Use under your sacrum in Bridge Pose for a supported version.
For seated poses: Use a block to elevate your hips, which can help alleviate strain on your knees and hips.
Suggested: Gaiam Cork Yoga Blocks — Durable, environmentally friendly, and offering a comfortable, natural texture for grip.
Yoga Strap
Purpose: A yoga strap helps you reach farther and hold stretches longer without putting undue strain on your muscles.
How to Use:
Seated Forward Stretch: Sit with your legs extended straight ahead. Wrap the strap around the bottoms of your feet and carefully pull yourself forward, maintaining a long, straight spine.
Shoulder Stretch: Grasp the strap behind your back with both hands and gradually raise it to gently open and stretch your shoulders.
Reclined Leg Stretch: While lying on your back, loop the strap around one foot and slowly raise your leg toward the ceiling, keeping it straight for an effective hamstring stretch.
Recommended: Jade Yoga Strap — Known for its durability and adjustable metal D-rings.
Foam Roller
Purpose: Foam rollers are excellent for muscle recovery, helping to ease tightness and improve blood flow.
How to Use:
To ease tight quadriceps: Lie face down and position the foam roller beneath your thighs. Gently roll from your hips toward your knees to help loosen the muscles.
For back relief: Sit on the floor with the roller positioned behind you. Carefully lean back and move slowly along your spine to massage and relax the muscles.
Pre- or Post-Yoga: Spend 5 to 10 minutes rolling key muscle groups to enhance flexibility and reduce soreness.
Recommended: TriggerPoint GRID Foam Roller — Features a firm, textured surface designed for deep muscle relief.
Meditation Cushion
Purpose: Meditation cushions support correct posture and increase comfort during longer sitting sessions.
How to Use:
Zafu (round cushion): Sit upright near the front edge of the cushion, crossing your legs comfortably before you.
Benefit: Raising the hips slightly tilts the pelvis forward, helping to maintain a natural and upright spinal alignment.
Suggested: Hugger Mugger Zafu & Zabuton Set — Provides sturdy support and includes a removable, washable cover for convenience.
Tips for Choosing Your Yoga Gear
Test materials: When trying out new gear, make sure to check the return policy, especially if you’re unsure about the feel or firmness.
Consider portability: If you often practice at different locations, opt for equipment that’s lightweight and easy to transport.
Research gear & reviews: Reading what fellow yogis have to say can give you valuable insights into a product’s performance and durability.
Stick with essentials first: Begin with a good mat, one block, and a strap—then build out as your practice deepens.
The Benefits of Having the Right Gear
Injury prevention: Props allow you to ease into poses safely.
Improved alignment: You’ll hold better posture without forcing your body.
Enhanced flexibility: Over time, supportive gear can help deepen your range of motion.
Increased consistency: When practice feels better, you’re more likely to return to the mat.
Final Word
The journey of a yogi is unique, but the tools that support it are often shared. Whether you’re seeking balance, flexibility, or peace of mind, these gym equipment must-haves offer exactly that. With trusted gear & reviews to guide your choices, your yoga practice can become not only more accessible—but more powerful.
Remember, it’s not about having everything. It’s about having the right things. Invest in your wellness, take your time exploring what fits, and enjoy the process. Namaste.
For athletes serious about fitness and performance, cardio & endurance training is non-negotiable. Two of the most effective—and debated—methods are cycling and running. Each offers unique benefits, but the best choice depends on your body, your sport, and your training goals.
Below, we break down the benefits of each and include step-by-step instructions so you can integrate them into your fitness routine effectively.
Running: High-Impact, High-Return
Why athletes use it: Running is a classic way to build cardio endurance, shed fat, and enhance mental resilience.
How to Use Running for Athletic Training
Start with short, slow runs:
Beginner: 2–3 runs per week, 20–30 minutes each.
Focus on easy pace, where you can still hold a conversation.
Build endurance safely:
Increase your distance by no more than 10% per week to avoid injury.
Add one longer run per week for endurance-building.
Add intervals for performance:
1–2x/week, include short sprints (e.g., 30s fast, 90s recovery x 6 rounds).
This improves speed and cardiovascular capacity.
Recovery is key:
Use foam rolling, stretching, and rest days.
Always listen to your body—shin splints and knee pain are early warning signs.
Cycling: Low-Impact Power Builder
Why athletes use it: Cycling builds serious leg strength and cardio fitness with less impact on joints.
How to Use Cycling for Athletic Training
Choose your setup:
Outdoor bike for long rides and natural terrain challenges.
Stationary or spin bike for convenience and interval workouts.
Begin with base rides:
3x/week, 45–60 minutes at a steady, moderate pace.
Keep RPMs (cadence) between 80–100 for efficiency.
Builds both speed and endurance while staying joint-friendly.
Add resistance:
Use hills or gear tension to simulate climbing.
Great for strength and sport-specific conditioning (e.g., soccer, skiing).
Don’t skip recovery rides:
Easy 30-minute spin sessions on off-days help promote blood flow and aid muscle repair.
Choosing What’s Best for You
Here’s a quick guide to help you decide:
Goal Go With Why Max calorie burn Running Higher energy output per minute Joint health Cycling Less impact on knees/ankles Build mental toughness Running Pushes through physical discomfort Cross-train or rehab Cycling Safe for injured or sore athletes Explosive leg strength Cycling Simulates power output sports like sprinting or skating
Tips for Balancing Both in Your Routine
Mix it up:
Alternate running and cycling days to avoid burnout or injury.
Prioritize based on season:
In off-season? Use cycling to maintain endurance with lower impact.
Pre-season? Focus more on running for sport-specific conditioning.
Track progress:
Use a fitness tracker or app to monitor distance, pace, heart rate, and recovery.
There’s no universal winner between running and cycling—they’re both powerful tools for building cardio & endurance. The smart athlete knows when and how to use each to complement performance, reduce injury risk, and meet specific fitness goals.
Whether you’re sprinting down a track or grinding up a hill on two wheels, the key is consistency, smart programming, and listening to your body.
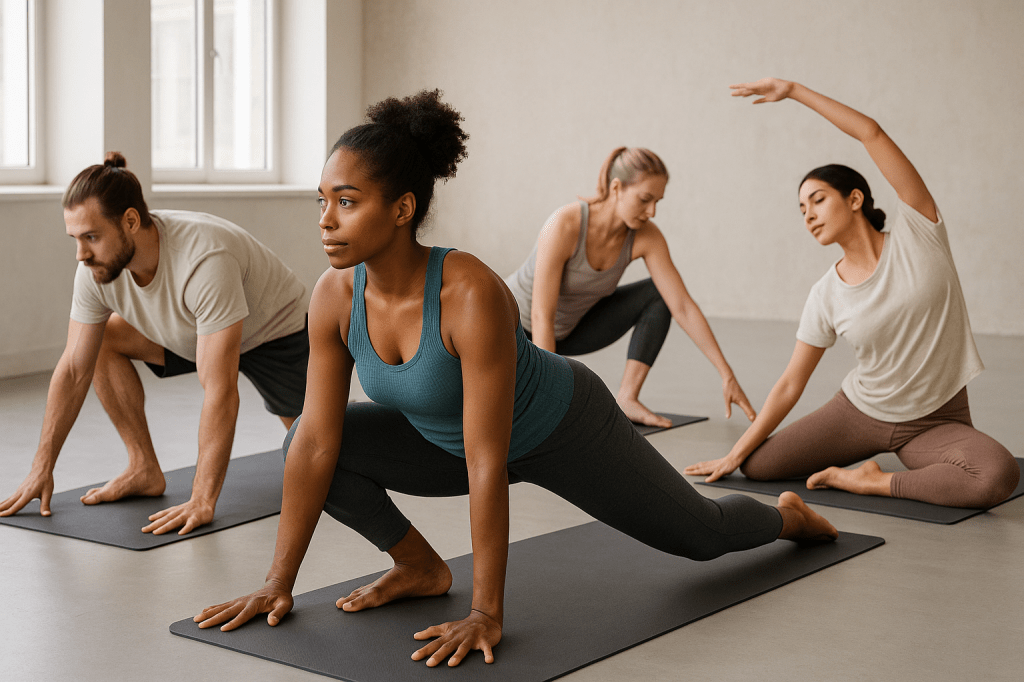
Whether you’re easing into your first downward dog or moving through advanced asanas, the key to a sustainable yoga practice isn’t just flexibility — it’s mobility. This short, effective daily routine supports joint health, reduces injury risk, and enhances your overall movement quality.
What’s the Difference Between Flexibility & Mobility?
Flexibility is how far a muscle can stretch.
Mobility is how well a joint moves under control through that range.
Yoga already boosts flexibility. But when we train mobility, we strengthen those flexible ranges so they’re more resilient — which is critical for preventing injuries.
Your 10-Minute Daily Mobility Routine for Yogis
No equipment needed. Just your body, your breath, and about 10 minutes of focused, mindful movement.
Controlled Shoulder Circles (CARs)
Purpose: Helps unlock the shoulder joint while improving strength and control throughout your range of motion.
Instructions:
Stand or sit tall.
Extend one arm straight out in front of you.
Slowly move it in a full circle overhead and behind, like you’re tracing the biggest circle possible.
Keep the rest of your body still.
Reverse direction after 5 reps.
Reps: 5 slow circles in each direction per arm.
Cat-Cow with Core Engagement
Why: Mobilizes your spine while training breath and core control.
Instructions:
Start on hands and knees.
Inhale: Arch your back, lifting your tailbone and chest (Cow).
Exhale: Gently curve your spine upward, drawing your chin toward your chest and tucking your pelvis under.
Focus on moving one vertebra at a time.
Time: 1 minute of slow, controlled reps.
90/90 Hip Switches
Why: Opens hips and strengthens rotational movement.
Instructions:
Sit down with both knees bent — position one leg in front of you and the other out to the side, forming roughly 90-degree angles at each knee.
Keep your chest tall.
Carefully twist your hips to move both legs over to the other side, making sure your hands stay lifted off the floor.
Control the motion — avoid rushing.
Reps: 10 switches total (5 per side).
Lunge with Spinal Twist
Why: Stretches hip flexors and thoracic spine — key for many yoga poses.
Instructions:
Step one foot forward into a deep lunge.
Place opposite hand on the floor.
Lift your opposite arm toward the ceiling as you rotate your torso to face your front leg.
Hold 2–3 breaths, then switch.
Reps: 5 reps per side.
Deep Squat Hold with Arm Reaches
Why: Improves ankle, hip, and thoracic mobility.
Instructions:
Stand with feet hip-width apart.
Sink into a deep squat (heels down if possible).
Extend one arm upward as you gently press the opposite elbow against the inside of your knee for support.
Switch arms slowly.
Time: Hold the squat for 1–2 minutes, alternating arm reaches every 20 seconds.
Downward Dog to Plank Rolls
Why: Engages shoulders, spine, and core control through transitions.
Instructions:
Start in Downward Dog.
Roll your spine forward into Plank position, stacking shoulders over wrists.
Roll back into Downward Dog with control.
Avoid collapsing — move smoothly.
Reps: 10 reps total.
Supine Glute Bridge with Knee Pull
Why: Activates glutes, mobilizes hips, and stretches hamstrings.
Instructions:
Position yourself lying on your back, with your knees bent and feet placed about hip-distance apart.
Lift hips into a bridge, then pull one knee toward your chest.
Hold for 2–3 seconds, return foot to floor, repeat on the other side.
Reps: 10 reps each side.
Helpful Tips for Staying Consistent
Pair it with an existing habit (like brushing teeth or before yoga).
Use a timer so you don’t overthink it — just flow.
Stay present. Each rep is a chance to reconnect with your body.
Benefits for Yogis
Reduces injury risk during dynamic flows or deep stretches
Improves joint strength and body control
Supports smoother transitions between poses
Enhances body awareness on and off the mat
Encourages sustainable, long-term movement
Final Thought
Yoga is about more than being flexible — it’s about moving with intention, grace, and control. This mobility routine strengthens the foundation that supports your practice. Add it to your daily rhythm and feel the difference in how you move, stretch, and flow.
Flexibility athletes—whether you’re a yoga enthusiast, dancer, gymnast, or contortionist—know the importance of maintaining and improving range of motion. But flexibility is about more than just stretching; it’s deeply connected to recovery and wellness, and mindfulness plays a pivotal role in this holistic approach to fitness.
Why Mindfulness Matters for Flexibility Athletes
Incorporating mindfulness into your routine isn’t just a trendy wellness buzzword. Mindfulness—being fully present and aware during movement and recovery—helps athletes connect with their bodies on a deeper level. This connection promotes better control, reduces injury risk, and enhances recovery times.
Mindfulness Techniques That Boost Flexibility and Recovery (with Instructions)
Focused Breathing During Stretching
Breathing deeply and mindfully during stretches relaxes muscles and improves flexibility. Here’s how to do it:
Find a comfortable stretch position that you can hold for 20-30 seconds without pain.
When you’re comfortable, softly close your eyes to improve your focus.
Slowly inhale through your nose for a count of four, feeling your stomach lift as you breathe in.
Hold the breath gently for around two seconds.
Then, release the air steadily through your mouth over a count of six, imagining the muscle tension melting away as you exhale.
Repeat this breathing cycle 3–5 times while maintaining the stretch.
Body Scan Meditation Post-Workout
A body scan helps identify and release muscle tension after training. Follow these steps:
Lie down comfortably on your back in a quiet space.
Close your eyes and take three deep breaths, relaxing your body with each exhale.
Slowly bring your attention to your toes. Notice any sensations—warmth, tightness, or ease.
Gradually move your focus upward to your feet, ankles, calves, knees, thighs, hips, abdomen, chest, back, shoulders, arms, neck, and finally your head.
As you notice tension, imagine breathing into that area and releasing the tightness on each exhale.
Spend 5–10 minutes completing the scan.
Mindful Movement Practices
Deliberate, gentle movements help improve both your body’s awareness and its ability to stretch. Try this simple routine:
Choose 5–10 minutes for a gentle flow, such as a slow yoga sequence or tai chi basics.
Move deliberately from one posture to another, paying attention to how each joint feels.
Breathe naturally and keep your focus on the sensation of movement.
If your mind wanders, gently bring it back to your body.
Take your time, letting your breathing and movements flow together naturally.
Visualization Techniques
Mental imagery supports physical flexibility by calming the mind and motivating your practice. Here’s how to practice:
Sit or lie down in a relaxed position. Close your eyes.
Take a few deep breaths to center yourself.
Picture your muscles lengthening and becoming supple as you stretch. Visualize your joints moving freely without resistance or pain.
Imagine warmth and healing energy flowing into any tight or sore areas.
Spend 3–5 minutes in this visualization before or after your workout.
The Benefits of Combining Mindfulness with Flexibility Training
Enhanced Recovery & Wellness: Mindfulness promotes relaxation and reduces stress hormones, which accelerates muscle repair and decreases soreness.
Improved Flexibility & Performance: Being mindful during stretches encourages you to listen to your body’s limits, avoiding overstretching while gradually expanding your range.
Better Mental Clarity & Focus: Mindfulness helps reduce distractions, allowing you to fully engage with your fitness routine and maintain consistency.
Injury Prevention: Awareness of body sensations helps detect early signs of strain or fatigue, leading to smarter training decisions.
Getting Started: Practical Tips
Spend 5 to 10 minutes daily focusing on mindful breathing or performing a body scan.
Explore mindfulness apps designed specifically for athletes or flexibility exercises to guide your practice.
Make mindfulness a regular part of both your warm-up and cool-down sessions.
Keep a journal to track how mindfulness impacts your flexibility progress and recovery.
By weaving mindfulness into your flexibility routine, you’re investing in your body’s long-term health and performance. With these easy-to-follow instructions, recovery and wellness become a natural and enjoyable part of your fitness journey.
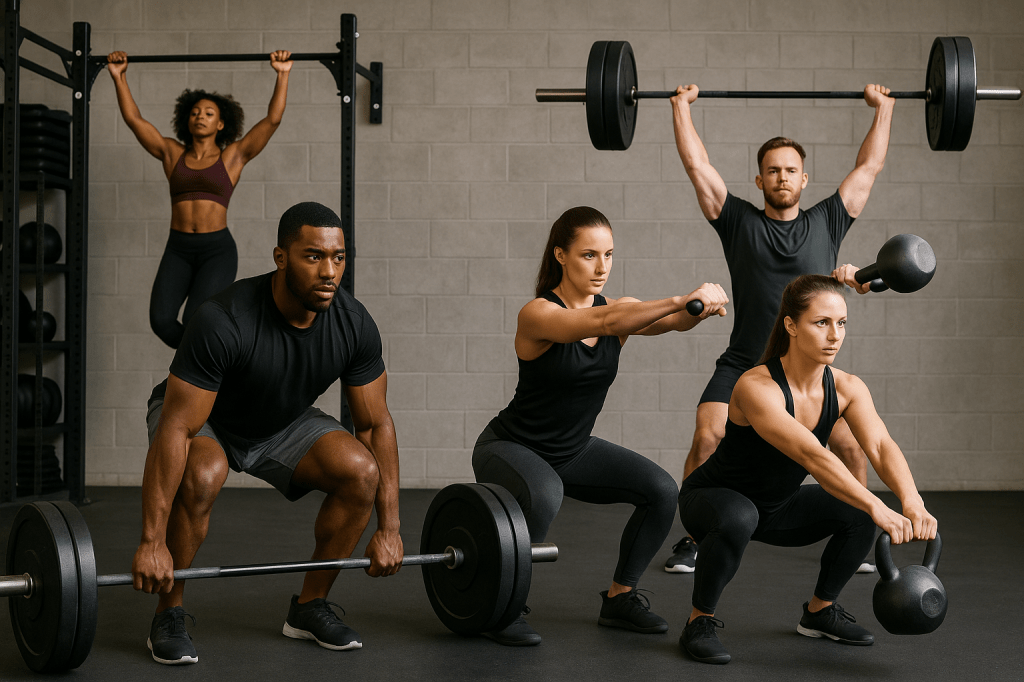
When it comes to building muscle and enhancing athletic performance, compound exercises are the cornerstone of effective strength training. Unlike isolation moves that target a single muscle, compound exercises engage multiple muscle groups simultaneously, making them a time-efficient and powerful way for athletes to increase strength, improve fitness, and reduce injury risk.
Why Compound Exercises Matter for Athletes
Athletes rely on functional strength — the ability to perform movements that mimic real-world activities or their specific sport. Compound exercises perfectly align with this goal because they replicate multi-joint motions, promote muscle coordination, and boost overall power.
By incorporating compound lifts into your training routine, you stimulate greater muscle activation, leading to improved muscle growth and strength gains. Additionally, these exercises enhance core stability and joint health, essential for athletic longevity.
Top Compound Exercises for Muscle Building and Athletic Fitness
Here are some foundational compound exercises every athlete should consider, along with step-by-step instructions to perform them safely and effectively:
Squats
Targets: Quadriceps, hamstrings, glutes, core, and stabilizing muscles.
How to Perform a Squat:
Place your feet roughly between hip and shoulder width, allowing your toes to angle outward slightly.
Engage your core and keep your chest up.
Gradually lower yourself by bending at the hips and knees, as though you’re lowering into a seated position.
Lower yourself until your thighs are roughly parallel to the floor, or as far as your flexibility comfortably permits.
Drive upward by pressing firmly through your heels to rise back to the starting stance.
Make sure your knees stay aligned with your toes during the entire motion.
Deadlifts
Targets: Hamstrings, glutes, lower back, traps, and grip.
How to Perform a Deadlift:
Set your feet about hip-width apart and position the barbell just in front of your shins.
Hinge at your hips and bend your knees to grasp the bar with hands just outside your knees.
Tighten your core muscles, maintain a straight back, and keep your chest upright.
Drive upward by pushing firmly through your heels, extending your hips and knees while keeping the barbell close to your body during the lift.
Once fully upright, begin lowering the bar by first hinging at your hips, followed by bending your knees in a controlled manner.
Bench Press
Targets: Chest, shoulders, triceps.
How to Perform a Bench Press:
Position yourself flat on the bench with your feet planted solidly on the ground for stability.
Grip the bar with your hands placed slightly wider than shoulder distance.
Carefully lift the bar off the rack and begin lowering it in a controlled motion toward the center of your chest.
As you lower the bar, keep your elbows angled roughly 45 degrees away from your body.
Press the bar upward until your arms are extended, keeping the motion steady and controlled.
Avoid snapping your elbows straight; instead, stop just short of full lockout to maintain muscle tension.
Pull-Ups and Chin-Ups
Targets: Upper back, biceps, grip strength.
How to Perform a Pull-Up:
Grab the pull-up bar with your palms facing away for a pull-up or toward you for a chin-up, placing your hands roughly shoulder-width apart.
Hang with your arms fully extended.
Activate your upper back muscles and begin pulling yourself upward by bending your elbows, aiming to bring your chest close to the bar.
Perform the movement with control, avoiding any swinging or using momentum to assist.
Lower yourself down slowly and with control until your arms are fully extended.
Overhead Press Muscle Groups Worked: Shoulders, triceps, upper chest.
How to Perform the Overhead Press:
Position your feet about shoulder-width apart and hold a barbell or dumbbells at shoulder level, keeping your palms facing forward.
Tighten your core muscles and maintain a neutral, straight spine throughout the movement.
Raise the weight above your head until your arms are fully extended.
Avoid arching your back; keep your ribs down and core tight.
Slowly lower the weight back to shoulder height.
Tips for Effective Strength Training with Compound Movements
Focus on Form First: Proper technique is critical. Begin with lighter loads to perfect your technique before increasing the weight.
Progressive Overload: Gradually increase weights or reps to continuously challenge muscles and stimulate growth.
Balanced Routine: Incorporate compound exercises targeting all major muscle groups to avoid imbalances and reduce injury risk.
Adequate Recovery: Strength training is intense; allow muscles time to repair and grow with rest days and proper nutrition.
The Benefits Beyond Muscle Growth
Compound exercises do more than build muscle. For athletes, they:
Enhance coordination and balance by requiring multiple muscles and joints to work together.
Improve cardiovascular fitness due to their demand on large muscle groups.
Support functional movement patterns, making athletic performance more efficient and powerful.
Reduce injury risk through strengthened muscles and improved joint stability.
Incorporating compound exercises into your strength training routine is a proven way to build muscle and elevate your athletic fitness. By focusing on these foundational movements and following smart training principles, you can unlock your full potential and enjoy the benefits of enhanced strength, performance, and overall wellness.
Yoga often centers on mindfulness, flexibility, and balance—but what if you could add cardio and endurance training that complements your practice without losing that sense of calm? A treadmill workout tailored for yogis can be the perfect way to boost your fitness while maintaining your mindful approach.
Why Yogis Should Add Cardio
While yoga enhances strength and flexibility, it doesn’t always provide enough cardiovascular challenge. Adding treadmill workouts helps build heart and lung endurance, improves circulation, and increases overall stamina—all of which support a more vibrant, longer-lasting yoga session.
How to Do a Treadmill Workout for Yogis: Step-by-Step
Instructions
This workout is designed to blend mindful movement with effective cardio. Take your time, focus on your breath, and move with intention.
Warm-Up (5 minutes)
Set the treadmill to a gentle walking pace, around 2 to 2.5 miles per hour.
Focus: Breathe deeply and evenly, swinging your arms naturally.
Maintain an upright posture with relaxed shoulders and a lengthened spine, similar to the alignment in Mountain Pose (Tadasana).
Mindfulness: Tune into how your feet feel with each step.
Interval Jog-Walk (15 minutes)
Cycle: Jog for 1 minute, then walk briskly for 2 minutes.
Jog speed: 4.5 to 5.5 mph, at a comfortable, sustainable pace.
Walk speed: 3.0 to 3.5 mph, brisk but controlled.
Breathing: Match your breath with steps — inhale for 3 steps, exhale for 3 steps.
Tip: Keep your gaze forward and relax your jaw and shoulders.
Incline Walking (5 to 10 minutes)
Set incline: Start at 3%, gradually increasing to 6-8% as you feel comfortable.
Keep a consistent walking pace between 3 and 3.5 miles per hour.
Engagement: Draw your belly in slightly to activate your core.
Posture: Keep your chest open and spine straight, avoiding leaning forward.
Breath: Slow and controlled, as in Ujjayi breathing (soft constriction in the throat).
Cool Down and Walking Meditation (5 minutes)
Speed: Gradually decrease to 1.5 to 2.0 mph.
Focus: Notice your breath, heartbeat, and how your body feels.
Mindfulness: Use this time like your Savasana — a moment to integrate the workout.
Optional: Close your eyes briefly if it feels safe, or soften your gaze.
Tips for Yogis on the Treadmill
Use a mantra like Inhale peace, exhale tension” to stay grounded.
Stay mindful of your posture — imagine lengthening your spine with every step.
Focus on steady, deep breaths to help maintain mental clarity and sustain your energy.
Listen to your body — if any movement feels off, slow down or take a break.
Benefits You’ll Notice
Adding treadmill cardio improves your endurance for longer yoga flows and helps keep your energy steady through extended poses. The focused breathing you practice on the treadmill also deepens your ability to stay present during challenging asanas. Together, they form a balanced approach to holistic fitness that nurtures both body and mind.
Keeping physically active is a powerful way to maintain both body and mind as we grow older. But before you head to your fitness class or take a brisk walk at the park, it’s important to be prepared. Preparing your gym bag thoughtfully helps ensure your workouts are safe, comfortable, and pleasant.
This guide breaks down exactly what seniors should pack, why it matters, and how to organize it all—with a few product reviews and safety tips along the way.
Step 1: Choose the Right Gym Bag Look for:
Lightweight design
Padded shoulder strap or handles
Wide zippered opening
At least 2–3 compartments
Water-resistant or easy-clean material
Instruction: Try the bag on (even at home) and check that you can lift and carry it without strain. If it’s uncomfortable empty, it will be worse when full.
Gear & Reviews Tip: Consider brands like Everest or Fitdom that make ergonomic bags with easy-access zippers.
Step 2: Pack a Hydration Bottle
Dehydration is a common issue among older adults, especially during exercise.
What to Pack:
1 spill-proof water bottle with easy-grip
Optional: Electrolyte drink packets (check with your doctor first)
Instruction: Fill your water bottle before leaving home. If possible, choose one with a flip straw or push-button lid for easier use.
Suggested Gear: Contigo AutoSeal bottles are leak-proof and senior-friendly.
Step 3: Include Proper Footwear and Socks
Healthy feet play a key role in maintaining balance, reducing discomfort, and lowering the risk of injuries.
What to Pack:
Clean gym shoes or supportive sneakers
Compression or cushioned socks
Small laundry pouch for used socks
Tip: Store your workout shoes in their own compartment or a dedicated shoe pouch to keep things clean and organized. After each session, store used socks in a sealable pouch or mesh bag to keep your bag fresh.
Step 4: Add Personal Care Essentials
Don’t underestimate the value of staying fresh and comfortable post-workout.
What to Pack:
Microfiber towel
Travel-size deodorant
Body wipes or facial cloths
Lip balm
Hand sanitizer
Instruction: Use small, leak-proof toiletry containers and place them in a zippered pouch to prevent spills.
Any medications you may need (in labeled containers)
Inhaler, EpiPen, or glucose tablets if required
ID card and emergency contact info
Copy of insurance card
Instruction: Store these in a small, clearly labeled pouch and put it in an easy-to-reach compartment of your bag.
Safety Tip: Include a written note of your known conditions, allergies, and medications in case of emergency.
Step 6: Add Fitness Gear for Warmups or Cooldowns
Even light equipment can boost your workout.
What to Pack:
Resistance band or stretch strap
Small foam roller or massage ball (optional)
Notebook or workout log
Instruction: Use your notebook to track how you feel before and after workouts, and jot down any exercises that help (or hurt).
Gear & Reviews Pick: TheraBand makes color-coded bands with varying resistance levels, great for all fitness levels.
Step 7: Pack for Motivation and Comfort
A little comfort goes a long way.
What to Pack:
Headphones and music or audiobook player
Light snack (like a granola bar or banana)
Extra pair of glasses or reading aids
Tip: Use a resealable bag for snacks and keep your glasses in a sturdy case to protect them from breaking. Download music or podcasts ahead of time if you’ll be in a low-signal area.
Before You Go – Final Bag Check:
Use this checklist before each outing:
Water bottle full
Shoes & socks packed
Towel & hygiene items in place
Medications/ID included
Fitness gear ready
Music/snack/glasses packed
Why This Matters
When seniors are well-prepared, fitness becomes less of a chore and more of an empowering part of daily life. Organizing your gym bag thoughtfully can promote self-reliance, boost safety, and encourage consistency—key elements for staying well over time.
Remember: You don’t need to pack everything every time. But with these essentials on hand, you’ll be ready for almost any activity, from tai chi to strength training.
As we age, maintaining muscle mass becomes increasingly important—not just for strength, but for overall health, mobility, and quality of life. For seniors dedicated to fitness and wellness, nutrition and meal prep play a crucial role in supporting muscle growth and recovery. While a balanced diet is the foundation, certain supplements can provide targeted support to help seniors maintain and even build muscle effectively.
In this article, we’ll explore the top supplements seniors can consider to enhance muscle growth, alongside practical nutrition and meal prep tips tailored to their unique needs—with easy-to-follow instructions.
Why Muscle Growth Matters for Seniors
Muscle loss, or sarcopenia, naturally occurs as part of aging and can lead to weakness, falls, and reduced independence. But with the right combination of exercise, nutrition, and supplements, seniors can slow or even reverse this decline. Supplementing smartly supports recovery, increases muscle protein synthesis, and boosts overall fitness results.
Key Supplements for Seniors Focused on Muscle Growth (With How-To Use)
Protein Powders (Whey, Casein, or Plant-Based)
Protein is vital for muscle growth and recovery.
Yet, many older adults find it difficult to get sufficient protein through their everyday meals.
Tips for adding protein supplements:
Aim to consume between 20 and 30 grams of protein at every meal to help preserve and grow muscle mass.
Consider adding a scoop of protein powder—typically providing around 20 to 25 grams of protein—into smoothies or mixing it with milk or water for convenience.
For best results, consume protein powder within an hour after completing strength training to aid muscle recovery.
If you choose casein protein, taking it before bed can provide a slow and steady release of amino acids during sleep.
Creatine Monohydrate Creatine is known for its ability to restore energy stores in muscle cells, which helps enhance strength and speed up recovery times.
How to use creatine effectively:
Consume 3 to 5 grams each day, ideally after exercising, combined with water or juice to enhance absorption.
If using casein, take it before bedtime for slow release during sleep.
Creatine Monohydrate
Creatine helps replenish energy in muscle cells, improving strength and recovery.
How to use:
Consume 3 to 5 grams of creatine each day, preferably following your workout, mixed with water or juice for optimal absorption.
There’s no need for a loading phase; consistent daily use is effective.
Drink plenty of water to stay hydrated while supplementing.
Vitamin D
Vitamin D supports muscle function and bone health.
How to use:
Have your vitamin D levels assessed through a medical checkup with your healthcare provider.
Supplement with 1,000 to 2,000 IU daily, or as advised by a healthcare provider.
Take with a meal that contains fat for better absorption.
Omega-3 Fatty Acids
Omega-3s aid muscle recovery and reduce inflammation.
How to use:
Consume a daily dose of 1,000 mg of EPA and DHA combined—be sure to verify the amounts on your supplement’s label.
Choose high-quality fish oil supplements with purity certification.
Consume with meals to improve digestion and absorption.
Branched-Chain Amino Acids (BCAAs)
BCAAs stimulate muscle repair and reduce soreness.
How to use:
Consume 5 to 10 grams of BCAAs either just before or right after exercising.
Mix with water or your favorite beverage.
Use on rest days to aid recovery if needed.
Nutrition & Meal Prep Tips for Seniors Focused on Muscle Health (Step-by-Step)
Step 1: Prioritize Protein
Incorporate a quality protein source into each meal, such as chicken, fish, legumes, dairy, or protein supplements. Measure approximately 3 to 4 ounces of meat or one serving of protein powder using a kitchen scale or measuring tools.
Step 2: Balance Your Plate
Cover half of your plate with a variety of colorful vegetables, dedicate a quarter to lean proteins, and reserve the last quarter for whole grains or complex carbs.
Step 3: Meal Prep for Consistency
Spend one or two days a week preparing meals in bulk. Prepare lean protein dishes and roast a variety of vegetables, then divide the meals into individual containers. Store them in the refrigerator or freezer for convenient, ready-to-eat options throughout the week.
Step 4: Stay Hydrated
Aim for 6-8 glasses of water daily. Carry a reusable water bottle and sip throughout the day.
Step 5: Incorporate Strength Training
Engage in resistance exercises 2-3 times per week, focusing on major muscle groups. Consult a fitness professional for age-appropriate routines.
Final Thoughts
Building and maintaining muscle as a senior isn’t just about staying fit—it’s about preserving independence, boosting confidence, and improving quality of life. The right combination of nutrition, meal prep, fitness, and carefully chosen supplements can make a meaningful difference.
Important: Always consult your healthcare provider before starting new supplements to ensure they fit your health profile.
With thoughtful planning and dedication, seniors can continue to grow stronger and enjoy the benefits of an active lifestyle.
If your usual go-to is a calming yoga flow, you might not think of cardio as a natural fit. But if you’re looking to improve stamina, boost heart health, or simply find more energy throughout your day, mixing cardio & endurance work into your wellness routine can deeply enhance your overall fitness.
This guide is designed for yogis who want to maintain their mind-body connection while exploring movement that elevates the heart rate in a sustainable, mindful way.
Why Should Yogis Add Cardio?
Yoga builds strength, balance, and flexibility—but it often lacks the sustained intensity needed to challenge your cardiovascular system. Adding 2–3 cardio sessions per week can:
Boost your endurance for long practices
Improve oxygen flow for breathwork (pranayama)
Enhance circulation and cardiovascular health
Help with detoxification through sweat
Balance a sedentary lifestyle if you sit often during the day
Best Cardio Exercises for Yogis (With Instructions)
These exercises are gentle on the joints, accessible for all levels, and easy to integrate into a yoga-friendly lifestyle.
Walking or Hiking
Why it works: Low-impact, meditative, and great for stamina.
How to do it:
Aim for 30–45 minutes, 3–4 times per week.
Focus on maintaining an upright posture and relaxed breath.
If you walk after yoga, let your body stay in “flow mode” by moving mindfully, not briskly.
Try breath syncing: inhale for 4 steps, exhale for 4 steps.
Tip: Nature walks offer grounding benefits—perfect for yogis who practice mindfulness or meditation.
Jump Rope
Why it works: Builds coordination and raises your heart rate quickly.
How to do it:
How to Get Started with Jump Rope:
Begin with short bursts—jump for about 30 seconds, then take a 30-second break.
Complete 5 cycles to keep the session around 5 minutes.
Keep your elbows tucked in and aim for quick, light jumps—think of it more like bouncing than leaping.
Focus on soft landings to ease pressure on your joints; imagine you’re skipping quietly on a yoga mat.
Pro tip: Use jump rope as a warm-up before a vinyasa session to get your blood flowing and loosen up tight muscles.
Swimming
Why it works: Full-body, low-impact, and breath-focused.
How to do it:
Swim laps for 20–30 minutes, mixing strokes (freestyle, breaststroke).
Focus on steady, rhythmic breathing—inhale through the mouth, exhale through the nose if possible.
Alternate your pace—swim two laps at a relaxed speed, then follow with one lap at a more vigorous effort.
Tip: Swimming pairs beautifully with yoga’s emphasis on breath control and fluid motion.
Dance or Free Movement
Why it works: Cardio disguised as joy. Great for creativity and emotional release.
How to do it:
Put on your favorite playlist.
Set a timer for 10–20 minutes.
Move freely—there’s no “right” way.
Let your breath and body lead. Don’t think; just move.
Tip: Follow up with a short yin yoga sequence to integrate and settle your energy.
Bodyweight Intervals (Yoga + HIIT Hybrid)
Why it works: Increases heart rate while using functional movement that supports yoga poses.
How to do it:
Perform the following as a 10-minute circuit, 2–3 rounds:
Final Thoughts Cardio & endurance exercises don’t compete with your yoga—they complement it. When done mindfully, they boost energy, deepen awareness, and improve your resilience both on and off the mat. Start small, listen to your body, and let your practice evolve to support your full fitness potential.